18
Disposal:IncompliancewithDirective2002/96/EC,thesymbolshownontheapplianceindicatesthatthe
equipmenttobedisposedofisconsideredaswasteandmustthereforebesubjectto"separatecollection".
Therefore,theusermustdeliver(orhavedelivered)theaforementionedwastetosortedwastecollection
pointssetupbythelocalauthorities,orreturnitdirectlytothedealeruponpurchaseofasimilarproduct.
Sortedwastecollectionandsubsequenttreatment,recoveryanddisposaloperationsencouragetheproduction
ofequipmentwith recycled materialsandlimitthe negative effectsontheenvironment and healthcausedby
improperwastemanagement.Illegaldisposaloftheproductonthepartoftheuserinvolvestheapplicationof
administrativesanctionsassetforthinArticle50ofLeg.DecreeNo.22/1997andsubsequentupdates.
ATTENTION: Always unplug the machine before clean-
ing the MAGIC VAC
®
.
• Clean hands thoroughly before proceeding with
cleaning the machine and accessories.
• Bothbeforeandafteruse,cleantheexteriorsurfac-
es of the MAGIC VAC
®
withadampspongeandlight
dishwashingdetergent(notabrasiveorsolvent).In
the event of accidental penetration of liquids inside
thestructure,donotplugtheunitintopower,donot
CLEANING INSTRUCTIONS
use it and contact the nearest authorized service
centeroryourauthorizeddealer.
• Thoroughly clean the MAGIC VAC
®
accessories
(canisters, lids, jars, etc.) like any other kitchen
object,allowingthemtodrycompletely.Ifwashing
inthedishwasher,loadtheminthetoprack.
• Refertotheinstructionsontheaccessory'spack-
aging.
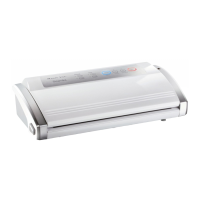
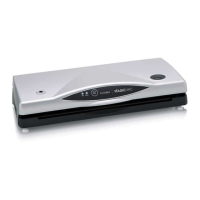
Model: P0211ED
Voltage 220-240V~50Hz130W
Dimensions 45,5(W)x22,2(D)x11,9(H)cm
Weight 2.3Kg
Marking
Approvals
Product approved by the F.I.C (Federation of Italian
Chefs).
The efficiency of MAGIC VAC
®
systems were tested
byAITA(ItalianAssociationof Food Technology) see
page 21.
TECHNICAL CHARACTERISTICS
Electromagnetic compatibility
TheMAGICVAC
®
Dinamikawascreatedtosatisfycur-
rentelectromagneticcompatibilityrequirements.
Inanyevent,ifyoususpectthatthedeviceinterferes
with the normal function of your television, radio or
other electrical appliance, tryto locate the devicein
another location in order to remove the interference,
or connect the appliance to another electrical outlet.
from the upper rim of the canister, and place the
cover on the canister.
- Attach the side handles on the lid itself and then turn
theknobtothe"OPEN"-(M)"position(fig.U).
- Using the Connection Tube (15), connect the air
intake for the ACCESSORY PORT tube (3) on the
machinewiththeCanisterLidKnob(fig.U).
- Close the Cover(4).
- Press the Marinating key (1.7) and the marinating
cycle will start. Throughout the marinating cycle
(approximately12minutes),themarinatingkeyLED
willflash.Themachinewillturnitselfoffautomati-
callyafterthethirdvacuumphase.
- WhentheLEDturnsoff,thecycleisfinished.
- RemovetheConnection Tube(15)fromthecanister
first and then from the ACCESSORY PORT (3)onthe
machine.
PleaseNote:Attheendofthecycle,ifyouwishtovac-
uum-pack your marinated food, turn the knob on the
canistertothe"CLOSED"position.
Youcan stopthemachineatany timebypressingthe
Cancelbutton(1.5);ifyouwishtorepeatthemarinating
operation you must detach the Connection Tube from
thecanisterandwaitforittorefillcompletelywithair.
Then,re-attachthetubetotheknob(intheOPEN-M
position)onthecanisterandrestarttherapidmarinating
cyclebypressingtheMarinatingbutton(1.7).
Please Note:
Duringthemarinatingcycle,theknobon
thecontainermustbeturnedtothe"OPEN-(M)"position.
Please Note:Ensurethatthesealonthelidandtherim
ofthecanisterarecleananddry.
 Loading...