9
4.3. Installing the security camera
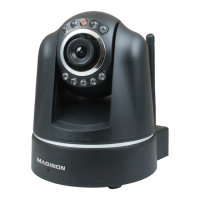
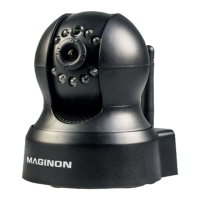
The IP security camera can be installed in a xed location using the stand supplied.
4.3.1. Fitting stand to camera
Hold the backplate of the foot against the surface of the chosen installation location and use
a pencil to mark the surface with the location of the two drill holes.
To bore the corresponding holes you will need a 6 mm masonry drill for stone or concrete
surfaces or a 3 mm drill if mounting on wood. After drilling, insert the wall plugs (supplied)
in the holes so they site ush with the surface. Then screw on the foot using the screws
supplied in the assembly kit.
4.3.2. Fixing the security camera
Place the camera’s threaded tripod bolt onto the mounting plate of the foot and screw the
camera tight using the tripod bolt, then tilt the camera on the tripod bolt into the required
position.
Note:
• The security camera should not be installed directly beside electronic equipment
as this may result in interference. Should you experience picture interference, test
the camera in a diff erent location rst.
• Choose a location to install the security camera which does not have sunlight falling
on the lens.
Note:
• Please be sure to operate the camera with the WiFi antenna attached at all times,
even if the WiFi connection is not being used, as the camera may otherwise become
damaged.