Operation Manual easyScreen
Insert the eartip attached to the red tubing into the baby’s right
ear. Do this by pulling gently down and out on the baby’s ear
lobe to open the ear canal. Hold the adapter and twist (gently)
the eartip into the ear canal (Figure 64). The fit of the eartip
should be secure; not superficial. Release the earlobe. Repeat
this procedure inserting the eartip attached to the blue tubing
into the baby’s left ear.
If you find that it is difficult to keep both eartips securely in the
baby’s ear canals at the same time, you can choose to test one
ear at a time.
Place the insert earphone transducer boxes above or to the side
of the baby’s head.
IMPORTANT NOTE: The calibration value for the insert earphone is saved in the
connector at the end of the insert earphone cable. Calibration values for inserts with
eartips are different from calibration values for inserts used with EarCups
TM
.
Never modify an insert earphone by replacing the original tubes and adapters
with the other adapter type. This will result in incorrect stimulus levels causing
inaccurate screening results.
NOTE: When using insert earphones, you cannot use the same transducer for
testing both ears. Only use the red colored transducer for the right ear and the blue
transducer for the left ear.
Preparing for OAE Testing
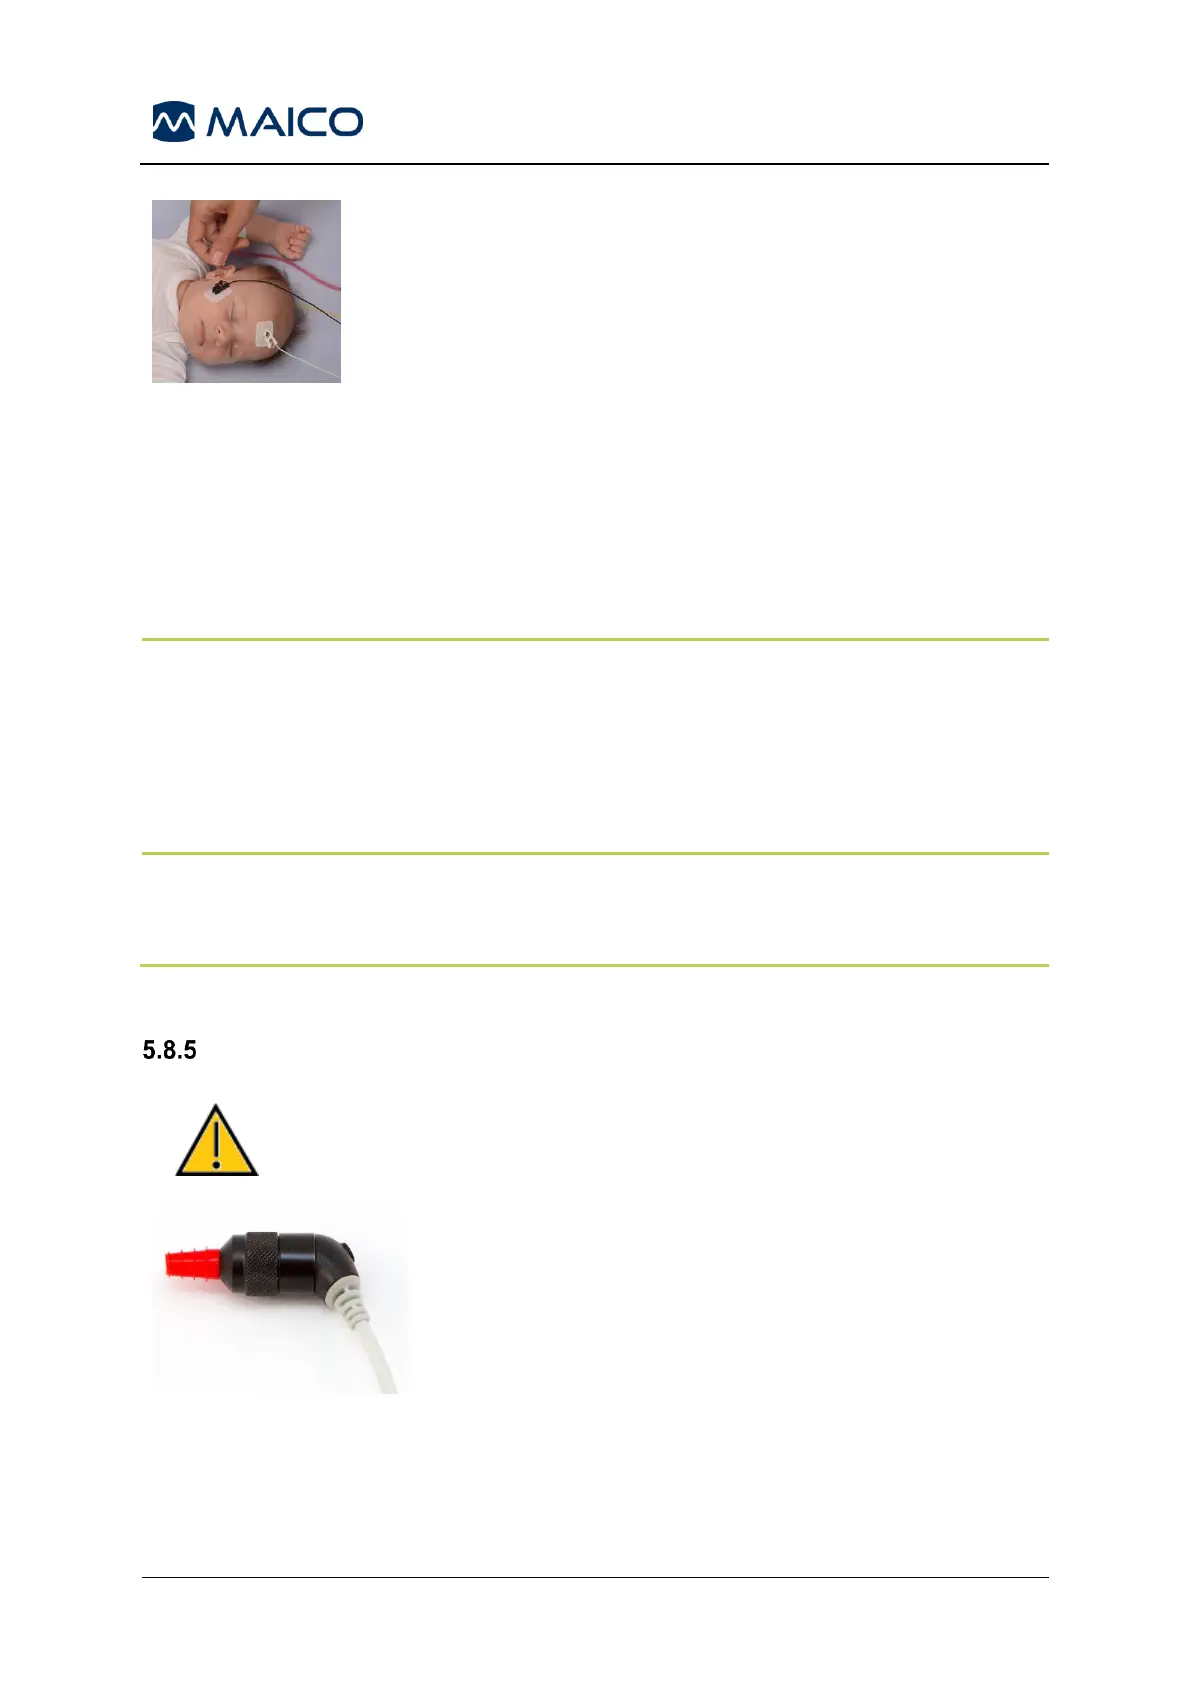
Do not insert the OAE probe tip into the baby’s ear without
an eartip installed. The adapter could scratch the baby’s ear.
Apply the eartips onto the OAE probe tip (Figure 65).
Insert the eartip into the baby’s first ear to test. Do this by
pulling gently down and out on the baby’s ear lobe to
open the ear canal. Hold the probe and aim and twist
(gently) the eartip into the ear canal. The fit of the eartip
should be secure; not superficial. Release the earlobe.
You should not hold the OAE probe during the
measurement since this can cause acoustic noise.