8 MAC III Wash user manual
4. Strip 8 mm (1/3 in.) of insulation from the end of each wire.
5. Use a small flathead screwdriver to fasten the wires into the
connector terminals in the insert as follows:
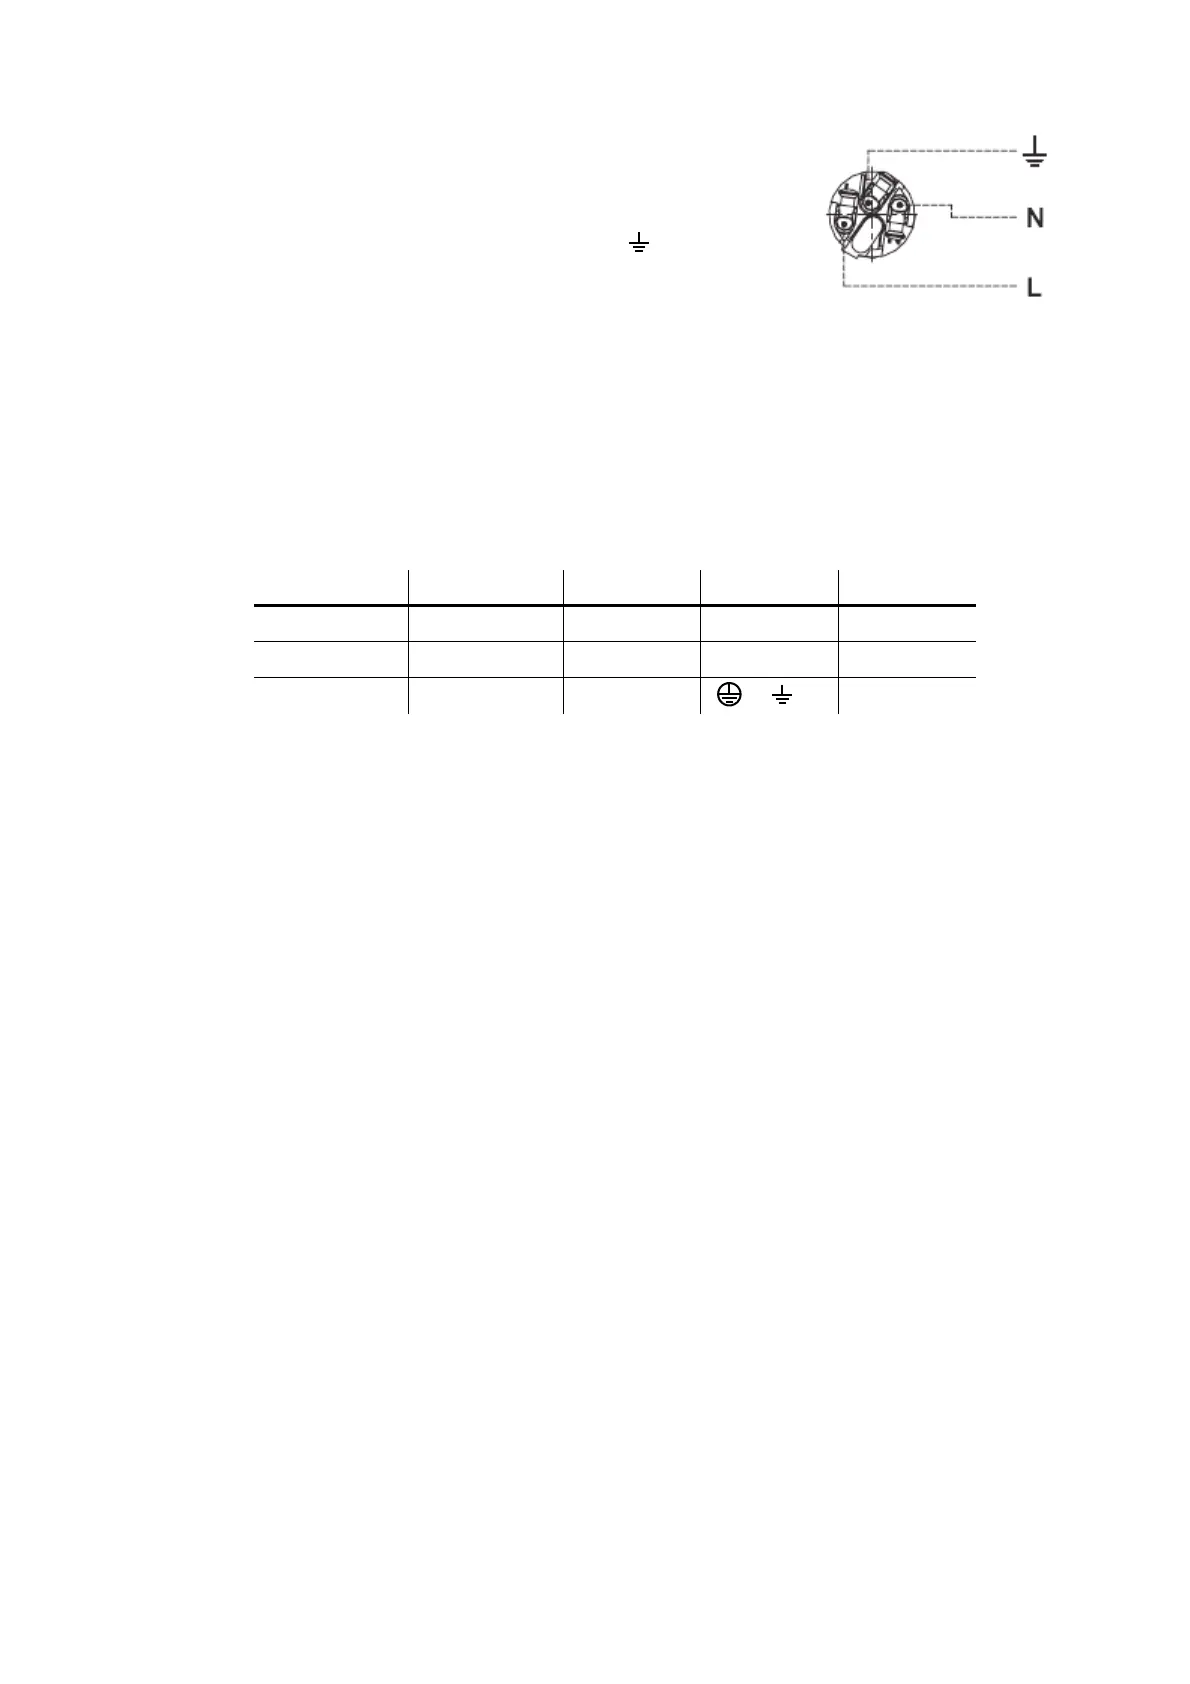
• live wire into the terminal marked L
• neutral wire into the terminal marked N
• ground (earth) wire into the terminal marked .
6. Line up the raised key in the insert with the keyway in the housing,
then push the insert and chuck into the housing.
7. Fasten the bushing to the housing using a wrench, applying a
torque of 2.5 Nm (1.8 lb.-ft).
Illustrations used by kind permission of Neutrik AG
Installing a cord cap (mains plug)
If you install a cord cap (mains plug) on the power cable to allow connection to power outlets, install a
grounding-type (earthed) plug, following the plug manufacturer’s instructions. Table 1 shows some possible
mains power pin and wire color identification schemes; if pins are not clearly identified, or if you have any
doubts about proper installation, consult a qualified electrician.
Applying power
To apply power, first check that the tilt lock is released and that a power input cable is connected, then set
the power switch on the base (see Figure 2) to the “I” position.
Wire color (USA) Wire color (EU) Pin Symbol Screw (US)
black brown live L yellow or brass
white blue neutral N silver
green yellow/green ground (earth) or green
Table 1: Cord cap connections