16 17
model no. 055-6751-6 | contact us 1-800-689-9928
1
2
3
4
4
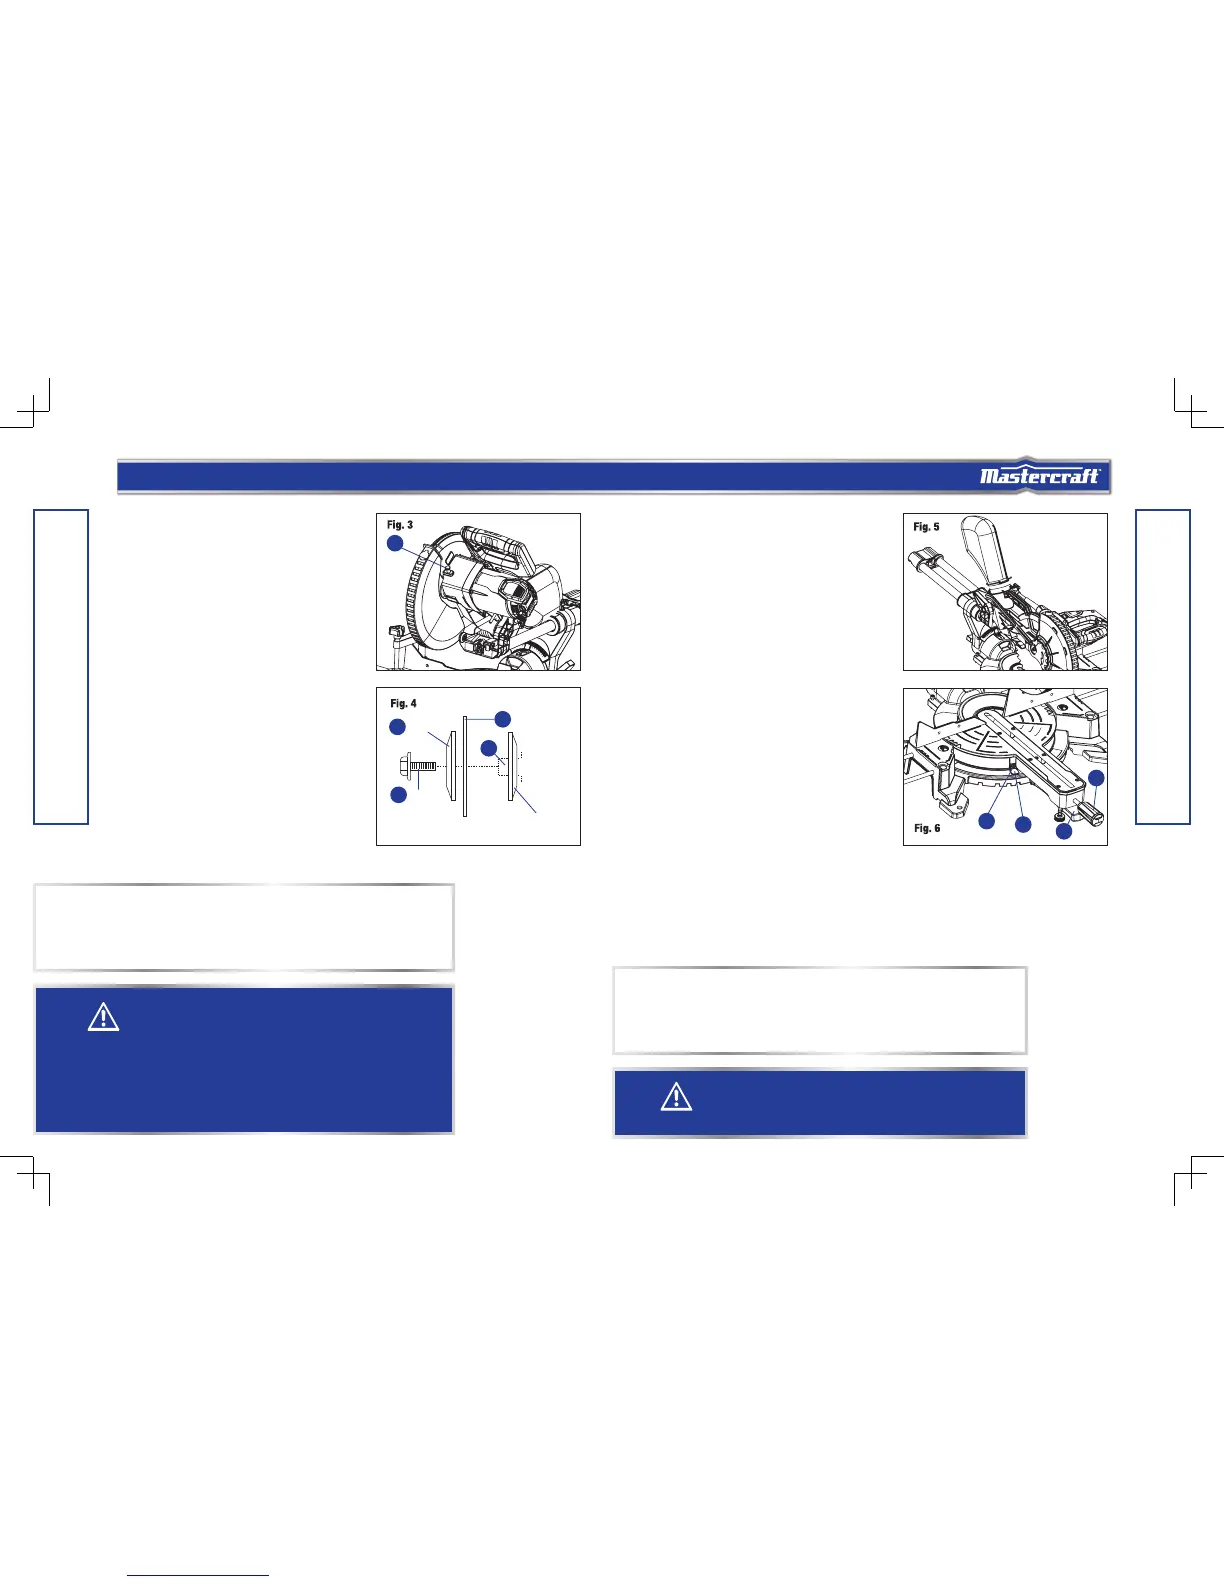
• Place the out flange against the blade and on the
arbor. Thread the blade bolt onto the arbor in a
counter-clockwise direction.
• Place the blade hex wrench into the blade bolt.
• Press the spindle lock button, holding it in firmly while
turning the blade counter-clockwise. When spindle
lock engages, continue to press it in while tightening
the blade bolt securely.
• Rotate the lower blade guard back to its original
position until the slot in the cover plate engages with
the cover plate screw. While holding the lower blade
guard, tighten the screw with a Phillips screwdriver.
• Verify that the operation of the guard does not bind or
stick.
• Be sure the spindle lock is released so the blade turns
freely before operating the saw.
INSTALLING THE DUST BAG
• Squeeze the metal collar wings on the dust bag.
●• Place the dust bag neck opening around the exhaust
port on the mitre saw and release the metal collar
wings.
MITRE SCALE
The sliding compound mitre saw scale can be easily read,
showing mitre angles from 0° to 45° to the left, and 0°
to 45° to the right. The mitre saw table has nine of the
most common angle settings with positive stops at 0°,
15°, 22.5°, 31.6° and 45°. These positive stops position
the blade at the desired angle quickly and accurately.
Follow the process below for quickest and most accurate
adjustments.
This tool is carefully adjusted and aligned at the factory,
but rough handling may have affected the alignment. If
your tool is not aligned properly, perform the following as
needed.
To Adjust Mitre Angles:
• Unlock the table by turning the mitre handle (1)
counterclockwise.
• Move the table while lifting up on the positive stop locking lever (2) to align the indicator (3) to the
desired degree measurement.
• If the desired angle is one of the nine positive stops, release the positive stop locking lever, making
sure the lever snaps into position, and then secure by tightening the mitre handle.
• If the mitre angle desired is not one of the nine positive stops, simply lock the table into desired angle
position by turning the mitre handle in the clockwise direction.
ASSEMBLY AND ADJUSTMENTS
NOTE:
The lower blade guard must be in the right position to access the cover plate screw.
NOTE:
To empty the dust bag, remove it from exhaust port. Open zipper on underside of bag and empty into waste
container.
IMPORTANT:
Make sure the flats of the out flange are engaged with the flats on the arbor shaft. Also, the flat side of the
out flange collar must be placed against the blade.
IMPORTANT:
Check bag frequently and empty it before it gets full.
ASSEMBLY AND ADJUSTMENTS
WARNING!
• To avoid injury, never use the saw without the cover plate securely in place. It keeps the
blade bolt from falling out if it accidentally loosens and helps prevent the spinning blade from
coming off the saw.
• Make sure the anges are clean and properly arranged. Lower the blade into the lower table
and check for any contact with the metal base or the mitre table.
• To avoid injury from an accidental start, make sure the switch is in the OFF position and the
plug is not connected to the power source outlet.
• Never cut metals or masonry products with this tool. This mitre saw is designed for use on
wood and wood-like products only.
WARNING!
Do not use this saw to cut and/or sand metals. The hot chips or sparks may ignite sawdust from
the bag material.
3
5
6

 Loading...