10
5. Working with the Cutting Tool
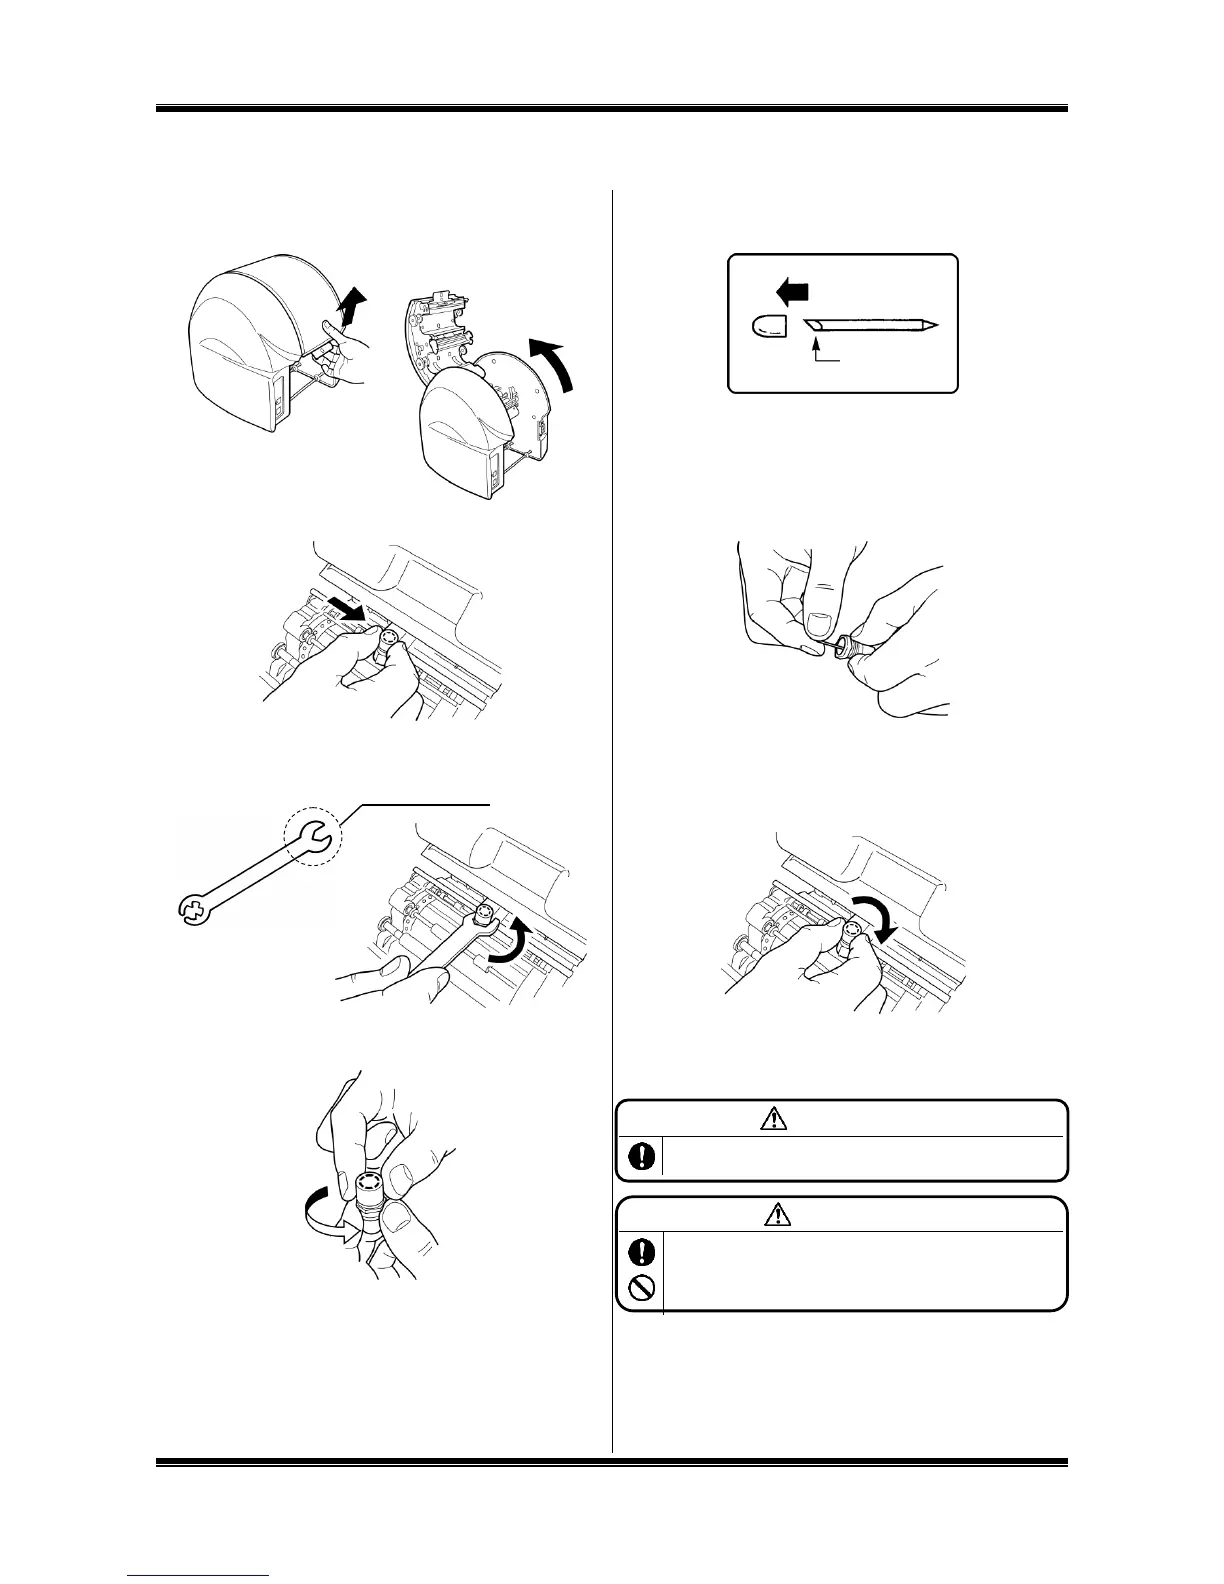
Installing (Replacing) the Cutting Tool
1. After turning off the power, pull up the opening/closing lever
to open the door cover.
2. Move the cutting head to the center manually.
3. Using an accessory spanner, turn the tool holder in the
counterclockwise direction to remove it. (Use the larger end
of the spanner.)
4. Turn the cap (top) of the tool holder in the counterclockwise
direction to remove it.
5. Prepare a new cutting tool (blade) and remove its protective
cap.
6. Holding a cutting edge (protective cap attached side)
downward, insert the blade lightly into the center of the
holder. DO NOT push the blade into the holder otherwise
this will not cut correctly.
* When replacing the blade, remove the old one first.
7. Tighten the holder cap. The share point will be projected
appropriately by tightening the cap firmly.
8. Clamp the tool holder manually onto the cutting head.
* When moving or carrying the printer, make sure to
remove the blade beforehand. Otherwise, the tip of the blade
may be damaged and result in improper cutting.
Store the cutting tool (blade) out of the reach of children. If
swallowed accidentally, seek medical attention immediately.
Prior to mounting/dismounting the cutting tool (blade), be sure to
turn off the power. You could be injured if the machine is activated
abruptly. Do not touch the tip of the cutting tool (blade) to prevent
an injury.