44
11 Operation of BepopPC EX (2): Import of Logo or
Mark
11.1 Scanning the Logo or Mark from the Scanner
1 Start BepopPC EX.
2 Click on the [OK] button in the “Setup sheet” screen.
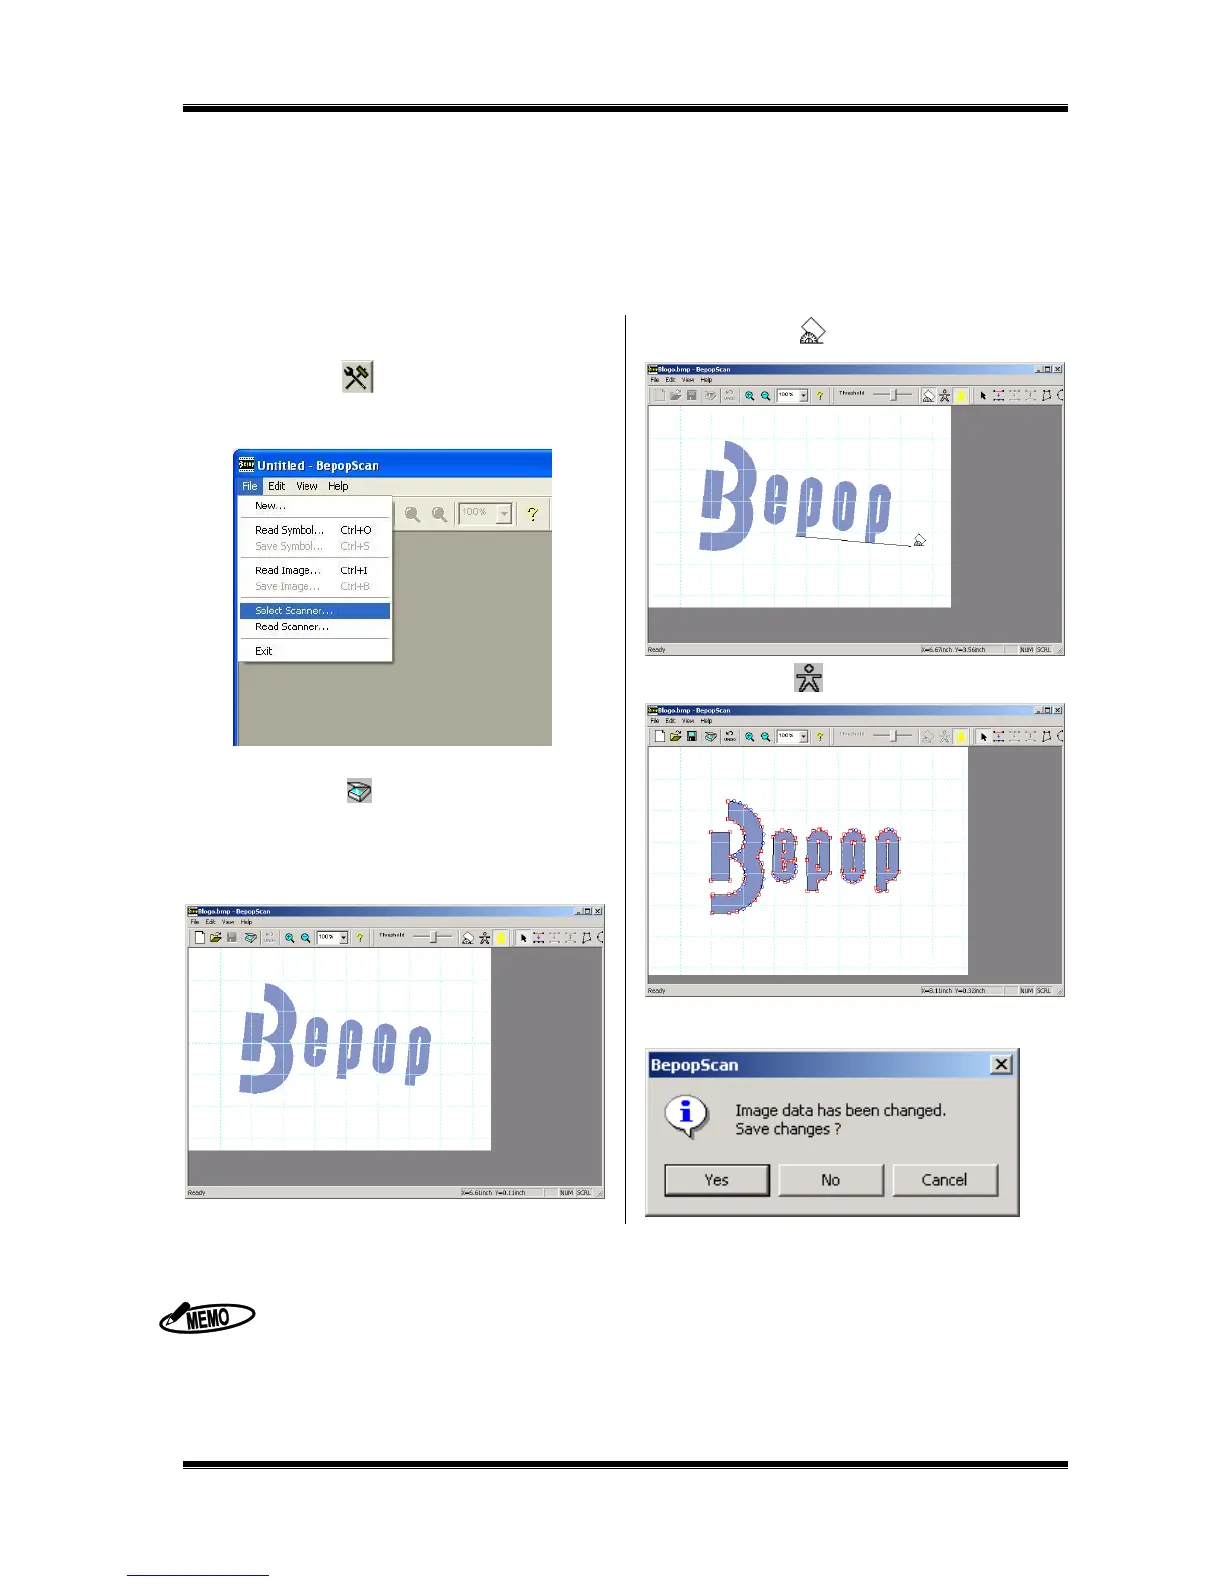
3 Click on the [ ] button. BepopScan (Edit symbol
screen) starts.
* You can also operate by selecting “File” – “Edit symbol”
4 Open “File” – “Select Scanner.”
5 Select Scanner you want to use.
6 Click on the [ ] button to start selected scanner.
7 Place a logo or mark on the scanner to read it.
* For the scanner operating methods, see the instruction manual for
the scanner.
8 Once the scanner finishes scanning, a scanned logo or
mark appears in gray in the Edit symbol screen.
9 Click on the [ ] button and drag a line you want to
make horizontal to correct the tilt of the read logo.
10 Click on the [ ] button to outline it.
* The graphic data is converted into the data for Bepop.
11 Select “File” – “Exit”. Select “Yes” to save the original data
(bitmap data) imported from the scanner.
Only the scanners compliant with the TWAIN Standards are available.
Once “Select scanner” is selected in Step ③, you do not need to select it thereafter.
For the methods to operate the scannere, see the instruction manual for the scanner.
The suitable logos or marks are as follows:
The maximum logo or mark is bitmap data up to A4 size.
Use the logo or mark which has a clear graphic symbol to be scanned. <Black and white print or line-work>
(The data with a photo or a gradational representation may not be converted as you expect.)
Only a necessary portion is scanned.