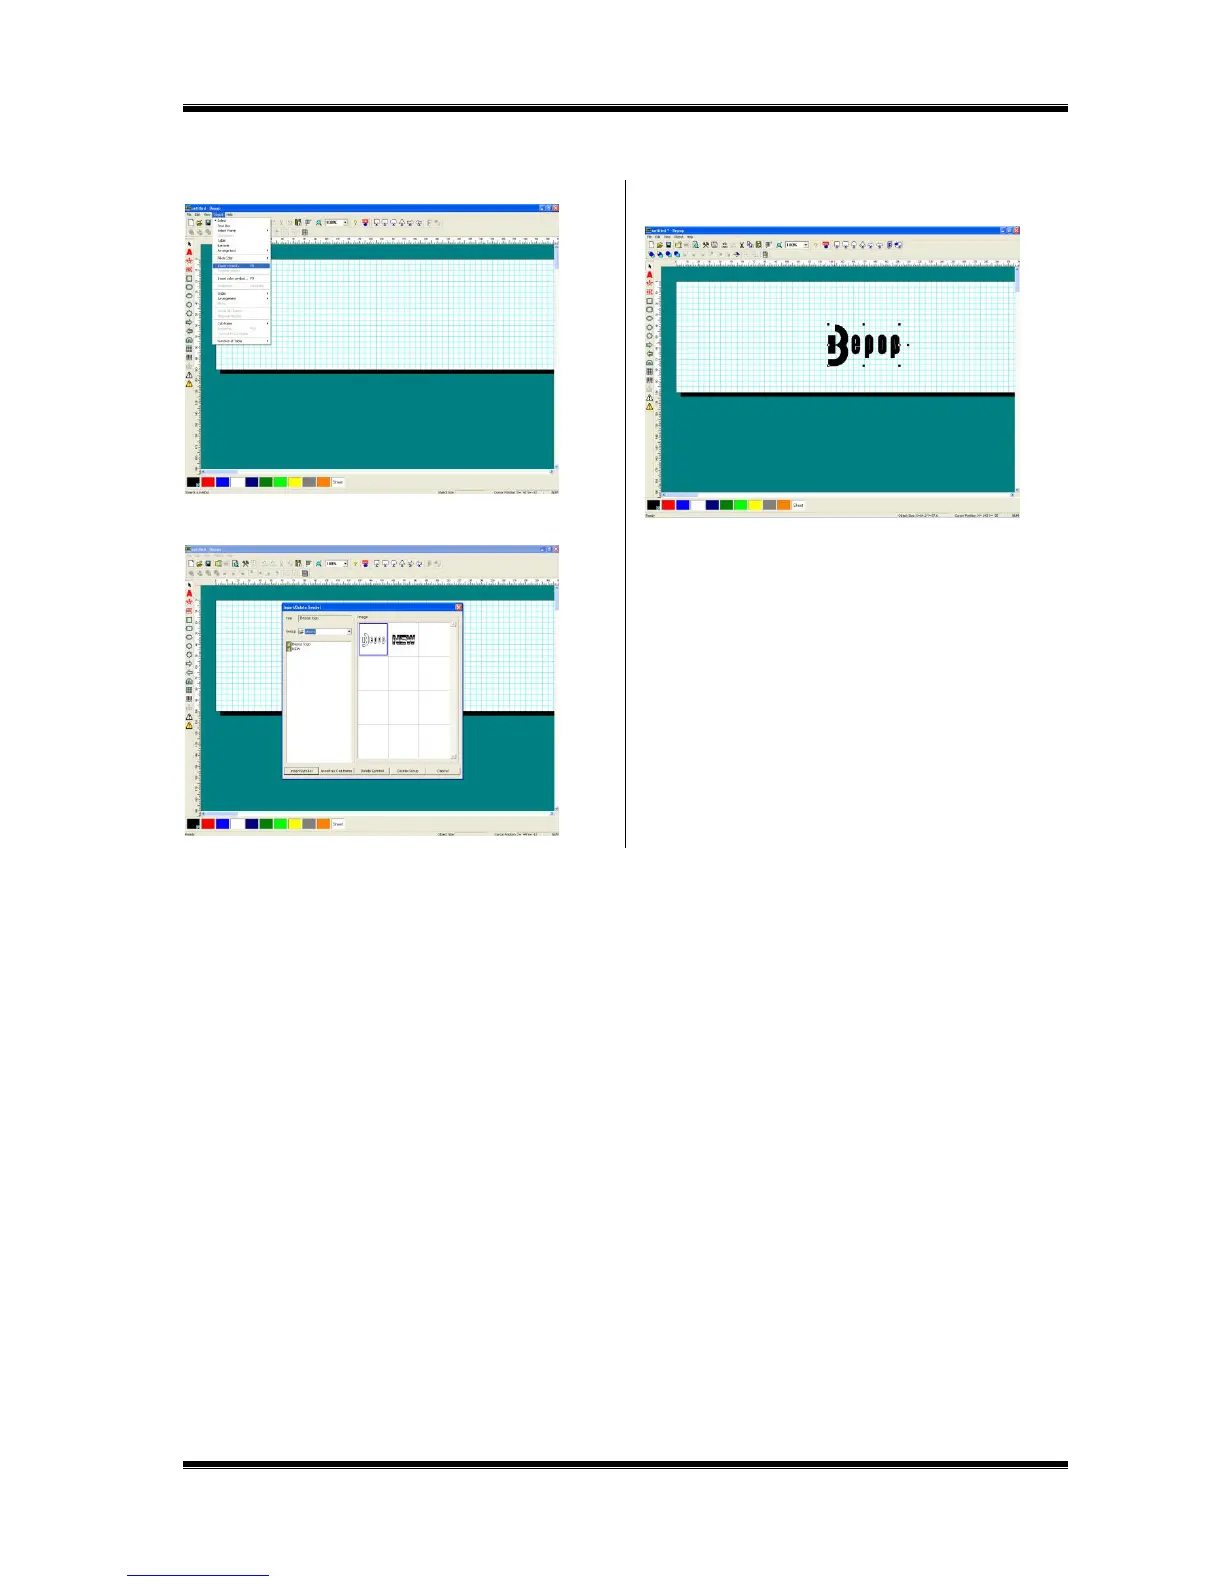
Home
Max
Label Maker
CPM-100G5
Max CPM-100G5 User Manual
4
of 1
of 1 rating
44 pages
Give review
Manual
Specs
To Next Page
To Next Page
To Previous Page
To Previous Page
Loading...
46
11.2
Inserting t
he Saved Symbol (When Using for BepopP
C
EX
)
1
Select “Object” –
“Insert
S
ymbol.”
2
Select
a
group
name
and
click
a
file
name.
A
symbo
l
image appears on the right.
3
Click
[Insert
Symbol]
button
or
double-click
on
the
image.
It is inserted in the editing screen.
39
41
Table of Contents
Default Chapter
3
Table of Contents
3
[Preparing the CPM-100G5/CPM-100HG5]
4
Be Sure to Read
4
Precautions for Use
5
1 Confirming the Package Contents
9
2 Component Units and Their Functions
9
3 Working with the Tape Roll
10
4 Working with the Ink Ribbon Cassette
11
5 Working with the Cutting Tool
12
[Installing the Bepoppc EX Software]
21
Notes
21
6 What Is Possible with Bepoppc EX
22
7 Important: Read before Installation
23
Environment of Pcs Capable of Running with this Software
23
Precautions for Installation
23
8 Installation and Uninstallation
24
Setup Menu
24
Installing Bepoppc EX Software
25
Uninstalling Bepoppc EX
30
Installing Only the Printer Driver
31
Uninstalling the Printer Driver
32
9 Setting the IP Address of the CPM-100HG5
33
Restrictions for LAN Connection
33
Setting the IP Address of the CPM-100HG5
34
10 Usage of Bepoppc EX (1): Input and Output of Characters
37
Outputting to Bepop
37
Checking the Remaining Tape Roll Length
37
11 Usage of Bepoppc EX (2): Import of Logo or Mark
41
12 Troubleshooting
41
4
Based on 1 rating
Ask a question
Give review
Questions and Answers:
Need help?
Do you have a question about the Max CPM-100G5 and is the answer not in the manual?
Ask a question
Max CPM-100G5 Specifications
General
Brand
Max
Model
CPM-100G5
Category
Label Maker
Language
English
Related product manuals
Max CPM-100HG5
44 pages
Max Bepop CPM-200G
40 pages