17
Setup, con’t
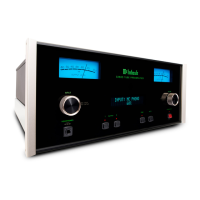
The C2500 can be part of a Multichannel Sound Sys-
tem for SACD, DVD-Audio and Home Theater. The
Right and Left Front Channels from an Audio/Video
Control Center or Surround Decoder can “Passthru”
the C2500 and onto its associated Power Amplifier(s).
The Setup Mode allows the activation of the Passthru
Mode and the selection of the specified C2500 Input
Connector to be used for the Right and Left Front
Channels. In the example below, the Right and Left
Front Channels from the Audio/Video Control Center
will be connected to the BALanced 2 Input Connec-
tors on the C2500. Refer to page 4 for additional con-
nection information.
Notes: 1. The Phono Input Connectors and Digital Input
Connectors are not assignable as a Passthru
Input.
2. If Balanced Input Connectors 1 and/or 2 are
already reassigned to a given Input, they will
not appear in the list of available Inputs for the
Passthru Mode.
3. When one of the RCA Inputs is selected as a
Passthru Input, it is advisable to remove it
from the list of available Inputs by switching it
Off. Refer to “Reassign Source Inputs” starting
on page 14.
1. Press and hold the TONE BYPASS/SETUP Push-
button until the Setup Mode is active. Then press
the OUTPUT 2 / MENU ► Push-button until the
Setup Menu item “SETUP: PASSTHRU, Source:
OFF” appears on the Front Panel Display. Refer to
figure 25.
To switch Off the Tube LED green illumination per-
form the following:
1. Press and hold the TONE BYPASS/SETUP Push-
button until the Setup Mode is active. Then press
the OUTPUT 2 / MENU ► Push-button until
the Setup Menu item “SETUP: TUBE LIGHTS,
Lights: On” appears on the Front Panel Display.
Refer to figure 22.
2. Rotate the VOLUME/ADJUST Control until
the Setup Menu item “SETUP: TUBE LIGHTS,
Lights: Off” appears on the Front Panel Display.
Refer to figure 23.
3. Rotate the VOLUME/ADJUST Control until
the Setup Menu item “SETUP: TUBE LIGHTS,
Lights: Meters” appears on the Front Panel Dis-
play. Refer to figure 24
Note: When Tube Lights “Meters” is selected, the
tube illumination goes On/Off as the meters
backlight goes On/Off. Refer to page 22 “Meter
Illumination”, the Trim Function controlling
the Meter Backlight.
4. To exit from the Setup Mode, press the TONE
BYPASS/SETUP Push-button.
SETUP: PASSTHRU
Source: OFF
Figure 25
Passthru
The Front Panel Display Brightness may be changed
from the default setting. The C2500 will remember
two brightness preferences, one with the Meters Illu-
minated and one without Meter Illumination. For each
preference there are four brightness settings for the
Front Panel Display. The Display Brightness setting
may be varied 1 (Dim) to 4 (Bright). Follow the steps
below for reducing the Display Brightness (with the
Meter Illumination On).
1. Press and hold the TONE BYPASS/SETUP Push-
button until the Setup Mode is active. Then press
the OUTPUT 2 / MENU ► Push-button until the
Setup Menu item “SETUP: DISPLAY, Brightness:
3” appears on the Front Panel Display. Refer to
figure 20.
2. Rotate the VOLUME/ADJUST Control until
“SETUP: DISPLAY, BRIGHTNESS: 1” appears
on the Front Panel Display. Refer to figure 21.
Note: To change the Display Brightness preference
with Meter Illumination Off, first switch off
the Meter Illumination (refer to page 22) and
change the Display Brightness Setting.
3. To exit from the Setup Mode, press the TONE
BYPASS/SETUP Push-button.
Display Brightness
Figure 20
 Loading...