12
Trim Menu
The trim menu allows you to make and store
adjustments to various settings for all inputs. The
trim menu can be entered using the INPUT knob or
the remote control.
The following table lists the trim options and the
range of values that can be adjusted:
Setting Values
Bass -12dB to +12dB in 1 dB increments
Treble -12dB to +12dB in 1 dB increments
Dirac Live
Voicing EQ Select to apply to current input
Audio Delay
(Lip Sync)
0 to 500 ms in 25 ms increments
Trim Center -10dB to +10dB in 1 dB increments
Trim Surrounds -10dB to +10dB in 1 dB increments
Trim Heights -10dB to +10dB in 1 dB increments
Trim Subwoofer -10dB to +10dB in 1 dB increments
Meter Lights
Display Brightness Max, 75%, 50%, or 25%
Tuner Mo de Frequency, Preset
Input Mode Auto, Movie, Music, Game, Through
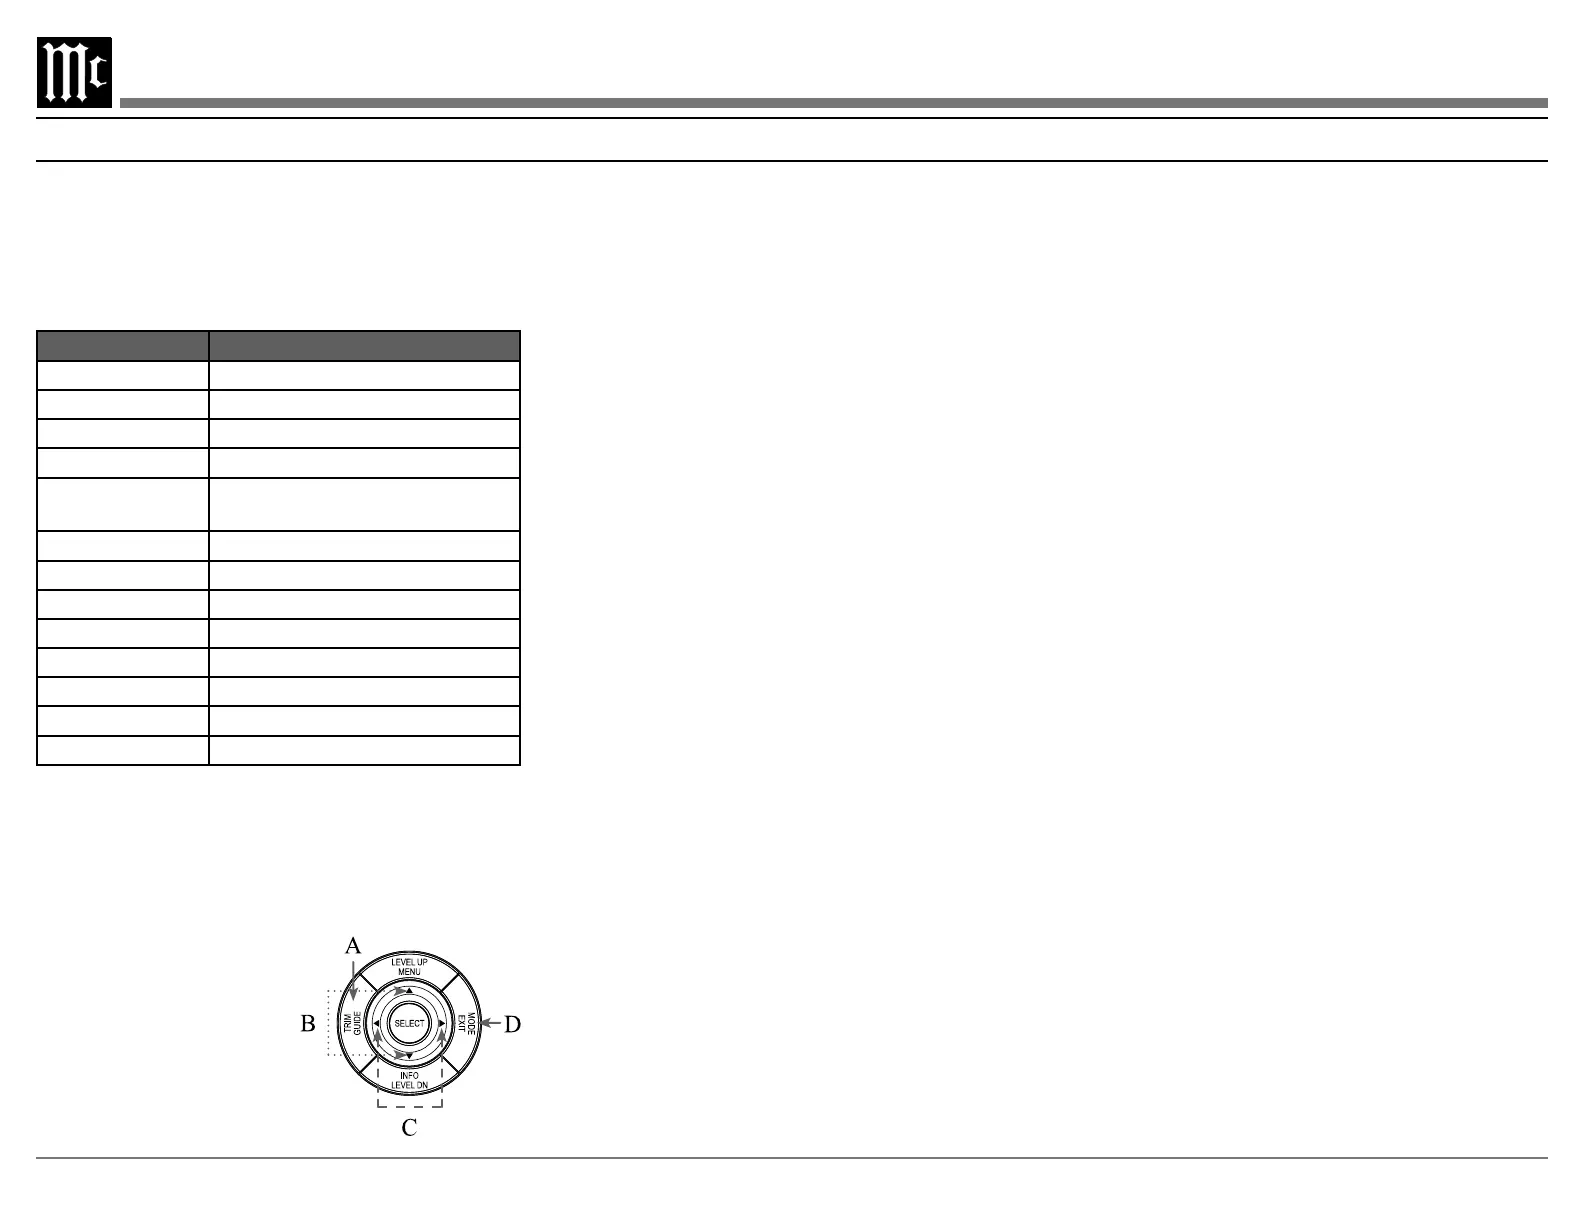
Trim Menu Using the Remote Control
A. Enter the trim menu by pressing the TRIM button.
B. You can scroll through the trim options by press-
ing the up or down arrows on the silver ring.
C.
Use the left and right arrows on the silver ring to
change values for the
selected trim option.
D. Use the EXIT button to
exit the trim menu or wait
ten seconds for the menu
to close automatically.
Trim Menu Using Knobs
To enter the trim menu, press and release the
INPUT knob. (Holding the knob for two seconds
enters the setup menu instead of the trim menu.)
Scroll through the options by turning the INPUT
knob.
Change the values of the current option by rotating
the VOLUME knob. Turn the INPUT knob to select
another option to edit or press the INPUT knob and
release to exit the menu. Changes will be saved.
Saving Trim Settings
Most trim settings are saved per input. For these
input. The following trim inputs are saved by
individual input:
• Bass
• Treble
• Audio Delay
• Trim Center
• Trim Surrounds
• Trim Subwoofer
• Mode
• Voicing EQ
Some trim settings are saved Globally. Making a
change to these settings for any input will make the
same change for all inputs. Global trim settings are:
• Dirac Live EQ
• Meter Lights
• Display Brightness
Input Mode
The following input modes are available:
• AUTO
• THROUGH
• MOVIE
• MUSIC
• GAME
MOVIE, MUSIC and GAME are variables that
surround modes that are used for MOVIE, MUSIC
and GAME options are assigned in setup. The default
for each option is AUTO. Other options are Dolby
Surround, DTS Neural:X, Multi-Channel Stereo,
Stereo and Through. For more information about
these options see “Setup: Audio > surround mode”
on page 18.
A quick way to change the current input’s surround
mode is to use the MODE button on the outer ring
of the remote control. Pressing the MODE button
will cycle through the surround modes. Stop on your
choice. The display will time-out in a few seconds
and your choice will be saved.
Assigning Input Modes
A. Enter the trim menu by pressing the INPUT knob
or the TRIM button on the remote control.
B. Rotate the INPUT knob or press the down arrow on
the remote control until MODE is displayed on the
VFD.
C. Press and release the INPUT knob or the SELECT
button on the remote control.
D. Rotate the INPUT knob or the up and down arrows
on the remote control until the desired input is
displayed.
E. Rotate the VOLUME knob or press the left and
right arrows to scroll through the surround modes.
F. Press and hold the INPUT knob for two seconds or
press the EXIT button to leave the trim menu (or
wait until it times out).
 Loading...