12
Changing Settings
There are two ways to change the settings of the
1. Use the front panel and the Vacuum Fluorescent
Display (VFD) and the INPUT and VOLUME
knobs or the remote control
2. Using a browser on a connected computer
network, then using the front panel method can
accomplish almost all the same things using some
additional patience.
In this manual, submenus are denoted in the style:
SETUP: VIDEO > HDMI
The title above indicates from the setup menu choose
the video submenu and then HDMI.
Navigating Setup with the Front Panel
To enter setup mode using the front panel press
and hold the INPUT knob for two seconds and then
release. A shorter push of the INPUT knob will bring
up trim settings. See “Setting Up Surround Sound”
Select options using a brief press of the INPUT
knob. A long press of the INPUT knob will close the
setup menu.
To return to a previous menu, scroll down to last
top most menu, the last menu choice will be MENU
user input.
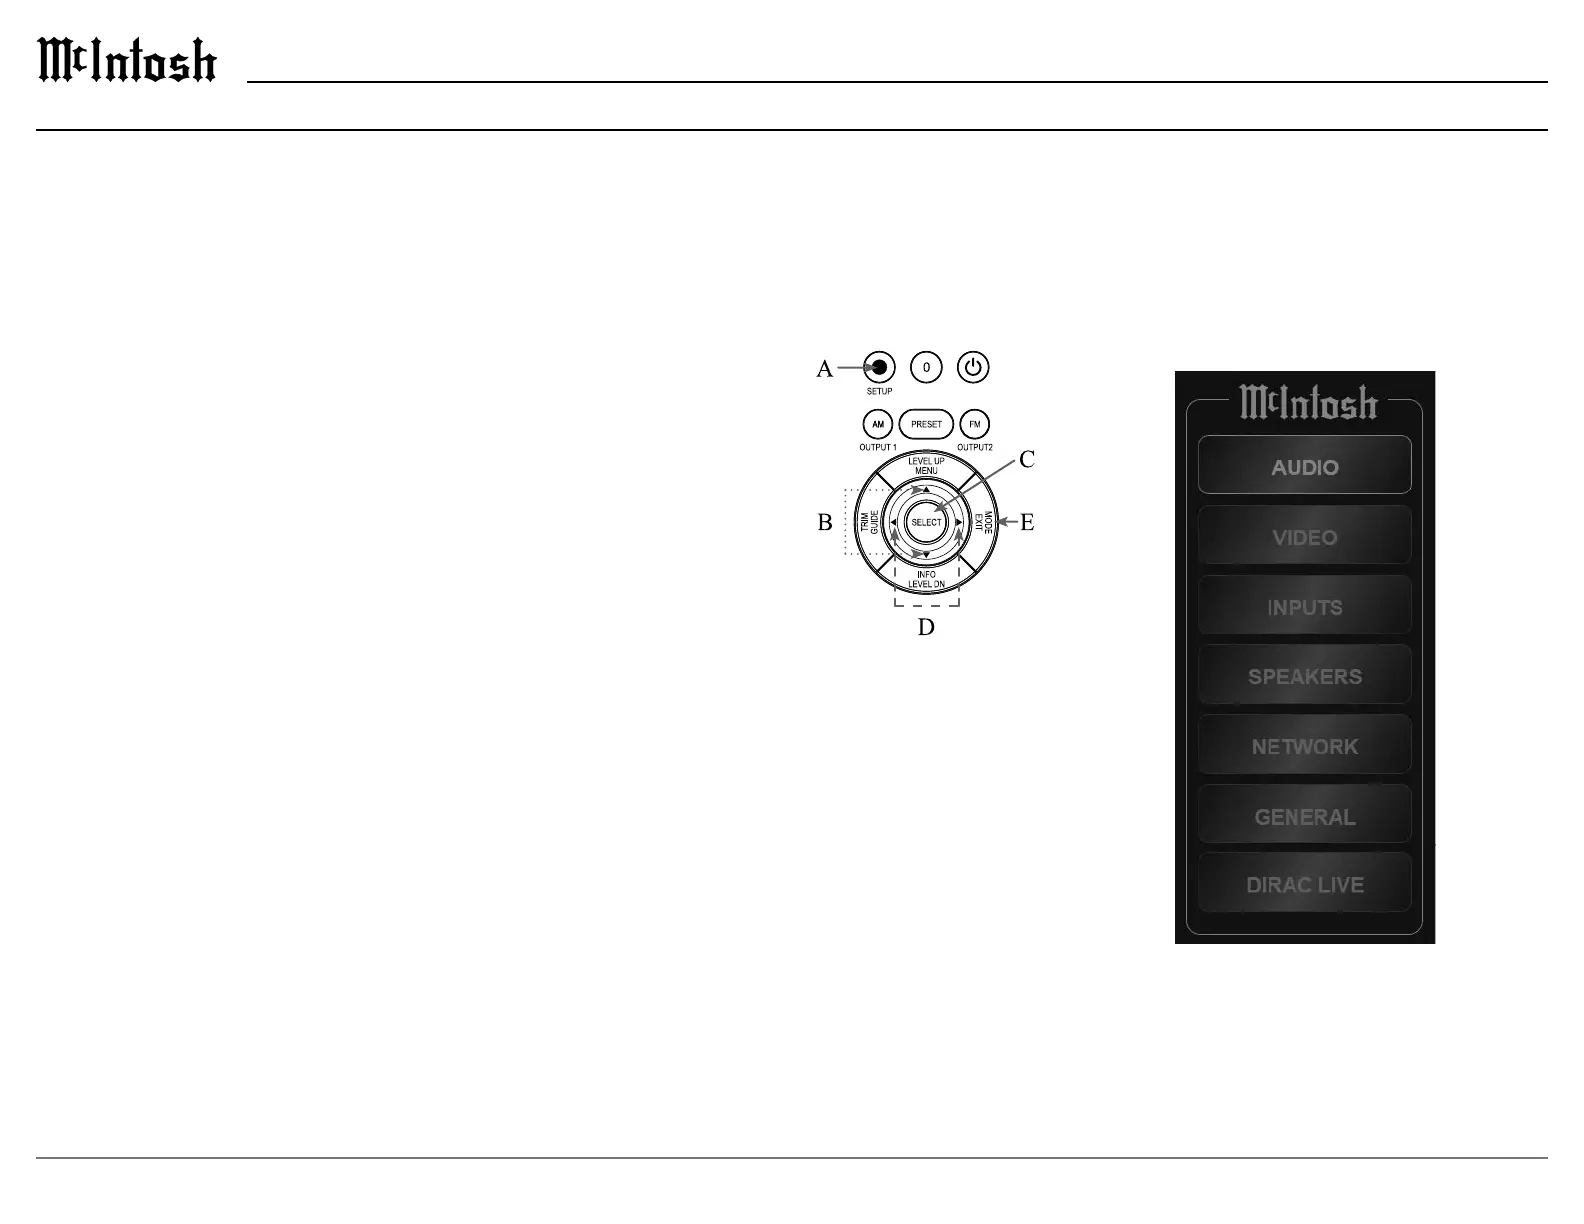
Navigating Setup with the Remote Control
A. Enter the setup menu by pressing the SETUP
button with the blue circle.
B. Use the up and down arrows on the silver ring to
navigate through the options.
change.
D. Use the left and right
arrows on the silver ring
to change values for the
selected setup option.
The new value will be
saved automatically.
E. To stop editing a setting
or to close the setup
menu, press the Mode/
the last option which is
Setup Menu Options
• Serial Number
• Firmware Version
• Inputs
• Network
•
• Audio
• Video
• Speakers
•
Setup from a Browser
Setup is easier from a web browser. Open a browser
window on a computer connected to the same
“Setup: Network > Network Information” on page
19).
The setup menu on your browser should look like
this:
Setup Menu