46
MELBOURNE INSTRUMENTS – NINA V 1.3.0
47
MELBOURNE INSTRUMENTS – NINA V 1.3.0
Wavetable Management
The Wavetable Management function allows import and
export of wavetables to a zip le on a USB ash drive.
For details on the wavetable le format, see page 44.
Import Wavetables
Choose Import Wavetables from the list. Nina will look
for a le called nina_wavetables.zip and read all the
wavetables on the drive and copy them into its internal
storage. After import, you can nd the new wavetables
by pressing the SHAPE Key. Wavetables are listed in
alphabetical order. A maximum of 127 wavetables can be
loaded.
Export Wavetables
Choose Export Wavetables from the list. Nina will create
a led called nina_wavetables.zip, with all of the imported
wavetables in its storage. The factory built-in wavetables
will not be exported.
Delete Unused Wavetables
This function allows clean up of imported wavetables.
It scans all the Presets to determine which wavetables
are used, and which are not. All wavetables that are not
used are deleted. The factory loaded wavetables are not
deleted by this operation.
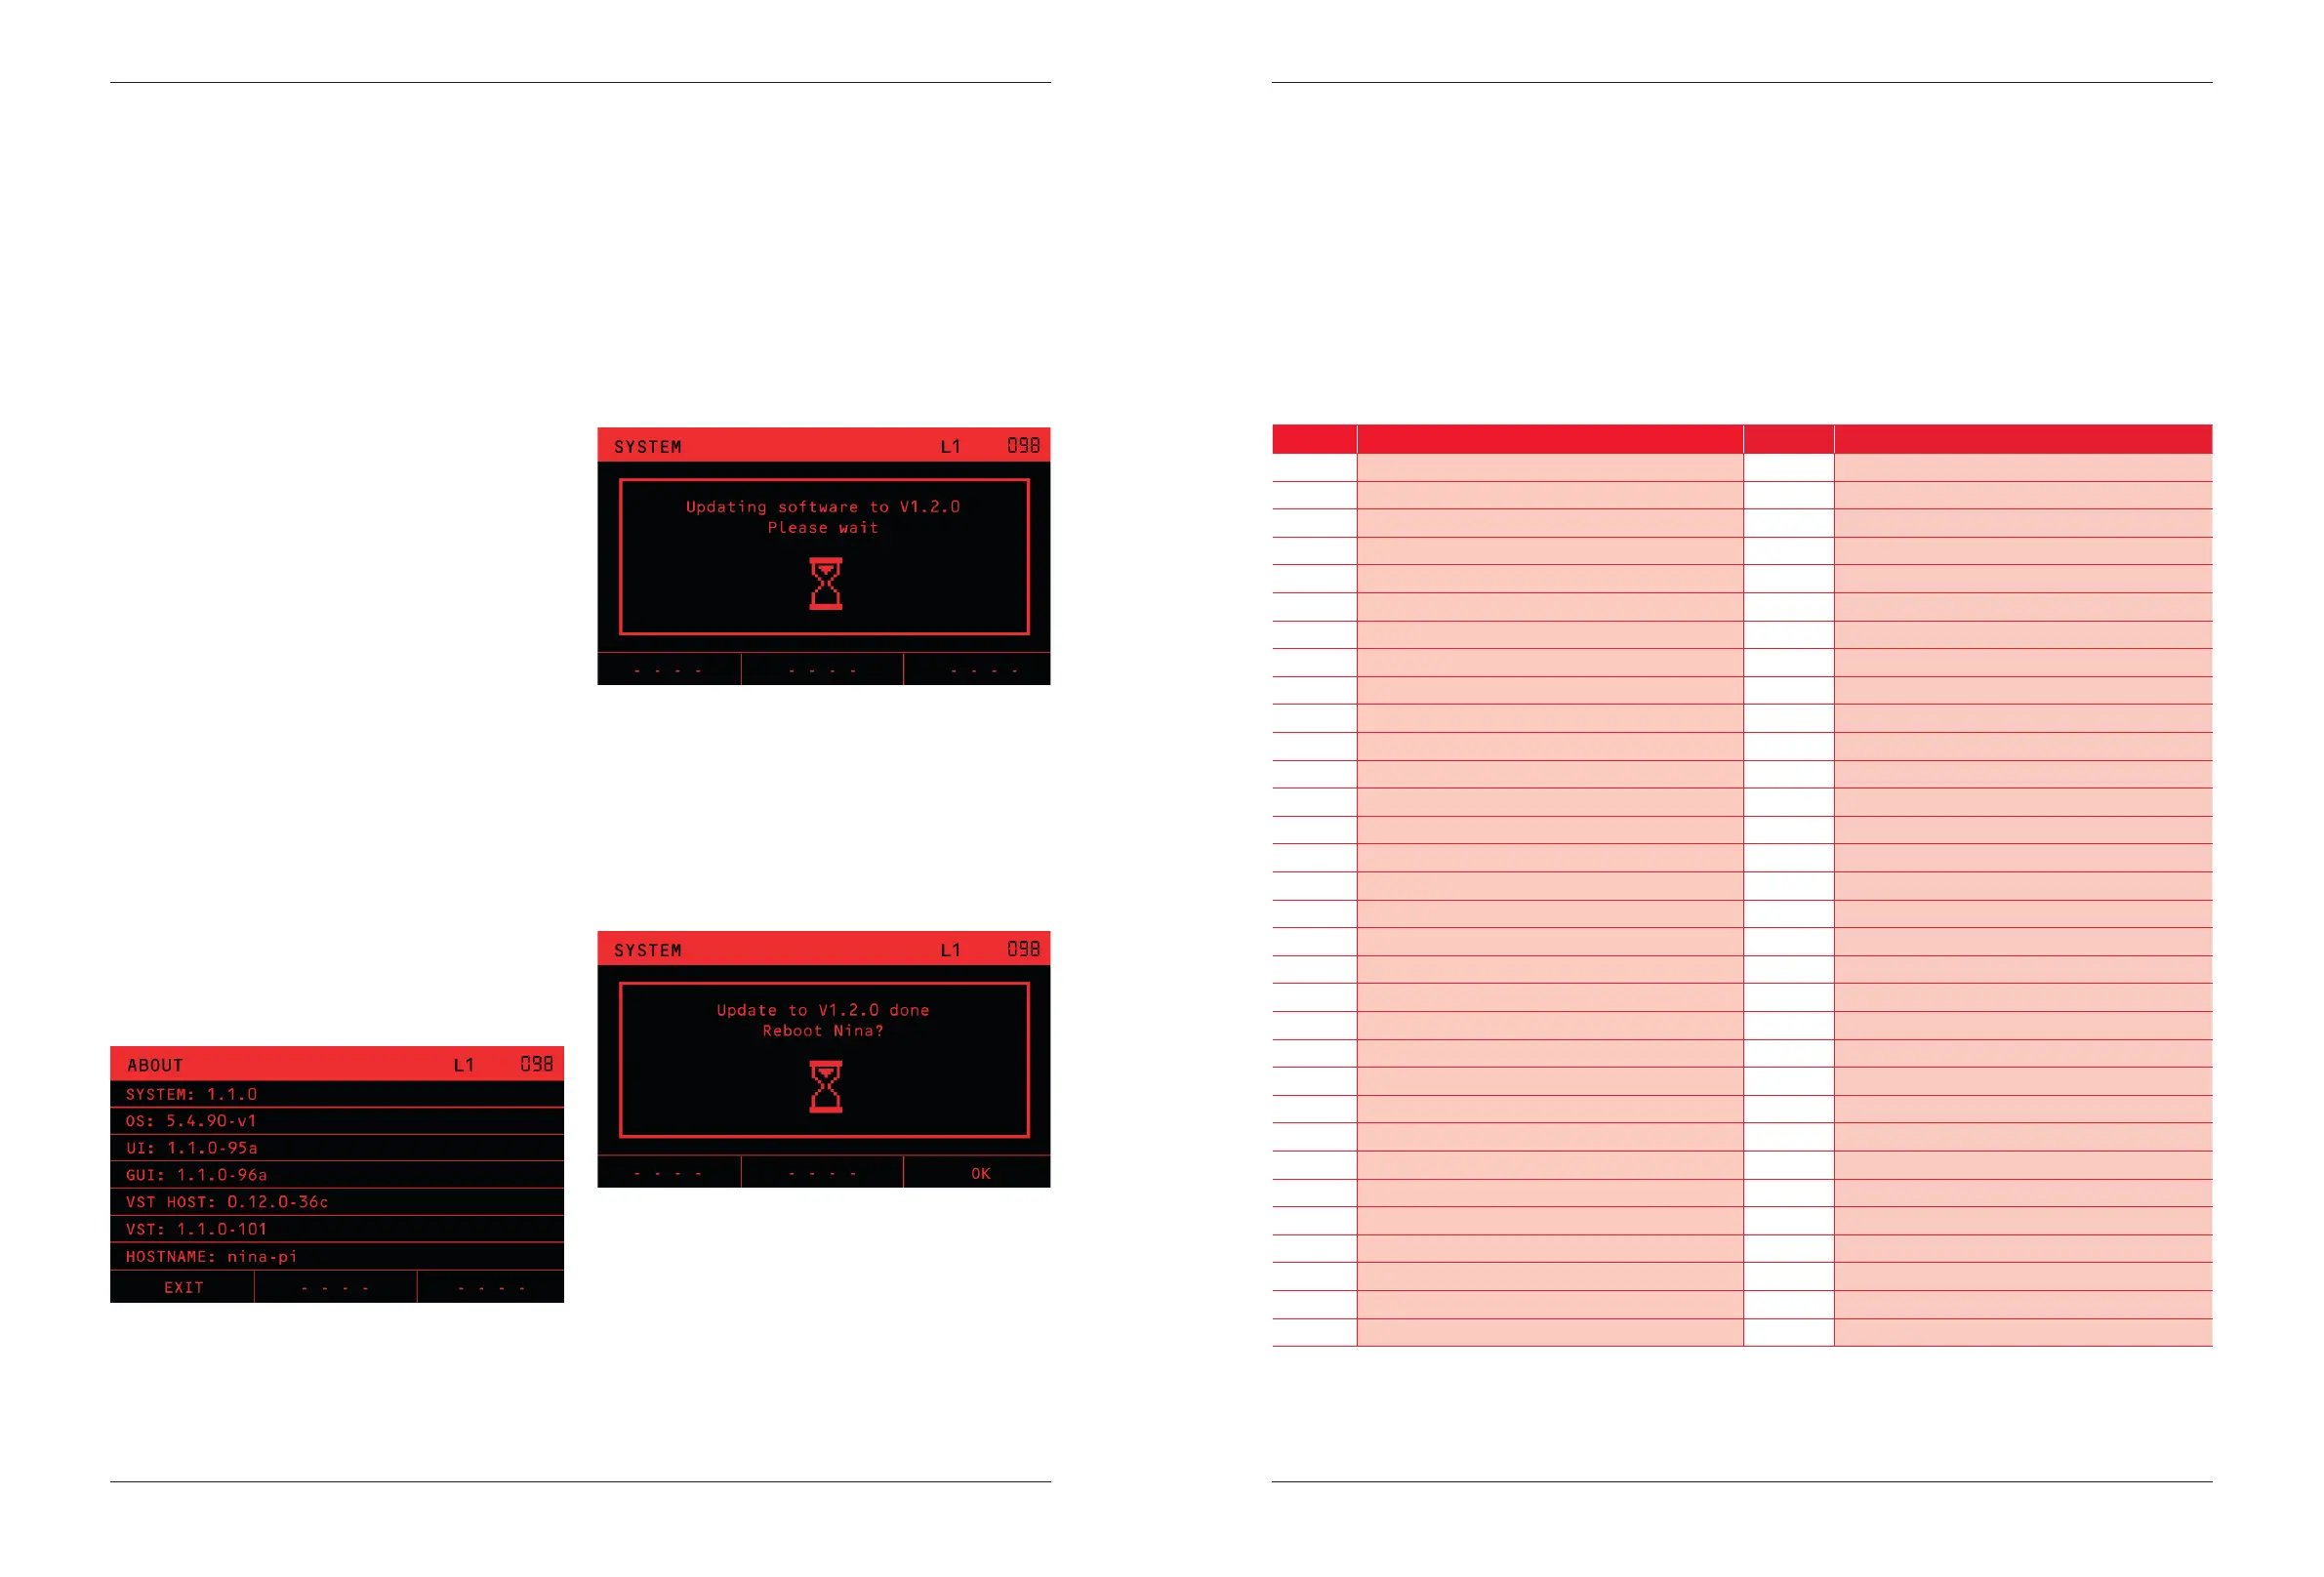
About
The ABOUT item on the SYSTEM menu will show you the
current System rmware revision number in the rst line,
and a number of internal numbers and status.
Firmware Upgrades
To perform a rmware upgrade, rst download the NINA
rmware and copy onto a FAT32 formatted USB ash
drive. The le is an .swu (software upgrade) le.
It will take around 5 minutes for the whole process, so make
sure you have time and reliable power when you do it.
After Reboot, Nina may run a Calibration, depending on
the rmware version and state of the unit. This process
can take up to 10 minutes.
Power o Nina, insert the ash drive into either one of
the USB-A ports, and power on Nina. Nina will boot up
to the Knob calibration stage, and then read the “.swu”
le. At this point it will display that it is doing the rmware
upgrade, and the version number:
The hourglass symbol will spin to show you the unit is running.
WARNING: Do not Power o while the Nina Update is
running
After the upgrade is nished, you will be asked to reboot.
Press OK. The unit will then reboot with the new rmware
loaded. You can check the version in the ABOUT item in
the SYSTEM menu.
USB Flash Drive Removal
USB ash or thumb drives may be removed safely if you
have nished all operations with them. Do not remove
them while Nina is actively writing to them e.g. EXPORT
BANK. At times you will be asked if you want to EJECT
them. This is mainly for convenience, and to make it clear
that the device is nished being used and ejecting is
safe. If you choose EJECT, the device will not be seen by
Nina until you remove and reinsert it.
Channel Param. Channel Param.
0 Bank Select (MSB) 32 Bank Select (LSB) 00-31 selects Banks 1-32
1 Mod Wheel 33 EG1 Attack
2 Mod Matrix MIDI Source 34 EG1 Decay
3 <Unused > 35 EG1 Sustain
4 <Unused > 36 EG1 Release
5 Glide Rate 37 EG2 Attack
6 (Reserved) Data Entry MSB for RPN/NRPN 38 (Reserved) Data Entry LSB for RPN/NRPN
7 Patch Volume 39 EG2 Decay
8 <Unused > 40 EG2 Sustain
9 <Unused > 41 EG2 Release
10 Pan 42 Spin
11 Expression Source 43 Morph
12 Eect Level 44 Morph
13 <Unused > 45 <Unused >
14 Osc 1 tune 46 <Unused >
15 Osc 2 tune 47 <Unused >
16 Osc 3 tune 48 <Unused >
17 Osc 1 width 49 <Unused >
18 Osc 2 width 50 <Unused >
19 Osc 3 width 51 <Unused >
20 Osc 1 Blend 52 <Unused >
21 Osc 2 Blend 53 <Unused >
22 Osc 3 Level 54 <Unused >
23 LFO 1 Rate 55 <Unused >
24 Osc 1 Level 56 <Unused >
25 Osc 2 Level 57 <Unused >
26 Noise Level 58 <Unused >
27 LFO 1 Level 59 <Unused >
28 Resonance 60 <Unused >
29 Cuto 61 <Unused >
30 Drive 62 <Unused >
31 Env Amount 63 <Unused >
Appendix A:
MIDI Control
The CC messages 64 and above are not shown. Nina
uses CC and not RPN/NPRN message for external
control and automation.
The USB-C connector on the rear port exposes a
class compliant USB MIDI device to a connected host
computer. The DIN MIDI IN supports the same functions.