6
5
3
2
1
SW1
SW2
SW3
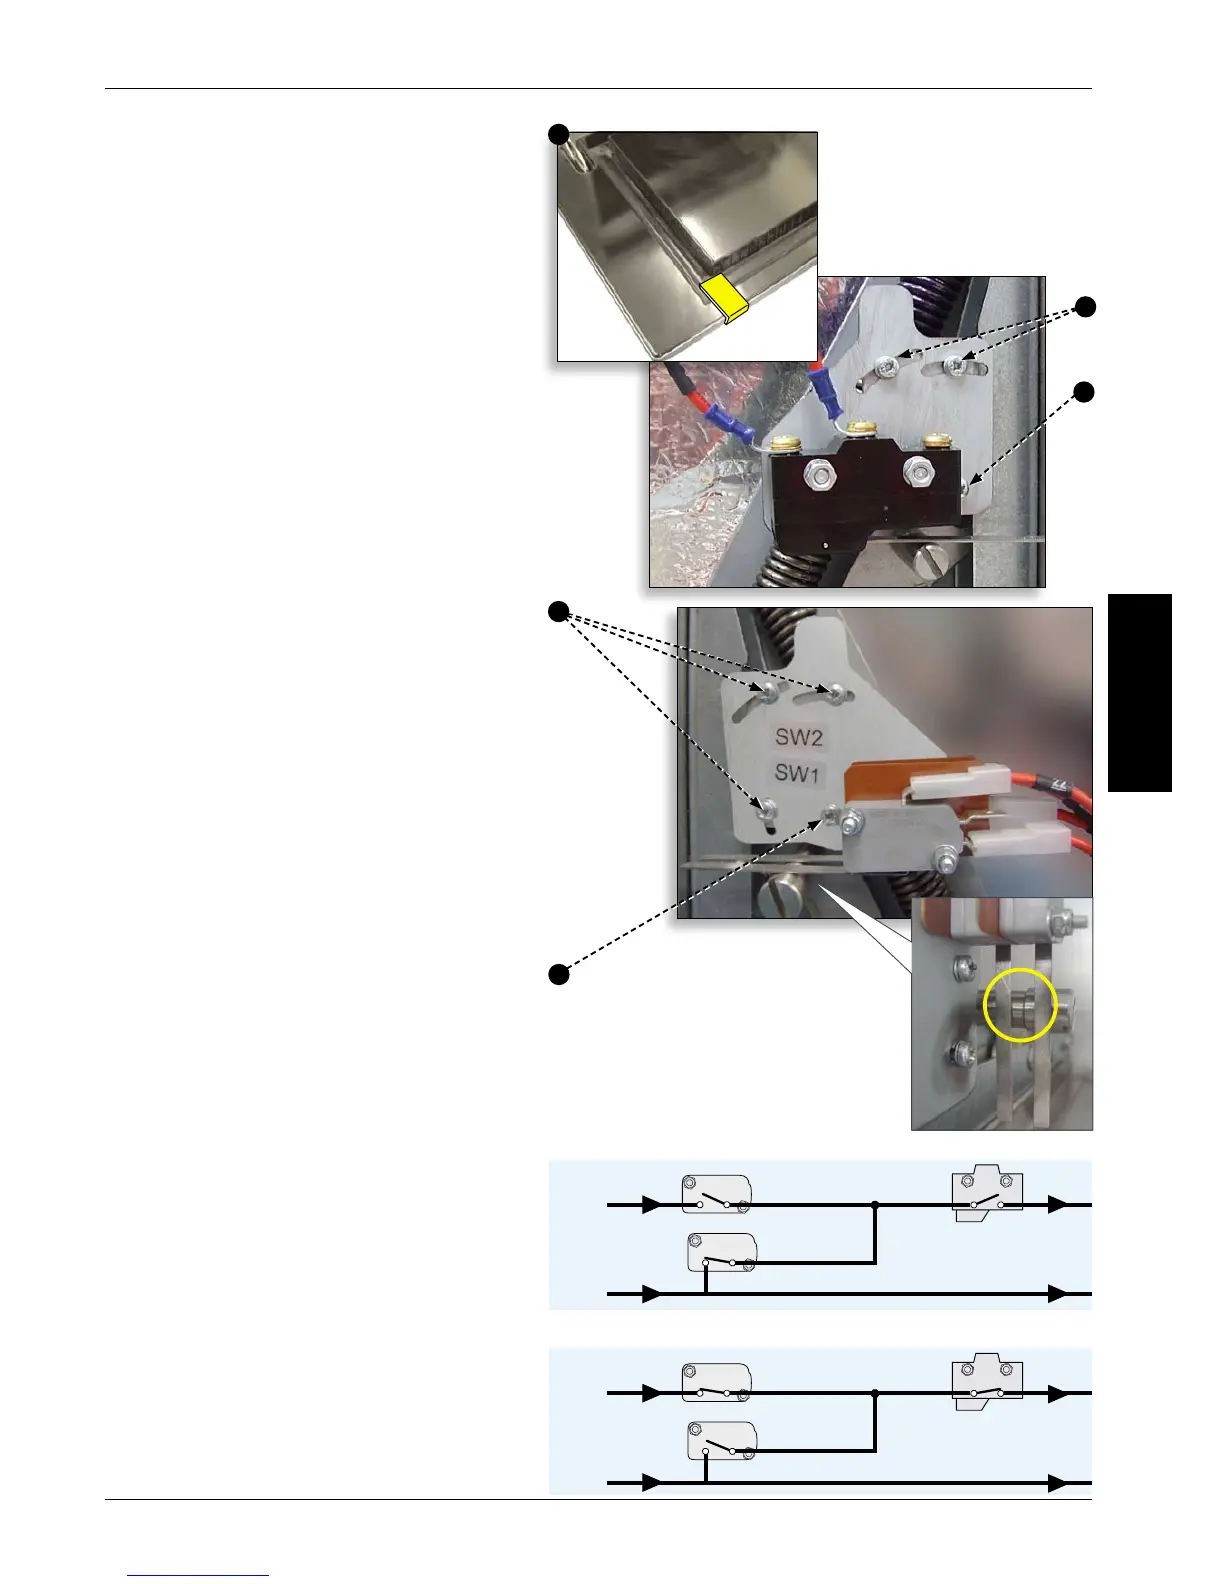
MAINS VOLTAGE COMPONENTS18
Door Interlock Adjustment18.1
Located on the door hinges are 3 safety interlock
microswitches, to prevent microwave emissions
escaping when the oven door is opened:
The Primary (SW3) breaks the electrical supply
circuit to the transformers.
The Secondary (SW2) breaks the microwave circuit if
the primary fails.
The Monitor switch (SW1) will short out the
Microwave circuit blowing the fuse if both Primary
and Secondary interlocks fail.
IMPORTANT: in the event that the Monitor
switch causes the Microwave circuit fuse to
blow, the Secondary (SW2) and Monitor (SW1)
microswitches must be replaced due to exposure
from high short-circuit currents.
The purpose of the following adjustment procedure
is to set the interlock to switch o the Microwave
circuit when the door is opened more than 4mm
and for the Microwave circuit to operate when the
door is closed and the door seal expands.
Door Interlock Adjustment procedure:18.1.1
Disconnect and isolate the oven from the 18.1.2
electricity supply.
Allow the oven to cool down.18.1.3
Remove the oven casing.18.1.4
Ensure that the High Voltage Capacitor is 18.1.5
discharged before commencing work.
Position red 2mm spacers over the top corners
1
of the door seal and carefully close the door
ensuring the spacer is still in position.
Slacken the pivot screw.
2
Release the adjusting screws and move the 3
backplate until microswitch SW3 just activates
then secure all screws.
Open door to replace the red 2mm spacers with
4
green 4mm spacers and close the door.
Slacken the pivot screw.
5
Release the adjusting screws and move the 6
backplate until microswitch SW2 just activates
then secure all screws.
Remove the spacers, then open and close the
7
oven door 5-10 times.
IMPORTANT: CHECK THE SWITCHES OPERATE IN
THE FOLLOWING SEQUENCE AS MICROSWITCH SW3
MUST SWITCH THE LOAD CURRENT.
Closing the door:
SW1 opens rst ●
SW2 closes second ●
SW3 closes third ●
Opening the door:
SW3 opens rst ●
SW2 opens second ●
SW1 closes third ●
OVEN DOOR OPEN
OVEN DOOR CLOSED