44
SERVICE
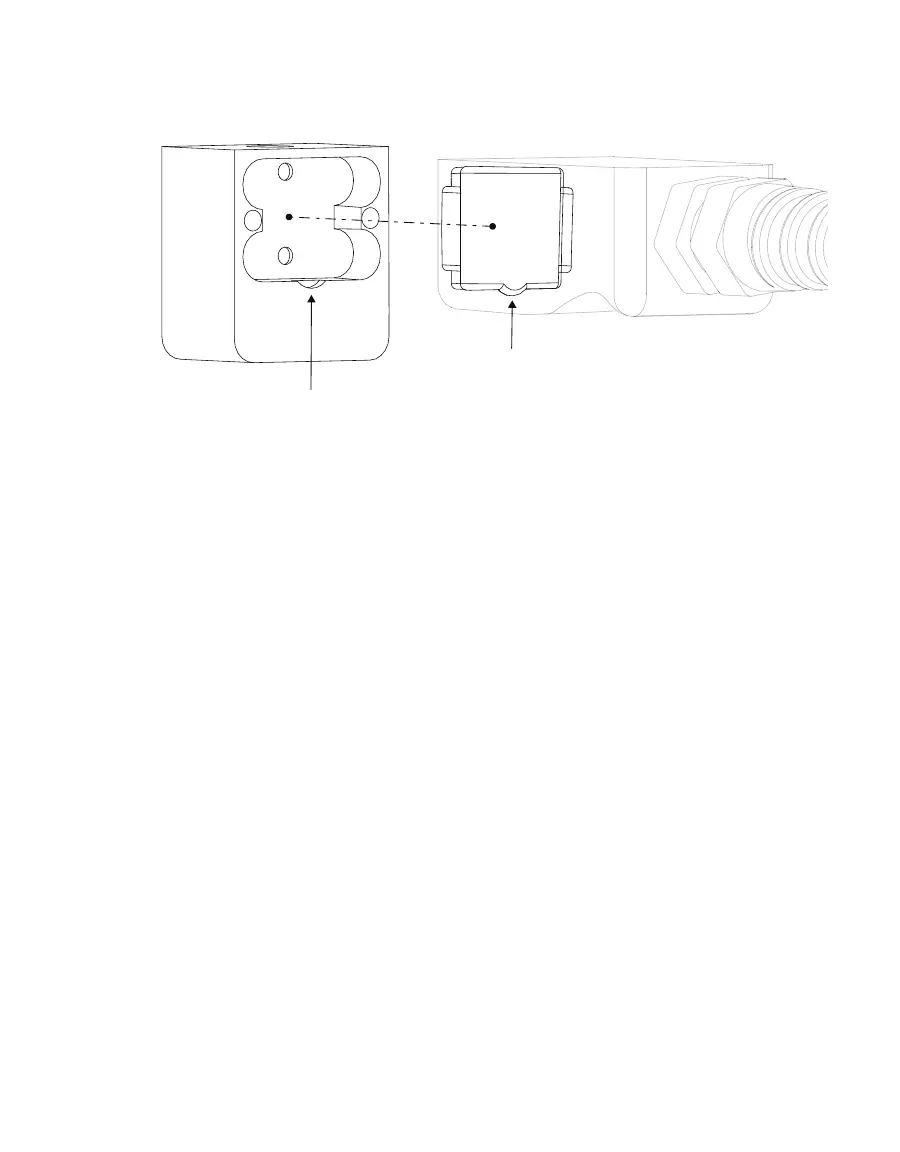
6. Align the half-circle tab on the lower edge of the black plastic sensor assembly with the
half-circle cutout on the aluminum block (Figure56).
Cutout in aluminum block
Tab on black sensor assembly
Figure56 Align tab and notch
7. Firmly press the aluminum block back onto the black plastic sensor assembly. Fully seat
the two pieces together to ensure a good seal.
8. Replace the machine screws and tighten until the aluminum block seats tightly to the
with plastic leaf clip.
DO NOT OVERTIGHTEN. The machine screws are threading into plastic, and
overtightening will strip the plastic threads.
9. Follow step12 through step22 in the previous cleaning instructions to reassemble the
sensor head and calibrate.
4.2.3 REPLACE LEAF PADS
Leaf pads can fall off or become damaged. When the sensor head is cleaned, check the
condition of the pads. They should make full contact with the leaf. A spare set of pads is
included in the SC-1 kit. Contact Customer Support if more leaf pads are needed.
To replace a leaf pad, use the following steps.
1. Remove the old leaf pad from the leaf clip, using tweezers, if necessary.
2. Clean any residue, dirt, or soil particles from the sensor block with a slightly damp cloth.
3. Peel the adhesive paper off the back of the new leaf pad.
4. Carefully place the new leaf pad on the leaf clip and press firmly.