MI 3201 TeraOhm 5 kV Plus Measurements
29
Measurement procedure:
- Select DIAGNOSTIC TEST function in MAIN MENU.
- Connect the test leads to the instrument and to the measured object.
- Press the START/STOP key to start the measurement.
- Wait until set timer runs out, the result is displayed.
- Wait until the object under test has discharged
- The result can optionally be saved by pressing the MEM key twice, see the chapter
6.1. Store, Recall and Clear Operation.
Legend of displayed symbols:
Fil0 (Fil1, Fil2, Fil3)
Filter type enabled, see the chapter 5.3.
Configuration
5000V
Set test voltage – step 25 V
U=5295
Actual test voltage – measured value
I=55.6nA
Actual test current – measured value
10.5G
Insulation Resistance – result
C=2.1nf
Capacitance of measured object
Tr:00min 15s
Set timer value
Bar
Analogue representation of Riso result
R15sec=10.6G
Resistance value measured after set time 1
R01min=10.5G
Resistance value measured after set time 2
R10min=10.5G
Resistance value measured after set time 3
DAR=1.67
DAR as ratio of R1min / R15s
PI=1.21
PI as ratio of R03/R02
DD=__
DD result
Notes:
- A high-voltage warning symbol appears on the display during the measurement to
warn the operator of a potentially dangerous test voltage.
- The value of the capacitance is measured during the final discharge of the test
object.
- If enabled, the instrument measures Dielectric Discharge (DD) when the capacitance
is in the range of 5 nF to 50 F.
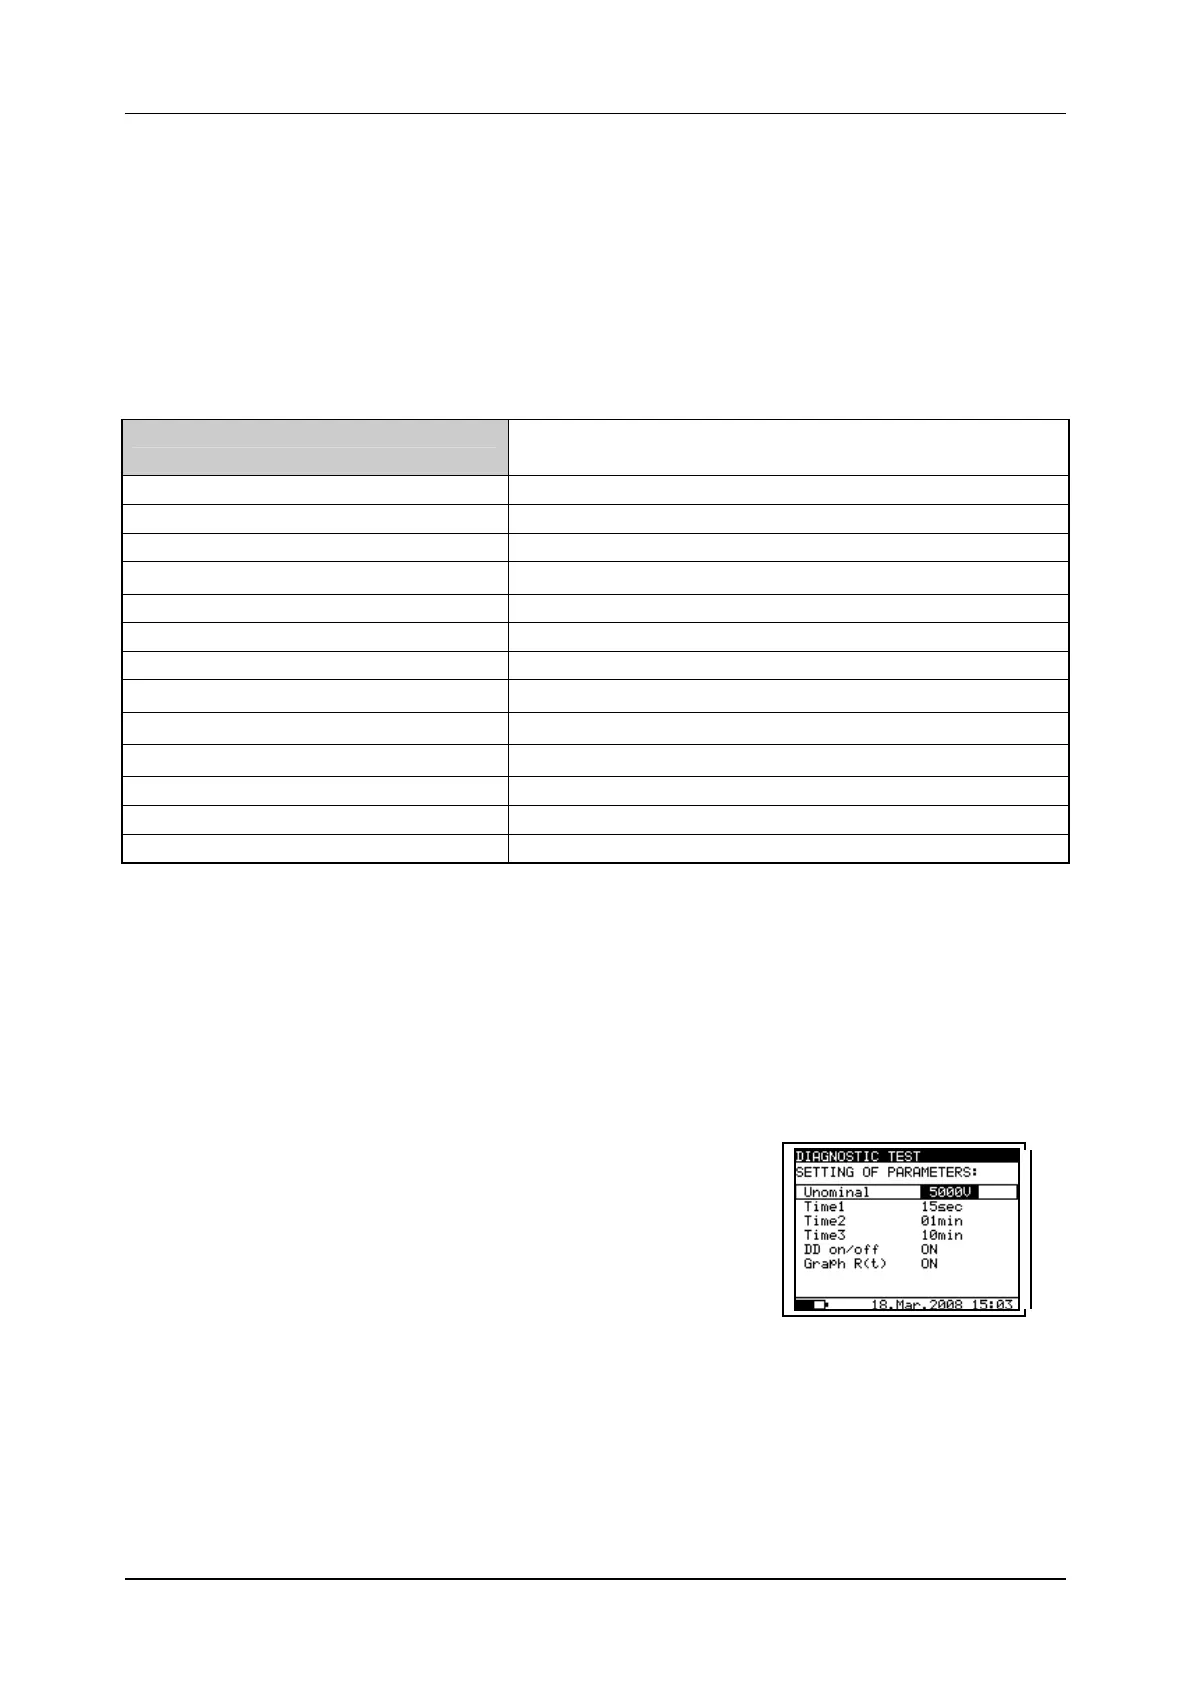
Setting-up parameters of the Diagnostic Test:
- Press the SELECT key, (the Set-up menu appears
on display, see the Fig. 18).
- Select the parameter to be set using the and
keys;
- Adjust the parameter using the and keys.
- Complete the set-up adjustments by pressing either
the ESC key or START key (to run the measurement
directly). The settings displayed last are stored.
Fig. 18. Set-up menu in
Diagnostic Test