1-14 Micron Electronics, Inc.
Micron ClientPro 766Xi/Xe User’s Guide
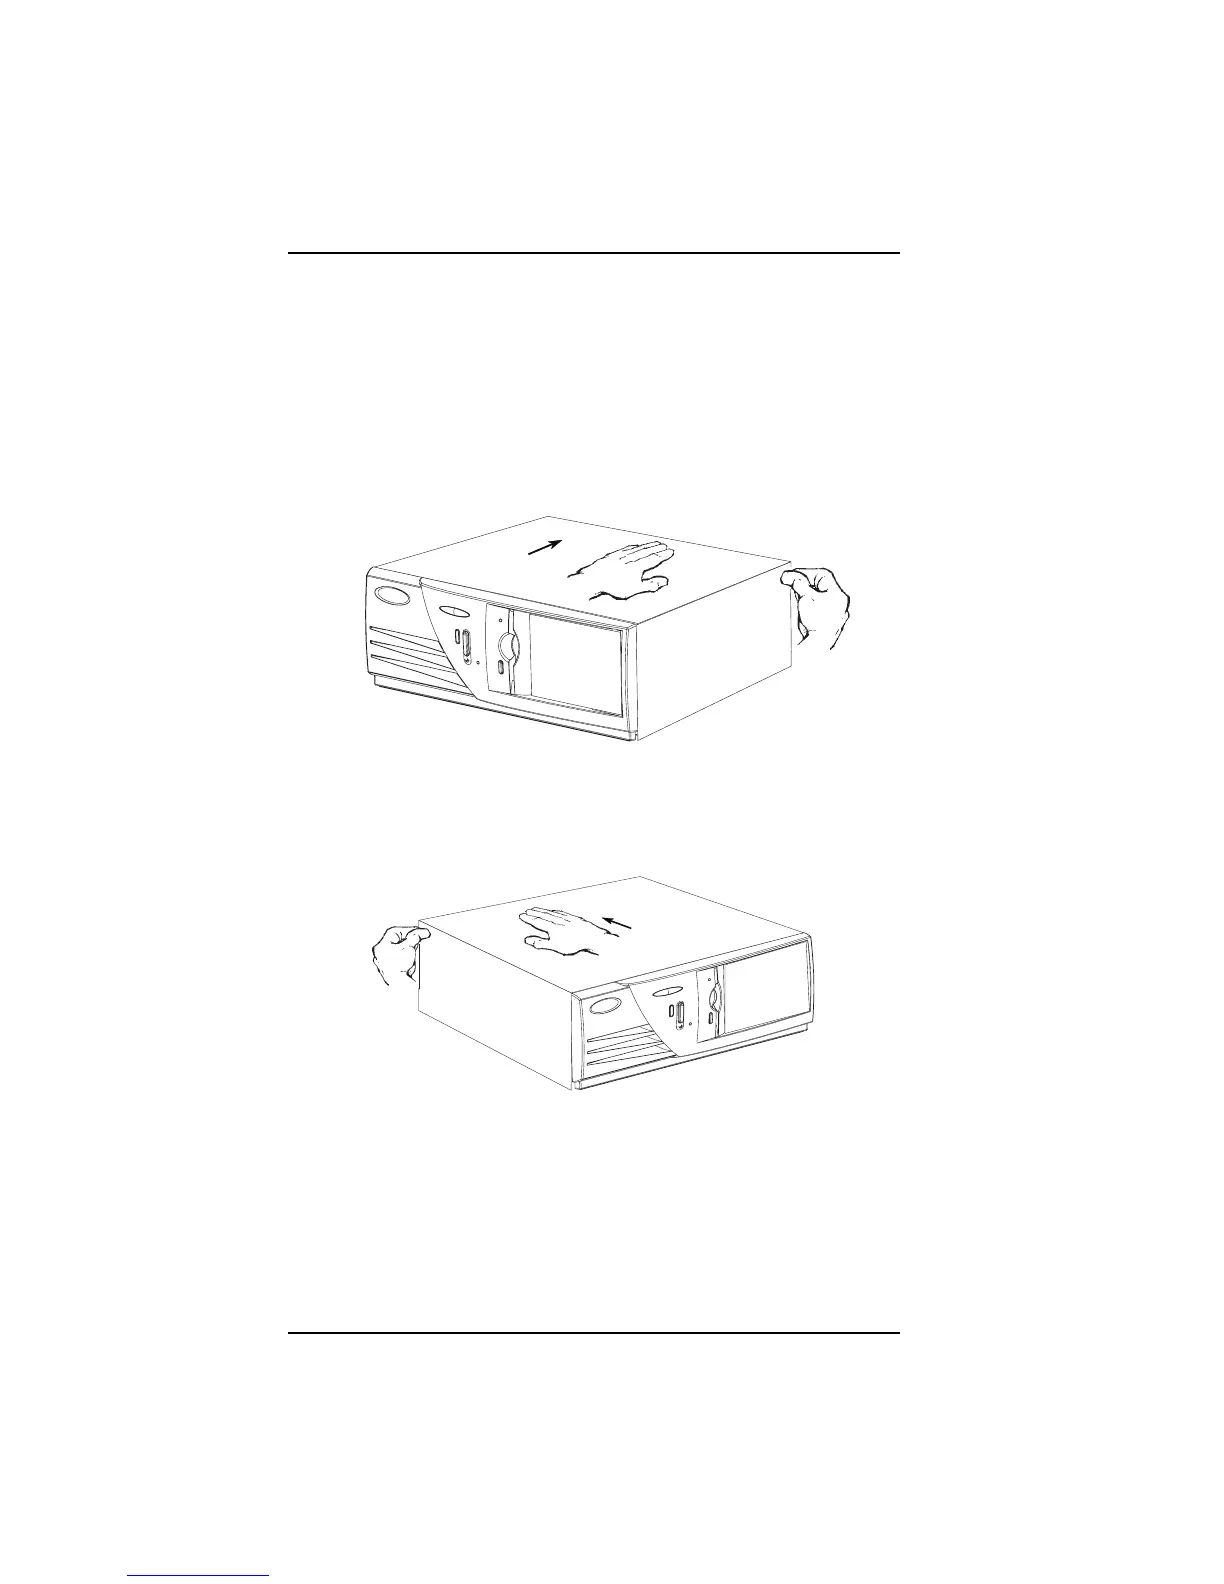
Removing the System Cover
Desktop Case
Refer to the figures below. No tools are required. It is not necessary to disconnect
the cable connectors on the back of the computer before opening the cover.
However, note where the cables connect to the back for future reference. (If
you have a video camera, a quick scan of the rear case is helpful).
2. Next, use your left thumb to press in on the left rear release tab. At the same
time, place your right hand on the left rear corner of the lid. Push down and
rearward, about ¾ of an inch, AS SHOWN ABOVE.
3. Grasp the two rear corners of the lid and lift it straight up.
1. Remove the thumb screw located in the top rear center of the lid. While
standing in front of the computer, use your right thumb to press in on the
right rear release tab. At the same, time place your left hand on the right
rear corner of the lid. Push down and rearward about ¾ of an inch, AS
SHOWN ABOVE.
To replace the cover, gently lower the top latching hooks into the top chassis
channels before pushing the rear of the cover into place. When the cover is
pushed forward, the flexible release tabs will lock into place and the thumb
screw can be fully tightened.