Preva Installation/Service Manual, 00-02-1577, Revision E01
99
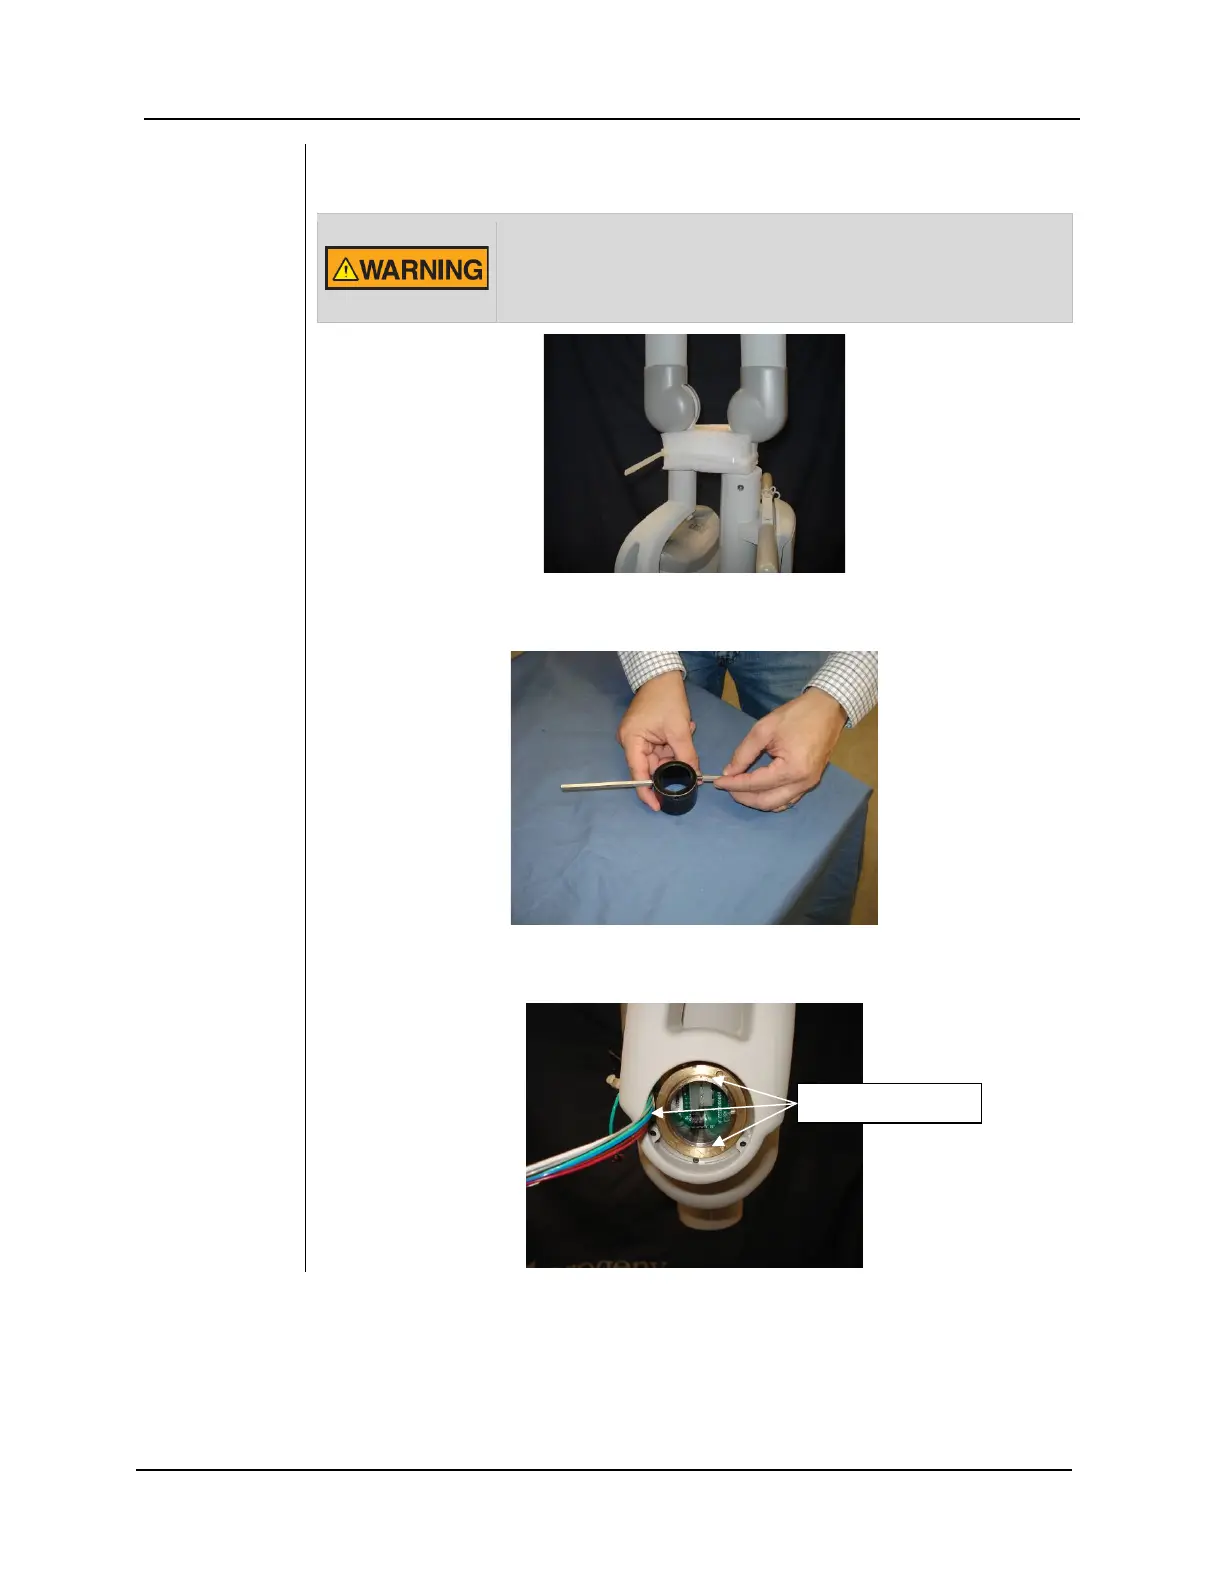
Figure 79
12. Secure the scissor arm with the provided cable tie and foam separator
before removing both spanner rings.
Do not remove the tubehead until this step has been
completed. The spring tension is adjusted to include its weight
so the articulating arm will spring open and can cause serious
injury if it is not secured.
Figure 80
13. Assemble the spanner wrench by threading the two leverage arms into
the base of the spanner wrench.
Figure 81
14. Align the three pins on the spanner tool with the alignment holes in the
brass spanner nut.