Preva Installation/Service Manual, 00-02-1577, Revision E01
34
Installing the Horizontal Arm and Brake Assembly
Horizontal Arm
and Brake
Assembly
1. Locate the Horizontal Arm in the top level of the shipping carton.
2. Remove the Horizontal Arm from the shipping carton. Do not remove the
cardboard tube around the wires but remove the red tag. Insert the
cardboard tube snugly into the shaft of the Horizontal Arm.
Note:
Do not lubricate the shaft of the Horizontal Arm or bearings in Control
Unit.
3. Insert the cardboard tube enclosing the wires into the opening in the top of
the Control Unit.
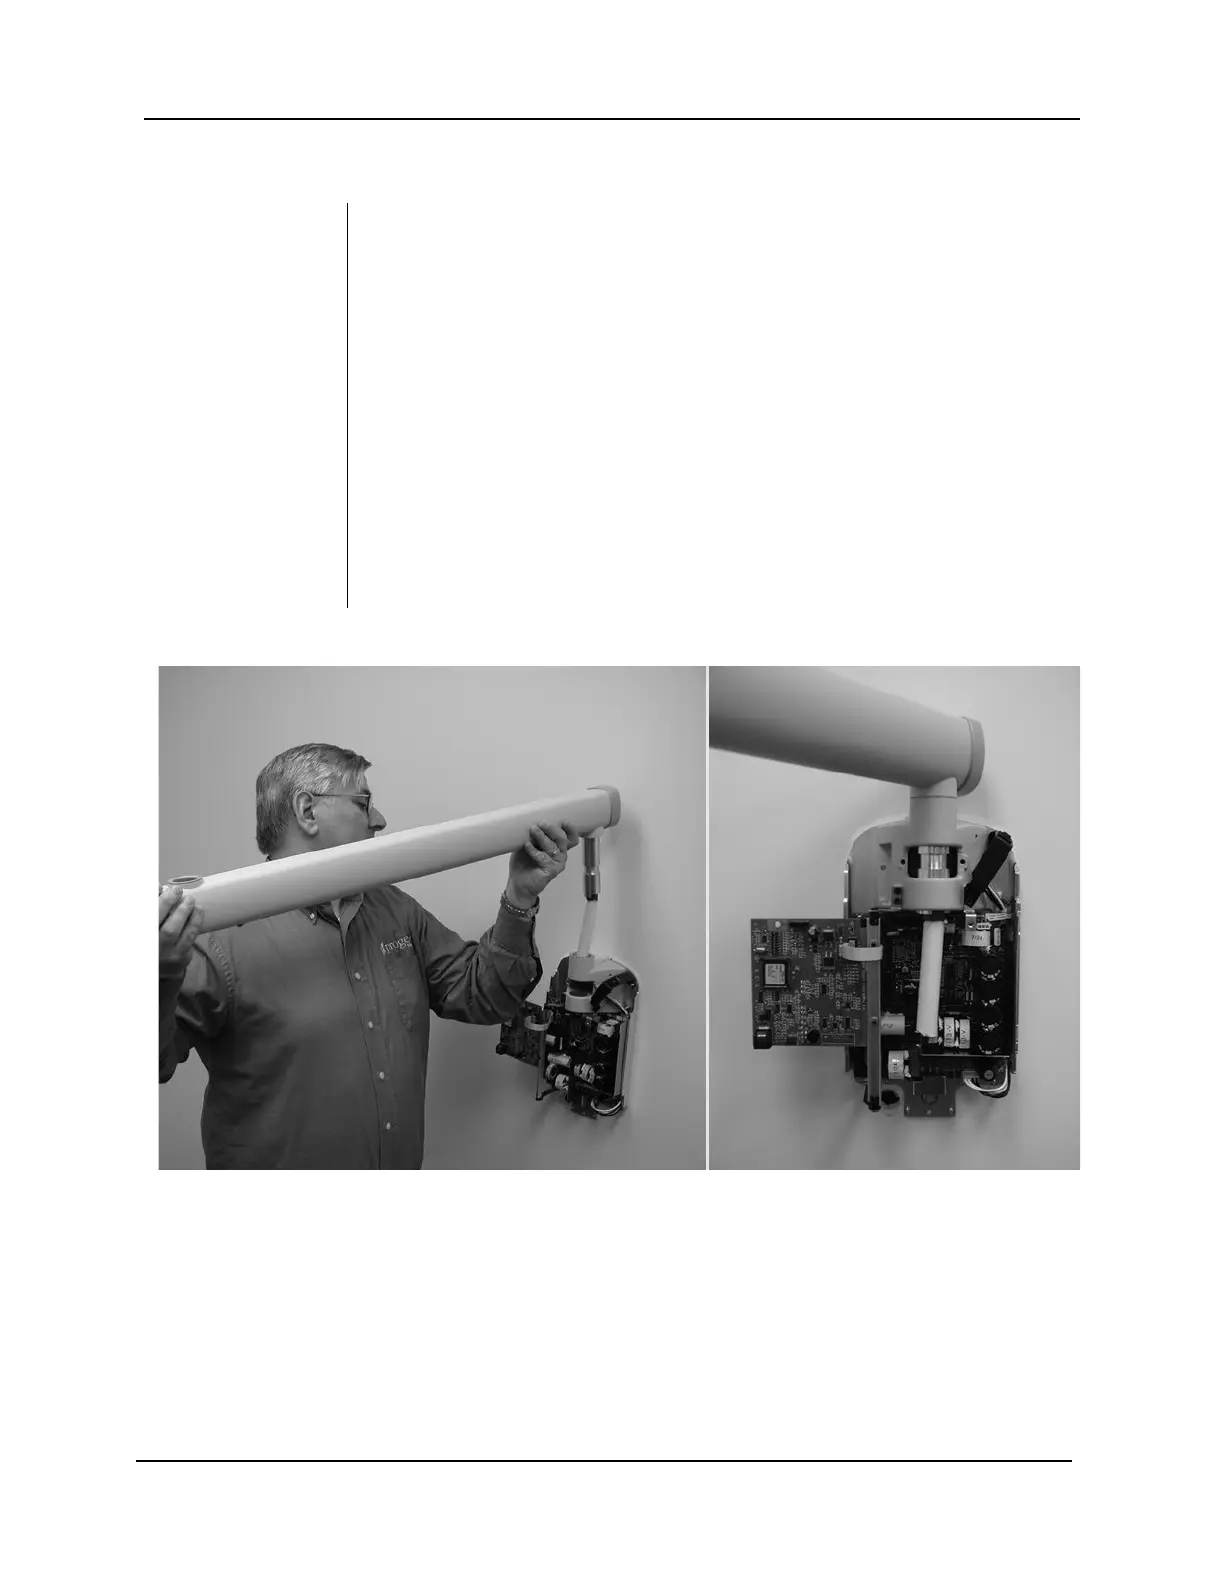
4. Insert the Horizontal Arm completely into the Control Unit, as shown in
Figure 18. Ensure that the Horizontal Arm is firmly seated in place.
5. Remove the cardboard tube to free the wires. Discard the cardboard tube.
Note: Do not make the wire connections at this time.
6. Locate the brake assembly 30-A2024 in the kit pack (30-A2049 or 30-
A2156). As shown in Figure 19, install and loosely tighten the brake
assembly in order to put a small amount of drag on the rotation of the
Horizontal Arm and to keep the Horizontal Arm from lifting out.
Figure 18 Installing the Horizontal Arm