Midtronics Inc. 7000 Monroe Street Willowbrook, IL 60527
www.midtronics.com
8
Chapter 1: Introduction DSS-5000 HD
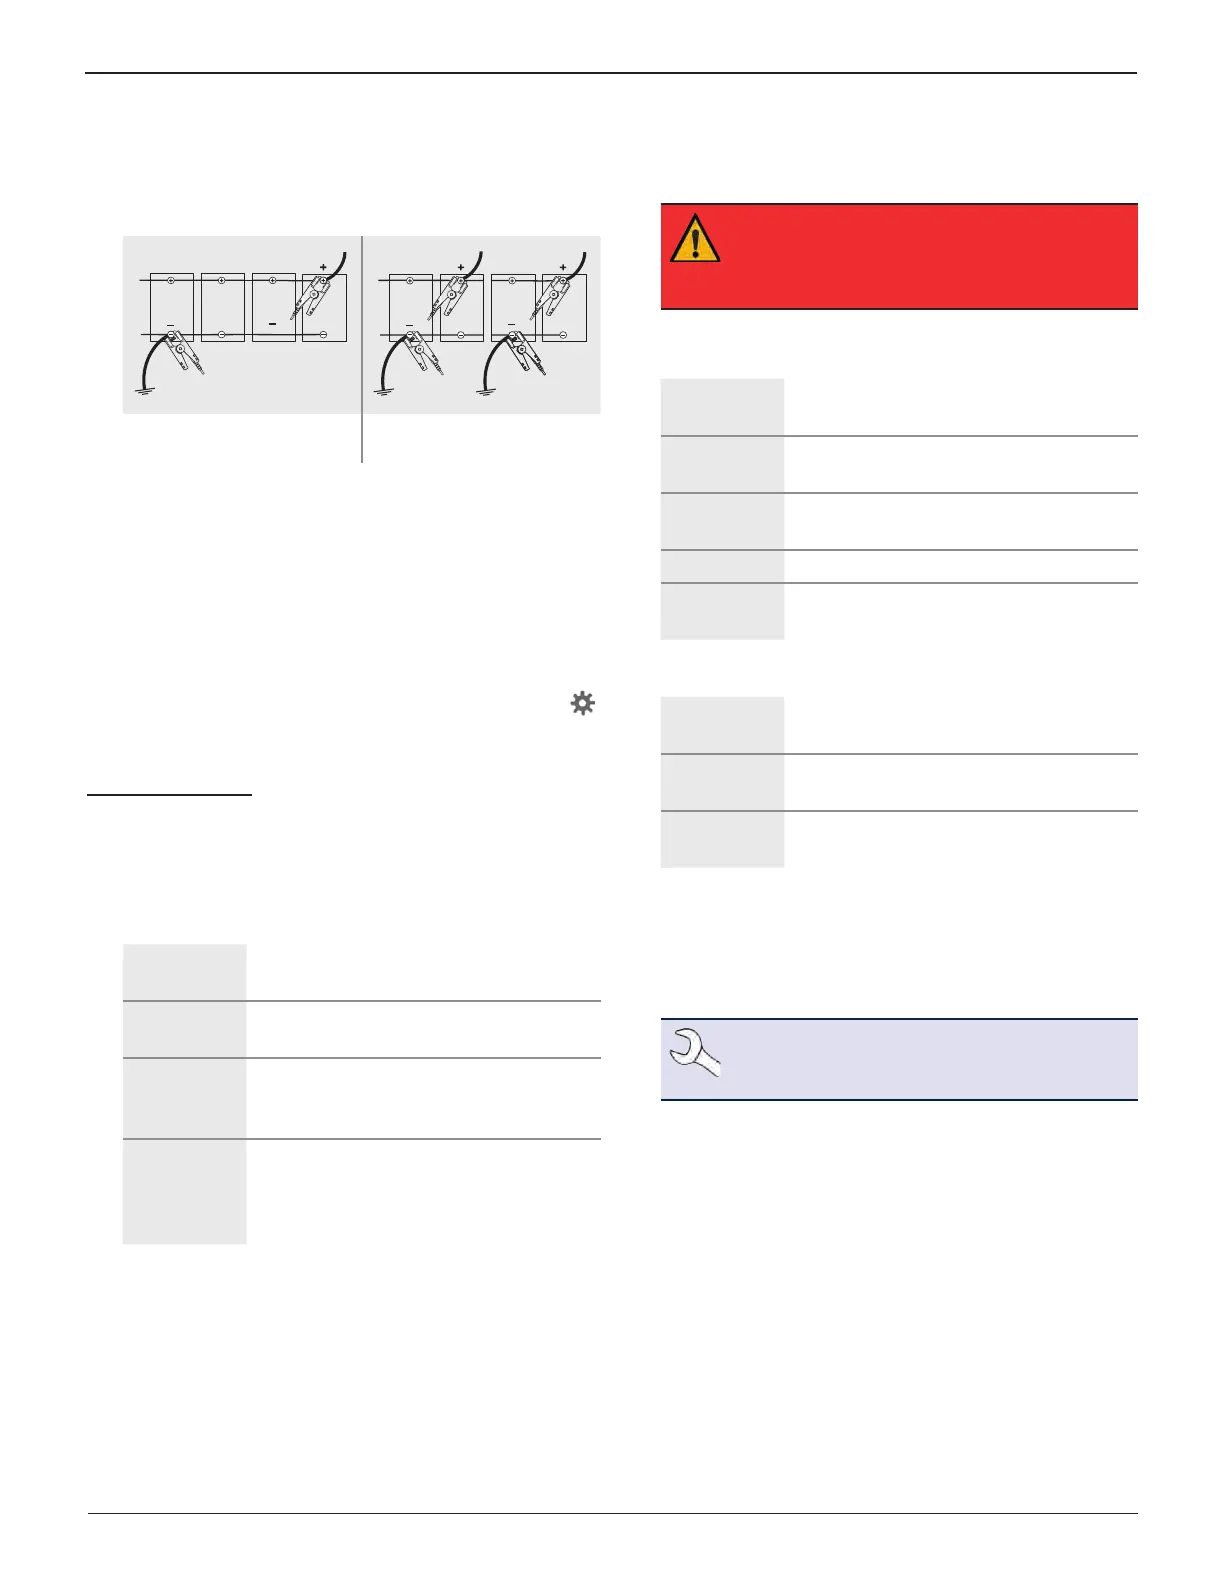
By design, most trucks with four batteries will have two
paths for starting current directly to the starter motor to
minimize voltage loss. Even though they are parallel, both
cable paths need to be tested independently – the results
should almost match.
Ground
Standard 12v Parallel Pack
(Common)
Single Pack
(Uncommon)
Connecting An Accessory Cable
Optional accessories such as an Amp Clamp or DMM clamps
plug into the connector on the top of the Tester Pod. Rotate
clockwise to lock the connector and counterclockwise to
unlock.
Setting User Preferences
Before starting your test you may want to customize the use
of your analyzer by setting preferences in the Settings ( )
Menu. The Settings Menu is described in Chapter 11.
Initial Power Up
1. Fully charge the Controller before use.
2. Press and hold the Power button to turn Controller on.
3. Upon initial power-up, the Language Settings screen is
displayed. Tap Next to continue.
System
Language
Select the Controller default language
displayed on the screen.
Test Result
Language
Select the Controller default language
for all displayed tests and test results.
Email
Language
Select the default standard language
for the analyzer to use for all tests and
results sent via email.
Print
Language
Select the default standard language
for the analyzer to use for all tests and
results printed using a networked
printer.
4. A Consent to collect data screen is displayed. Tap the Con-
sent check box and then tap Next to continue.
5. Using the displayed keypad template, enter the new user
name and password.
6. Tap Next to continue.
IMPORTANT: By default, the rst user created
is assigned Administrator rights. Tap Add User
to add additional users. See Chapter 14: Settings
to change these defaults.
7. The Date/Time Settings are displayed. Tap Next to con-
tinue after making any adjustments.
Select Time
Format:
12-hour or 24-hour format
Select Date
Format:
DD/MM/YYYY, MM/DD/YYYY, or YYYY/
MM/DD
Select Time
Zone:
Time zone oset from Greenwich Mean
Time
Set Date: Set the current date
Set Time: Set the current time in the selected time
zone
8. The Test Settings are displayed. Tap Next to continue after
making any adjustments.
Battery
Rating
Default: CCA (Cold Cranking Amps)
Temperature
Units
Select Fahrenheit or Celsius
Decimal
Separator
Select decimal point or comma
9. A list of devices connected to the tester is displayed.
To add a device, tap the plus (+) sign and follow the
on-screen instructions. To unlink from a device, tap the
displayed serial number to select it. Tap the trash can icon
(
3
) to delete it.
NOTE: A passkey number is automatically gen-
erated once the Bluetooth pairing has been es-
tablished.
Tap the check box to require an Amp Clamp when
performing a System Test.