-37-
Fixation setting and holding position of DEC 200
Examination conditions
After the optical lens is attached to the control unit and setup is complete, the user can start
taking images. Approaches for taking the image of human eye fundus are as follows:
•
Have the examinee stay in <5 lux dark room; in such an environment, a
newspaper is nearly impossible to see. Remove the patient’s glasses or
contact lenses. Make sure that the eye’s pupil has a diameter larger than4
mm, or be sure to suĸciently dilate in advance.
•
Auto focus to inĮnity by pressing the OK button halfway down. Once the
preview image is clear, then the focus is right for eye screening.
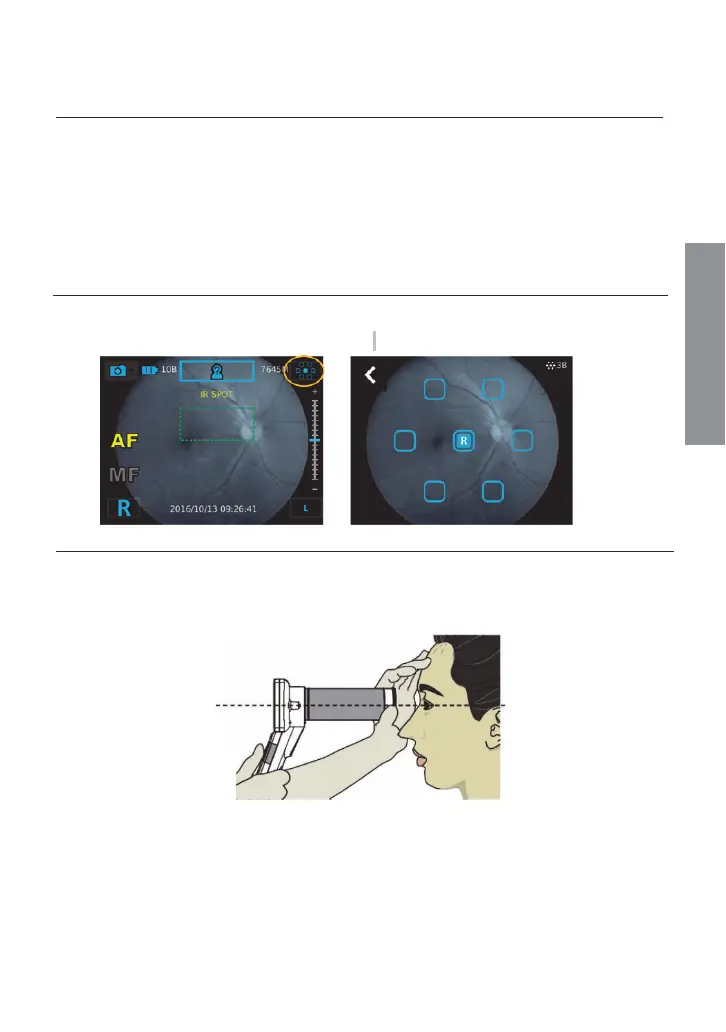
Fixation lamp
Choose Įxation LED position and ask the examinee to look at the Įxation LED. Adjust the
brightness of Įxation LEDs by using the brightness adjustment keys of the control unit. 5B is
the maximum brightness level in Įxation setting.
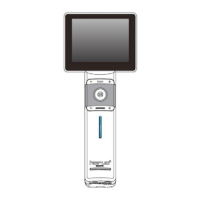
Holding position
Hold the control unit with one hand and use the other hand to hold the front side of the lens.
Maintain the lens at the same height of the eye being examined. To stabilize the lens, rest the
lens on the part of the hand between the thumb and index Įnger and put your middle and
index Įngers on the examinee’s forehead, as showed in the following image.
View the examined eye keeping the lens horizontal to the examined eye. Then move forward
slowly until you can see the optic disk in the controller screen. (For sanitary reasons, make
sure the controller lens does not touch the patient’s eyes or nose.)
Taking pictures