-31-
Taking pictures
Sequence of operations
A. DEC 200
Step 1: Turn on the power
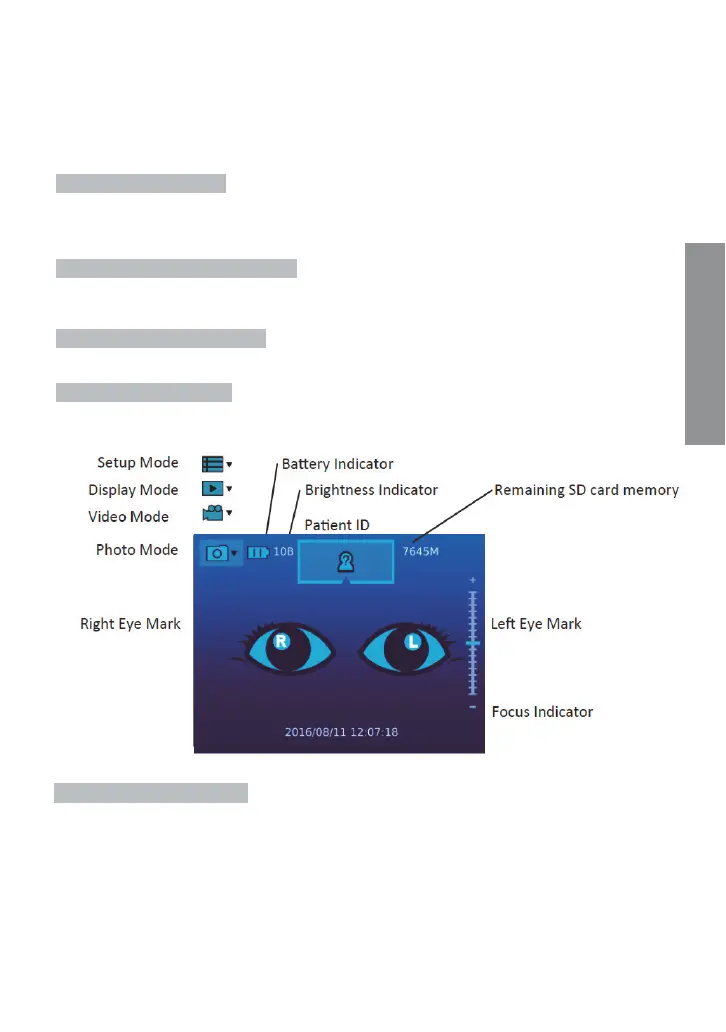
Press the power button to turn on the control unit. Approximately one to two seconds later,
the boot screen will appear on the LCD panel. After about 15 seconds, the information icons
will appear on the top of the LCD panel.
Step 2: Make sure SD card is inserted
Once the SD card has been inserted, the user can start to take photographs in any shooting
mode, either photo or video mode.
Step 3: Choose a shooting mode
Tap the photo or the video mode icon to enter a shooting mode.
Step 4: Mark left /right eye
By doing so, the user can tell whether a photo/video is left eye or right eye of examinee record
from its Įle name.
Step 5: Trigger Auto Shooting
There is a green frame on screen which acts as ”IR spot indicator”.
Taking pictures


 To Next Page