OM-281138 Page 19
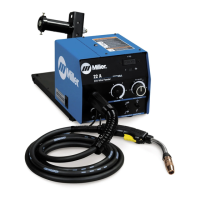
5-9. Installing And Threading Welding Wire
Tools Needed:
1 Retaining Ring
2 Hub Tension Adjustment Nut
If necessary, move hub on support
for use of different size wire spool.
Remove retaining ring, and install
spool so hub pin fits spool hole.
Reinstall retaining ring.
Adjust tension nut so wire is taut
when wire feed stops.
3 Pressure Assembly
Adjustment Knob
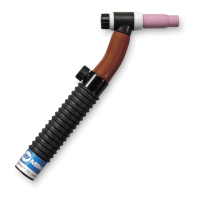
Lay gun cable out straight.
A Open pressure assembly,
hold wire tightly, and cut off
end. Push wire through guides
into gun.
B Close and tighten pressure
assembly. Press JOG button
until wire comes out gun.
C To adjust drive roll pressure,
press gun trigger to feed wire
against wood surface. Tighten
knob so wire does not slip.
Cut off wire. Close door.
Ref. 802 356 / S-0627-A
WOOD
Tighten
1
2
3
15/16 in
A
C
B

 Loading...