16 - 40 Operator’s Manual
16 Probes and Biopsy
b. Select a proper needle-guided bracket, and match the locating groove with the tab of the
probe. Mount the bracket onto the probe.
c. Tighten the pinch nut of the needle-guided bracket to confirm that the needle-guided
bracket is properly installed on the probe.
2. Adjust the needle angle to the proper shift as required:
a. Loosen the angle pinch nut.
b. Adjust the angle block to the desired level.
c. Tighten the angle pinch nut.
3. Insert the biopsy needle:
a. Adjust the dial scale to the required needle type shift.
b. Pull the lock pin and close the V-shaped cover to fix the lock pin in the groove of the
needle type adjusting base, so as to install the needle into the guiding hole.
4. Release the needle from the bracket:
a. Pull the lock pin out until the V-shaped cover can be turned and opened up.
b. Turn over the V-shaped cover to expose the needle. Remove the probe and bracket.
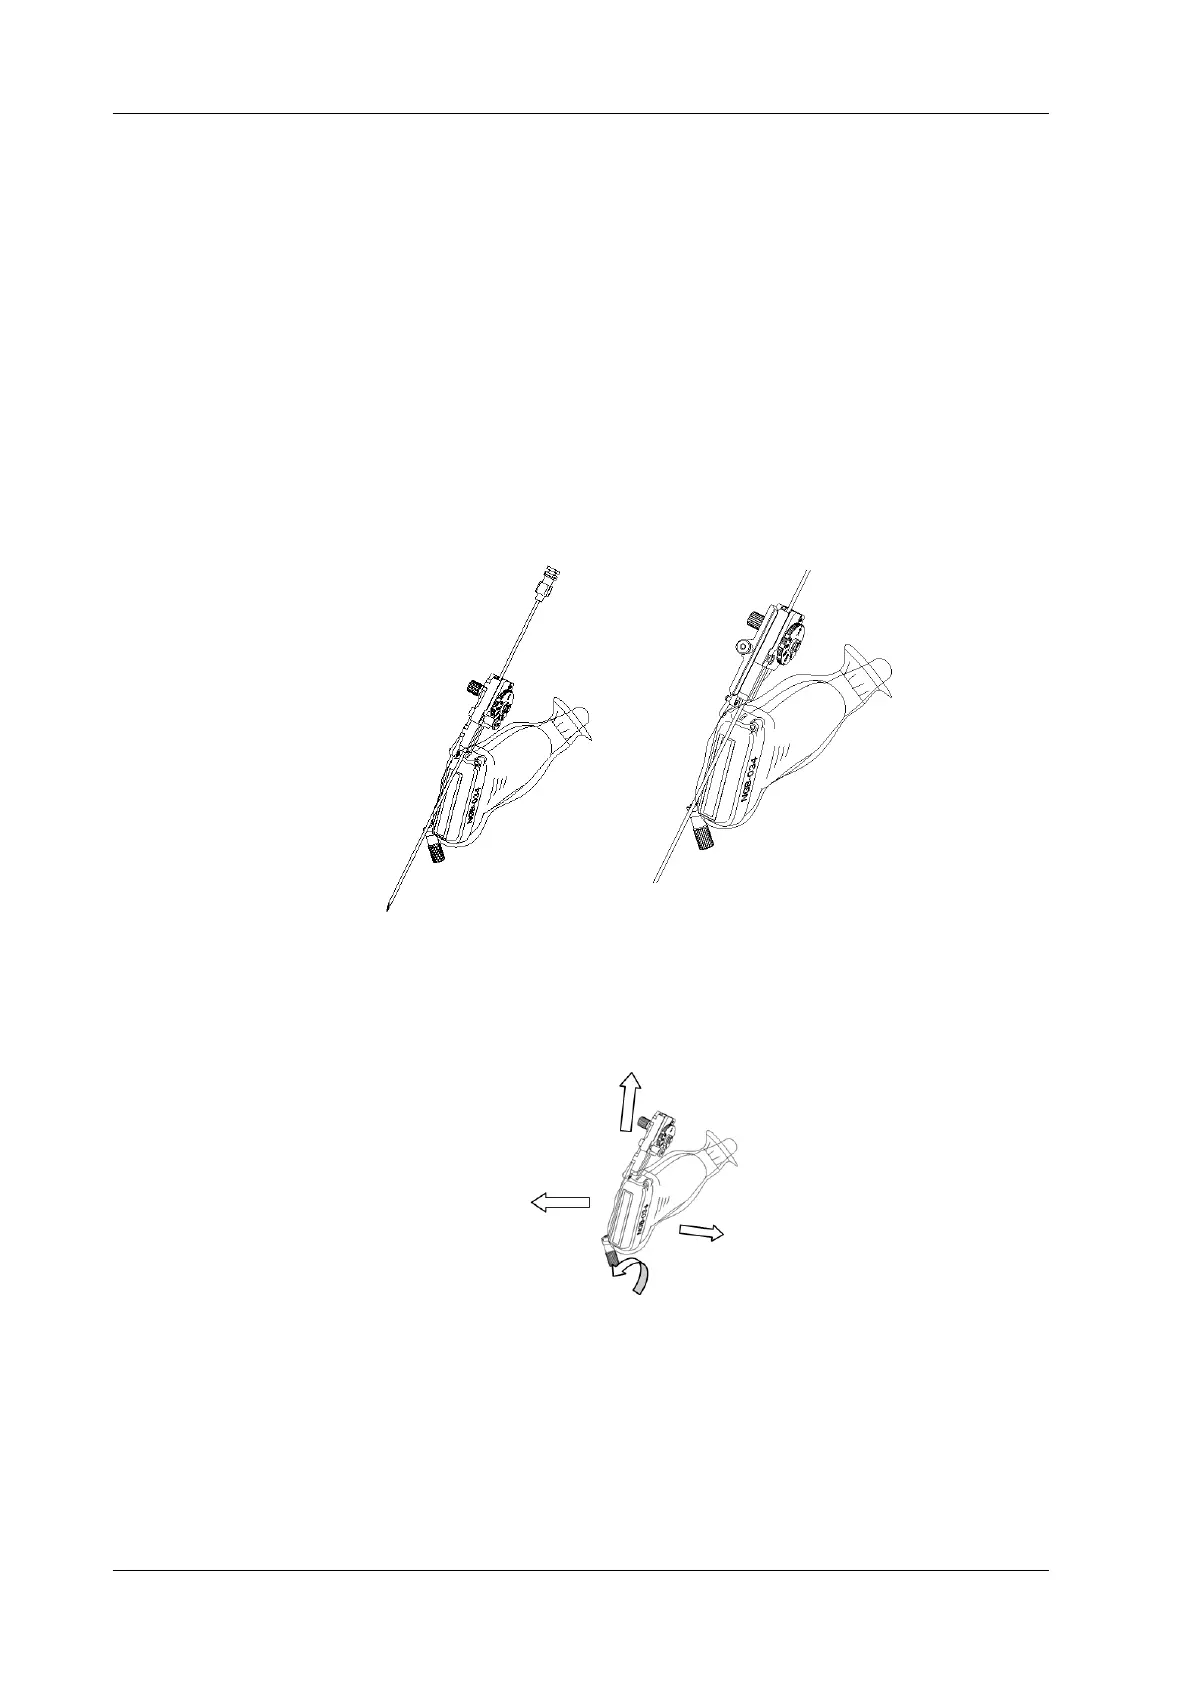
5. Remove the needle-guided bracket:
a. Unscrew the pinch nut to release the needle-guided bracket.
b. Hold the probe and take out the bracket.
 Loading...


