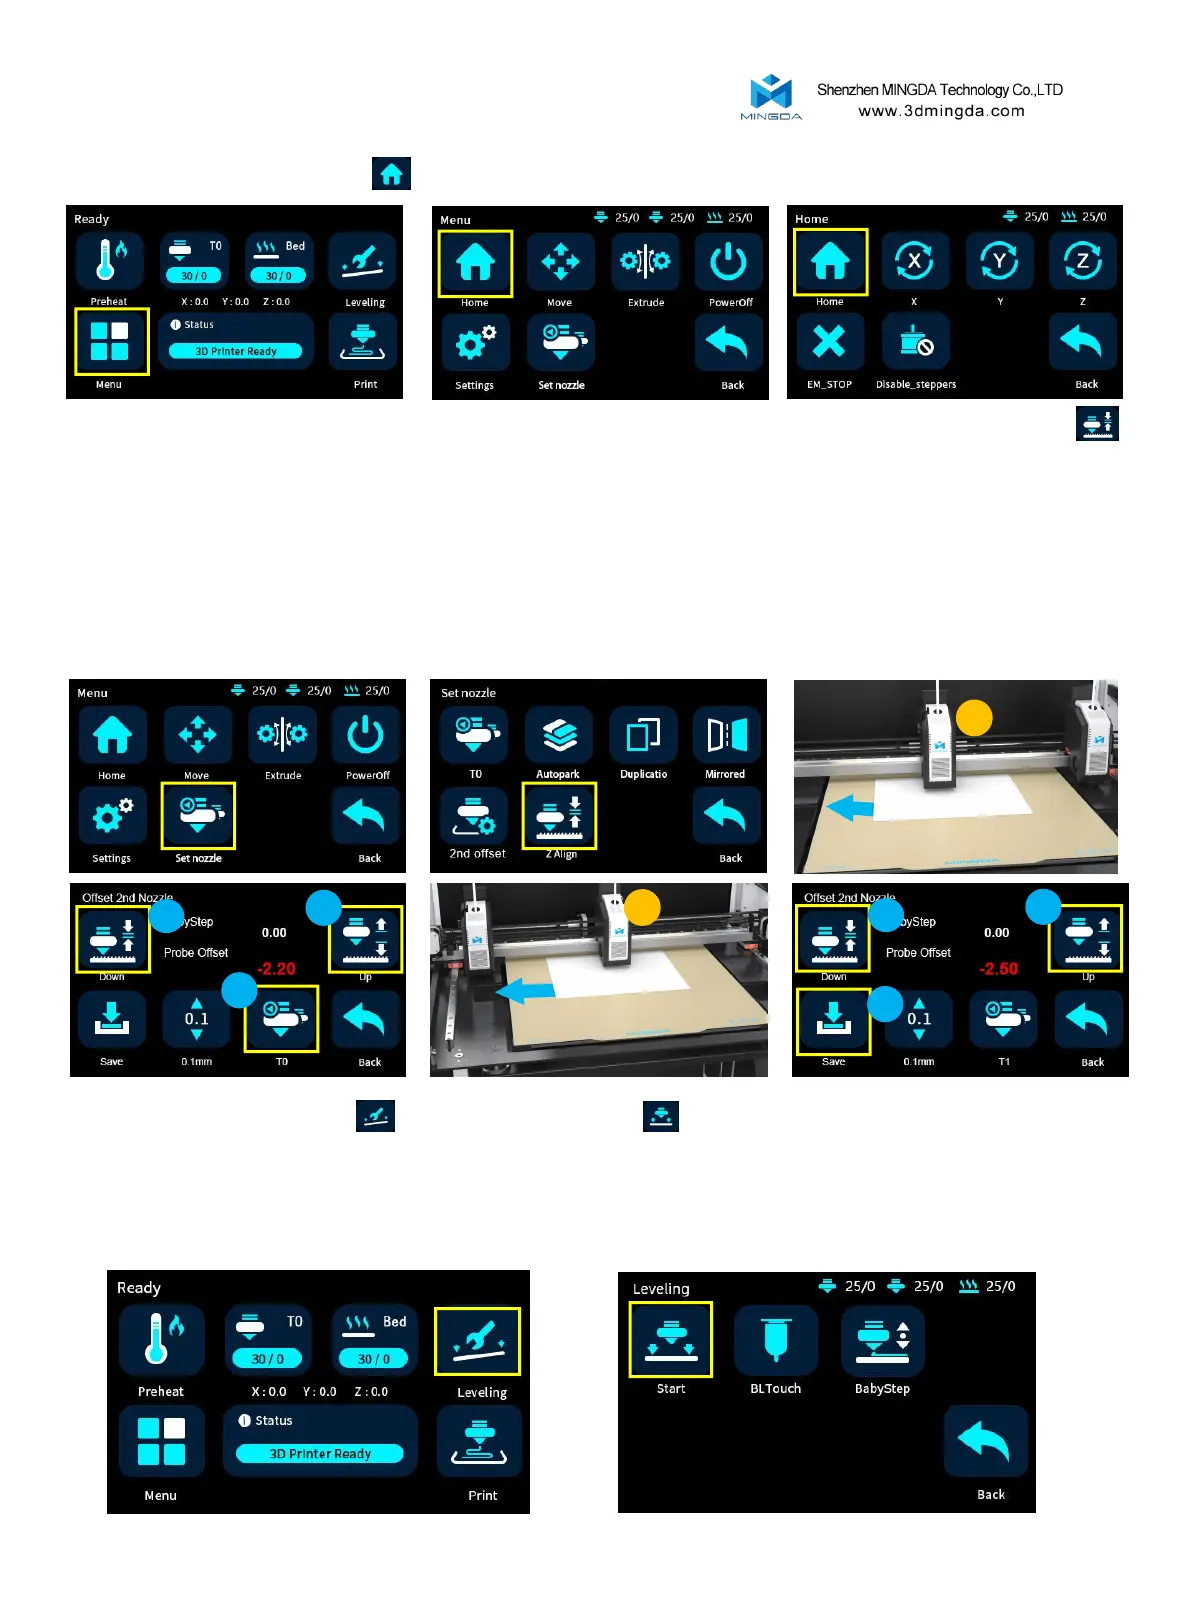
4.Click the leveling button , then click the start button to initiate the automatic leveling process. The left
print head will begin to move and perform the automatic leveling procedure.
[Note: Please do not insert your hand into the printer enclosure during the leveling process to avoid any potential
injuries or accidents.]
11
3. Adjust the Z-offset by ZAlign.
First click Menu-Home-Home and wait for the machine to reset.
Click the T0 button on the screen to switch the T1 extruder (the right extruder), and the right extruder will
move to the middle position. Adjust the Z-offset to an appropriate distance in the same way.
Click the Save button to save the settings.
Then take a piece of A4 paper and put it between the nozzle and the hot bed, and click Menu-Set Nozzle-Z Align
on the screen. The default calibration is T0 extruder (left extruder) extruder heat bed starts to move until it stops.
Move the A4 paper by hand, and adjust the Down and Up keys on the screen until the nozzle can scrape the A4 paper.
Calibration of the left extruder is complete.
T1
T0
1
1
2
1
1
2