40
TONE CURVES
SETTING THE WHITE AND BLACK POINTS
Properly setting an image’s white and black points will usually correct the color cast and midtone distribution.
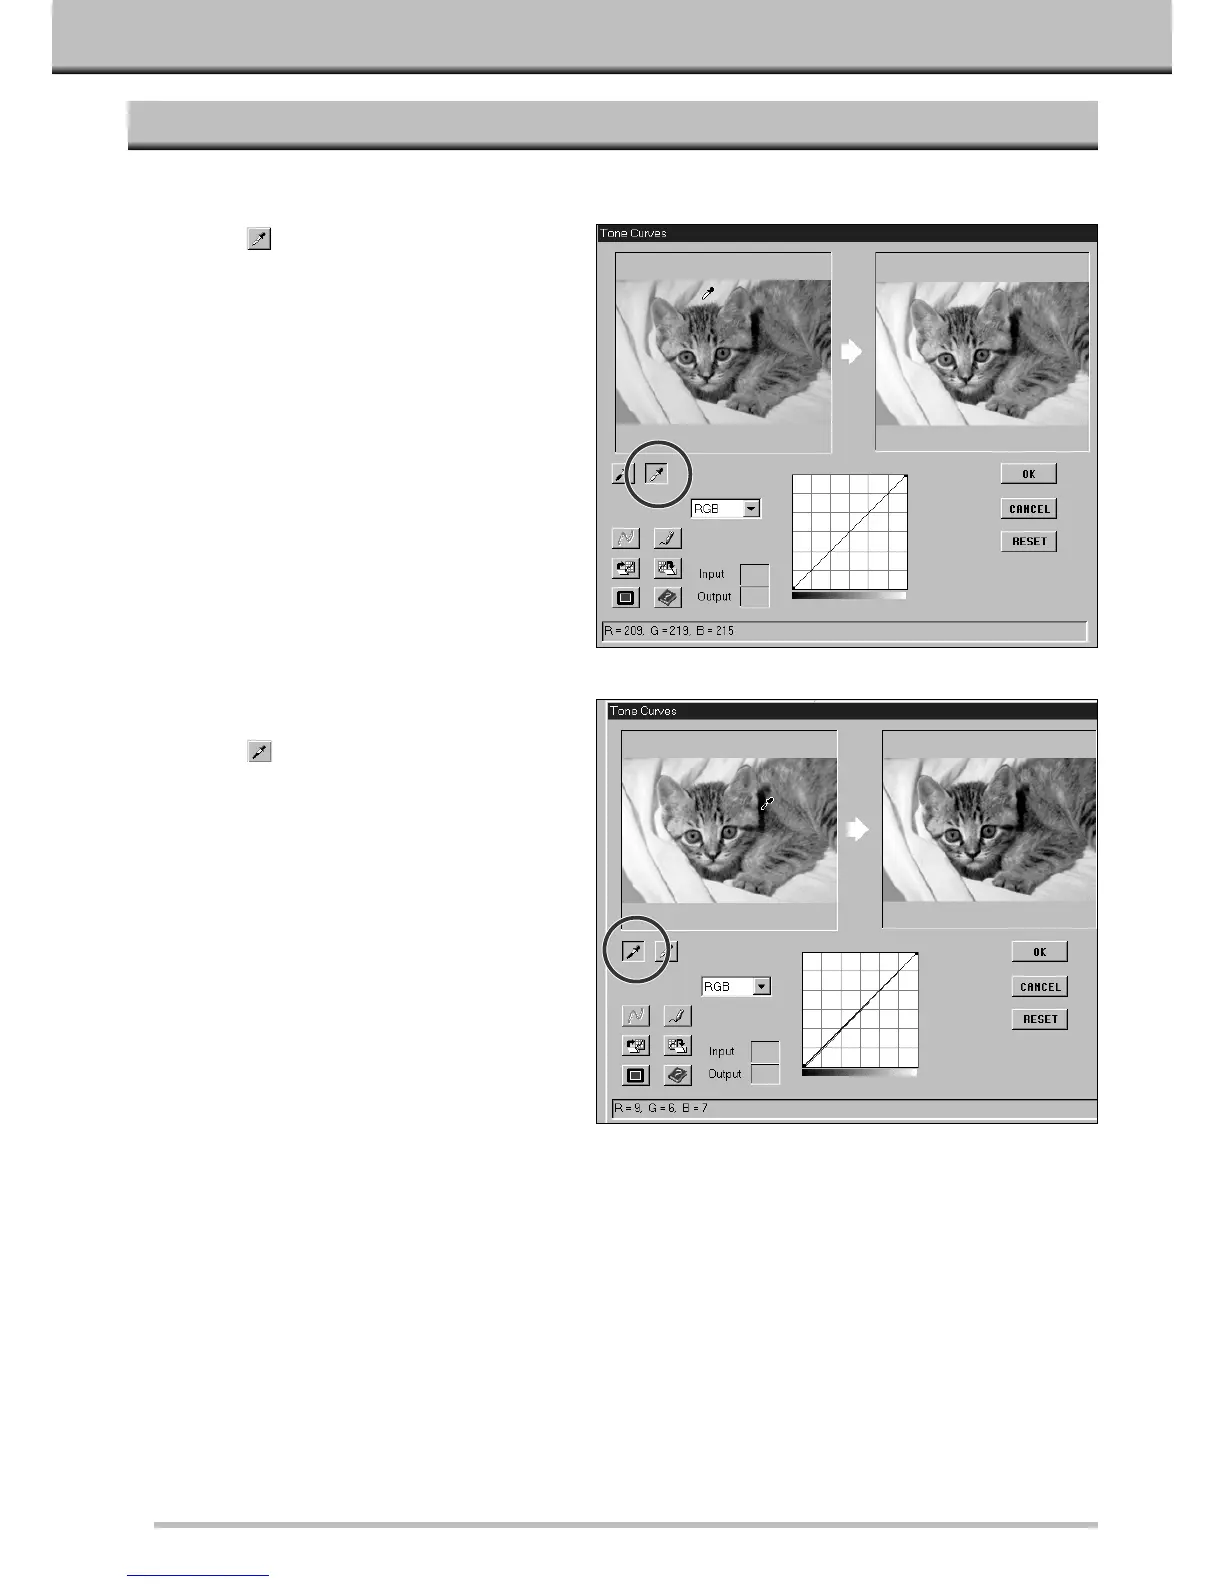
1.Click on .
• The cursor will change to the white eye-
dropper.
2.Click on the tone in the control image
that should be scanned as the
brightest neutral white in your image.
• The RGB brightness value of the selected tone
will be changed to 255. The change will be
reflected in the Preview image.
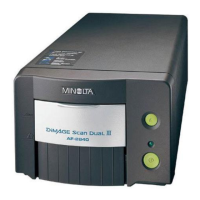
3.Click on .
• The cursor will change to the black eye-
dropper.
4.Click on the tone in the control image
that should be scanned as the
darkest neutral black in your image.
• The RGB brightness value of the selected tone
will be changed to 0. The change will be
reflected in the Preview image.