OPERATION
Mirage 2000/4000/6000 User’s Manual
3-69
Repeat the color adjustment of sides and corners for each edge of the screen that does
not yet match the center (note that each corner is adjustable in either of its two
adjacent “side” menus). When done, all areas of a given screen should match. Repeat
Steps
2a
&
2b
for all remaining screens.
Step 3: Adjust Light Output in 8 Zones
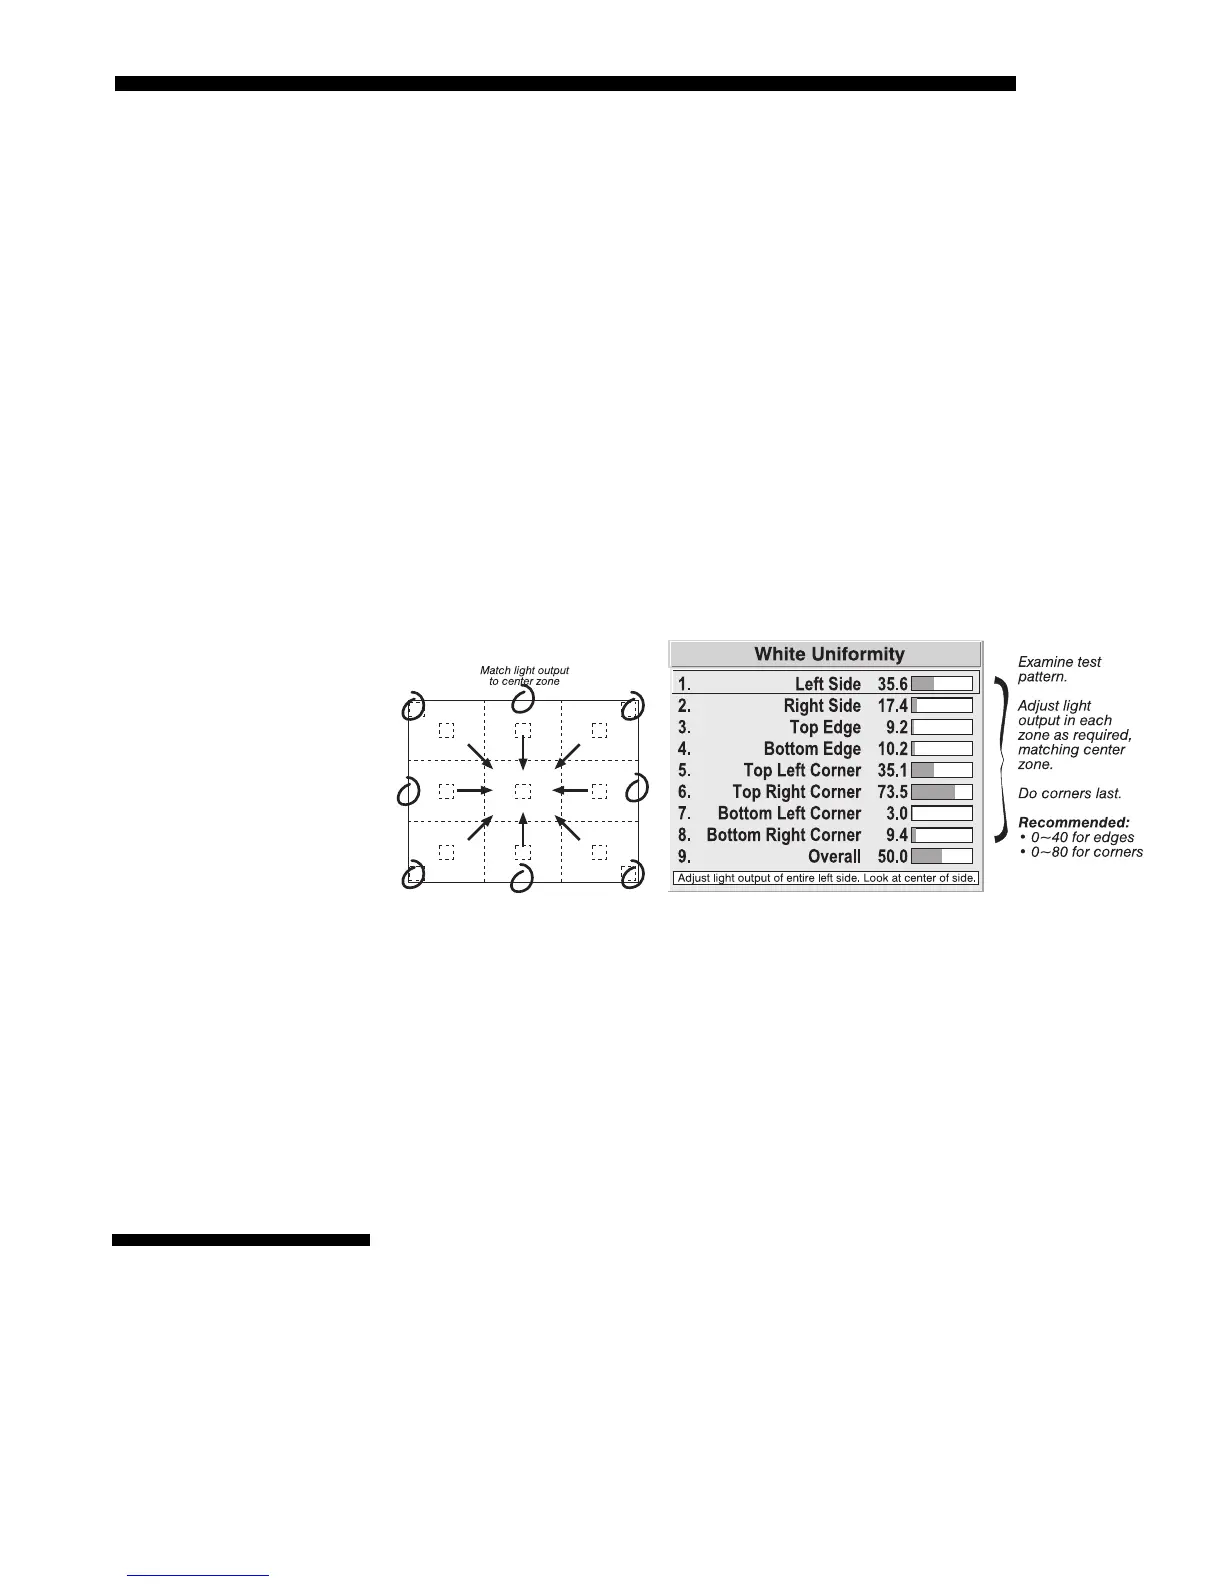
3a) For each screen, compare the light output of each edge and corner to that of
the center. If any of the areas differ, use the White Uniformity menu to match
edges and corners to the center as described below (see Figure 3.46). Begin
with the screen exhibiting the most obvious variations in light output.
•
Adjust edge White Uniformity first—note that each edge adjustment also
affects the rest of the screen slightly. Keep all edges just slightly lower
than the center light output rather than matching light output precisely.
Otherwise, it may not be possible to brighten the corners (typically the
dimmest areas of the screen) enough. I.e., the best uniformity is a
compromise between the brightest and darkest areas of the screen.
• Adjust corner White Uniformity last—each corner adjustment affects only
this quadrant.
• Repeat for each screen.
Figure 3.46. Match Zones to Center Light Output
Step 4: Readjust Color Temperature (level of red/green/blue) in 8 Zones
4a) Return to Steps 2a & 2b and, if necessary, fine tune the zones so that they all
still exhibit a single color temperature.
Canceling Brightness Uniformity
If you do not want to use or apply Brightness Uniformity settings, delete the
checkmark from the “Uniformity Enable” checkbox at the top of the Brightness
Uniformity menu.
Occasionally the projector may encounter an error condition that interrupts normal
operation. Such a condition can be caused by an invalid user entry, an input signal
error (most common) or other system error.
If you would like to be notified on-screen of such errors, select the “Screen” option
from the “Display Error Messages” pull-down list (in Preferences menu). If you
would like to be notified via a serial communication only, select the “RS-232” option
instead. To receive both notifications, select “All”. To disable error messages (except
for invalid user entries), select “Off”.
3.12 Error
Conditions