INSTALLATION AND SETUP
2-12
Mirage 22000/4000/6000User’s Manual
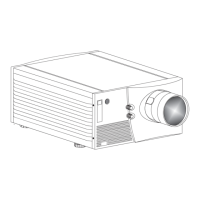
Figure 2.10. Maximum Horizontal Offsets
(ALL LENSES)
For typical front or rear floor mounts, mount the projector on a
secure table or cart. Take care with a mobile cart—avoid
sudden stops, excessive force and uneven surfaces that may
cause the projector and cart combination to overturn.
The table or cart should be reasonably level. Fine adjustments to the projector level
can be made by adjusting the height of the projector legs; refer to 2.7, Leveling for
details.
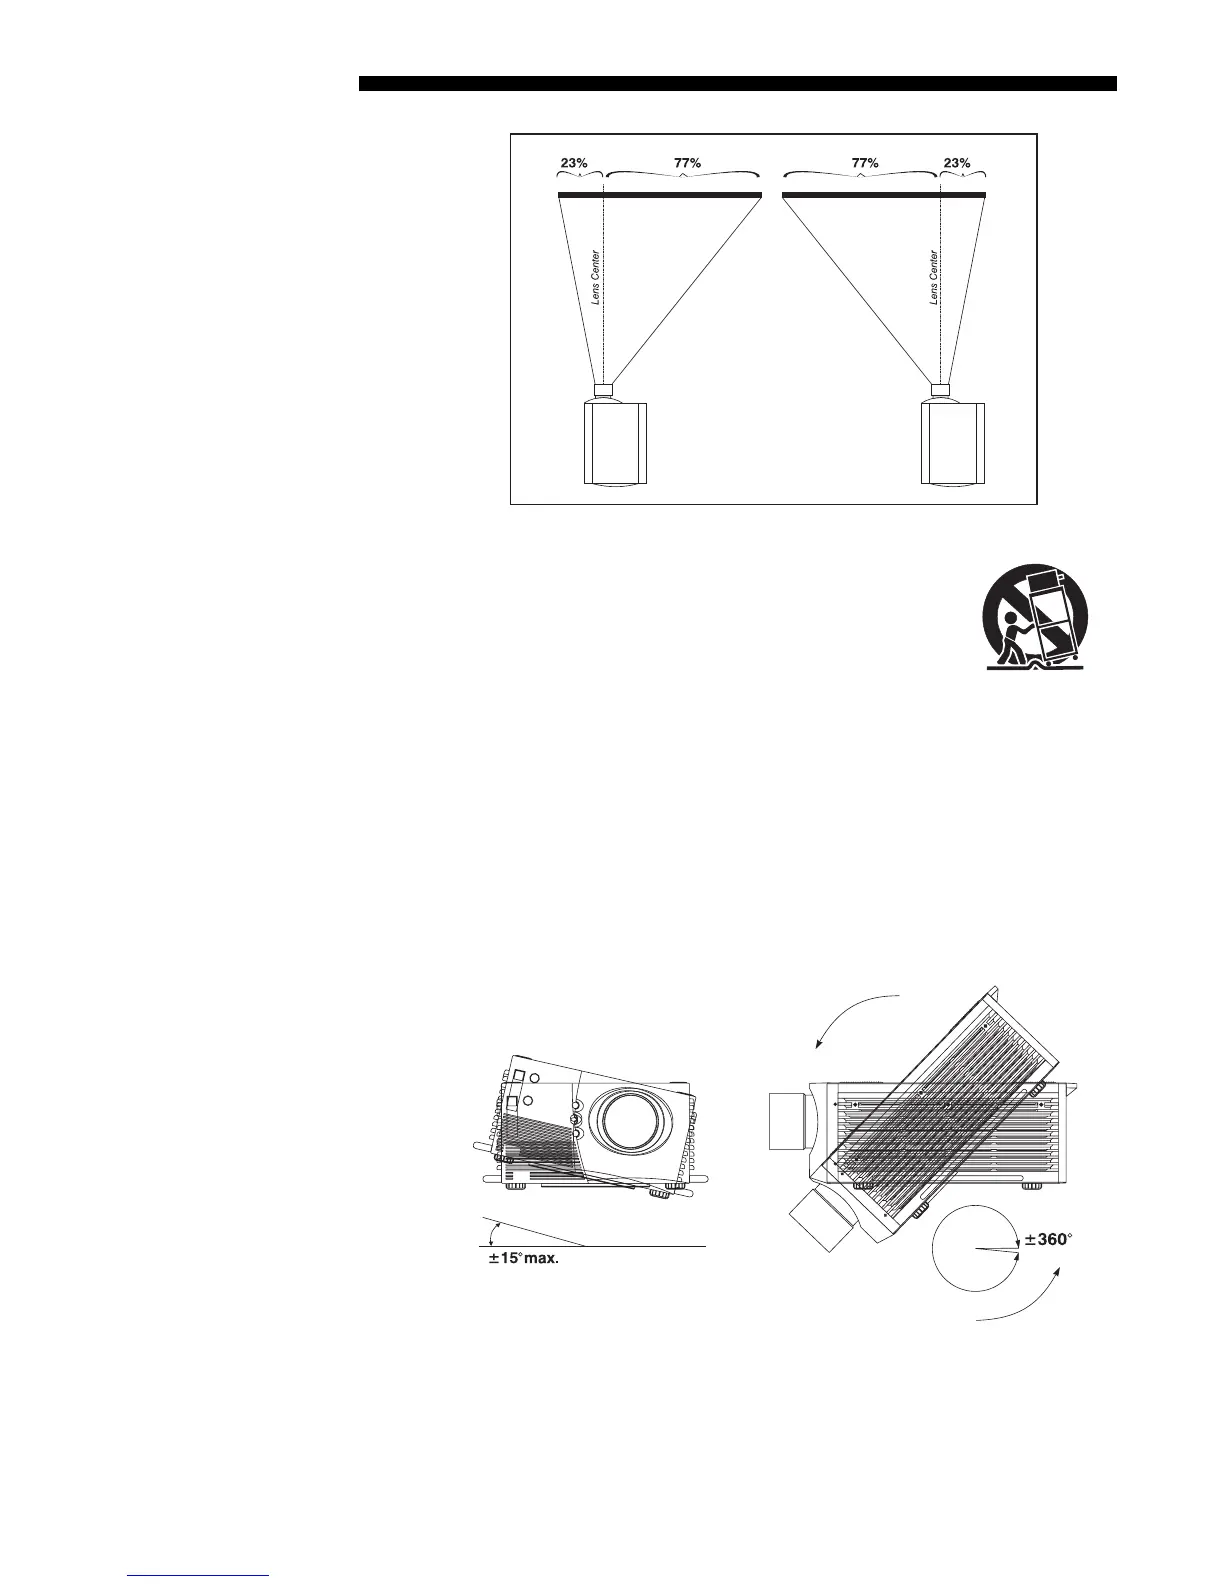
Special Mounting
Note that projector can be rotated and mounted at any vertical angle—i.e., you can
tilt the face of the projector up or down as much as desired for your installation. The
side-to-side tilt, however, must not exceed 15° (see Figure 2.11). This limit ensures
that the arc lamp in the projector operates properly and safely. Always make sure that
exhaust air from the projector does not vent towards the lens, otherwise you may
detect heat waves in your projected image.
Figure 2.11. Horizontal and Vertical Tilt Ranges
You must use the proper ceiling mount fixture (and/or stacking kit, if applicable) for
your projector. For more information, contact your dealer.
Mountin
'