INSTALLATION AND SETUP
2-20
Mirage 22000/4000/6000User’s Manual
If you are using more than one Marquee Signal Switcher, daisy-chain the RS-232
switcher inputs/outputs together to form a complete network of inputs accessible
from the projector (you can network up to 9 switchers), and connect Switcher #1 to
the projector as shown in Figure 2.20. In addition, connect the RGB output from each
switcher to its matching slot on switcher #1–for example, connect the RGB output
from switcher #2 to slot #2 on switcher #1, and the RGB output from switcher #3 to
slot #3 on switcher #1. Note that slots used in this manner on switcher #1 are no
longer recognized as inputs to the projector–if you select a slot location that is
connected to another switcher’s RGB output, the projector will display the “no input
signal” error message.
Plug the projector’s high-current line cord into the line input socket located in the
lower right corner of the rear panel of the projector, then plug the 3-pronged end of
the line cord into a grounded AC outlet. Input voltage to Mirage 2000/4000 must be
100-240 VAC. Input voltage to Mirage 6000 must be 200-240 VAC. Use the proper
power source and the high-current rated line cord provided. See Section 5,
Specifications for all power requirements.
WARNING
Do not attempt operation if the AC supply and cord are
not within the specified voltage and power range.
Caution: Once the projector is turned off, the lamp cooling fans will continue to
run for approximately five minutes to ensure that the projector and lamp have
sufficiently cooled, at which point the fans will automatically shut off. To avoid
thermal stress to the lamp, do not unplug the line cord while the lamp cooling fans
are running—and do not unplug the projector in order to power down.
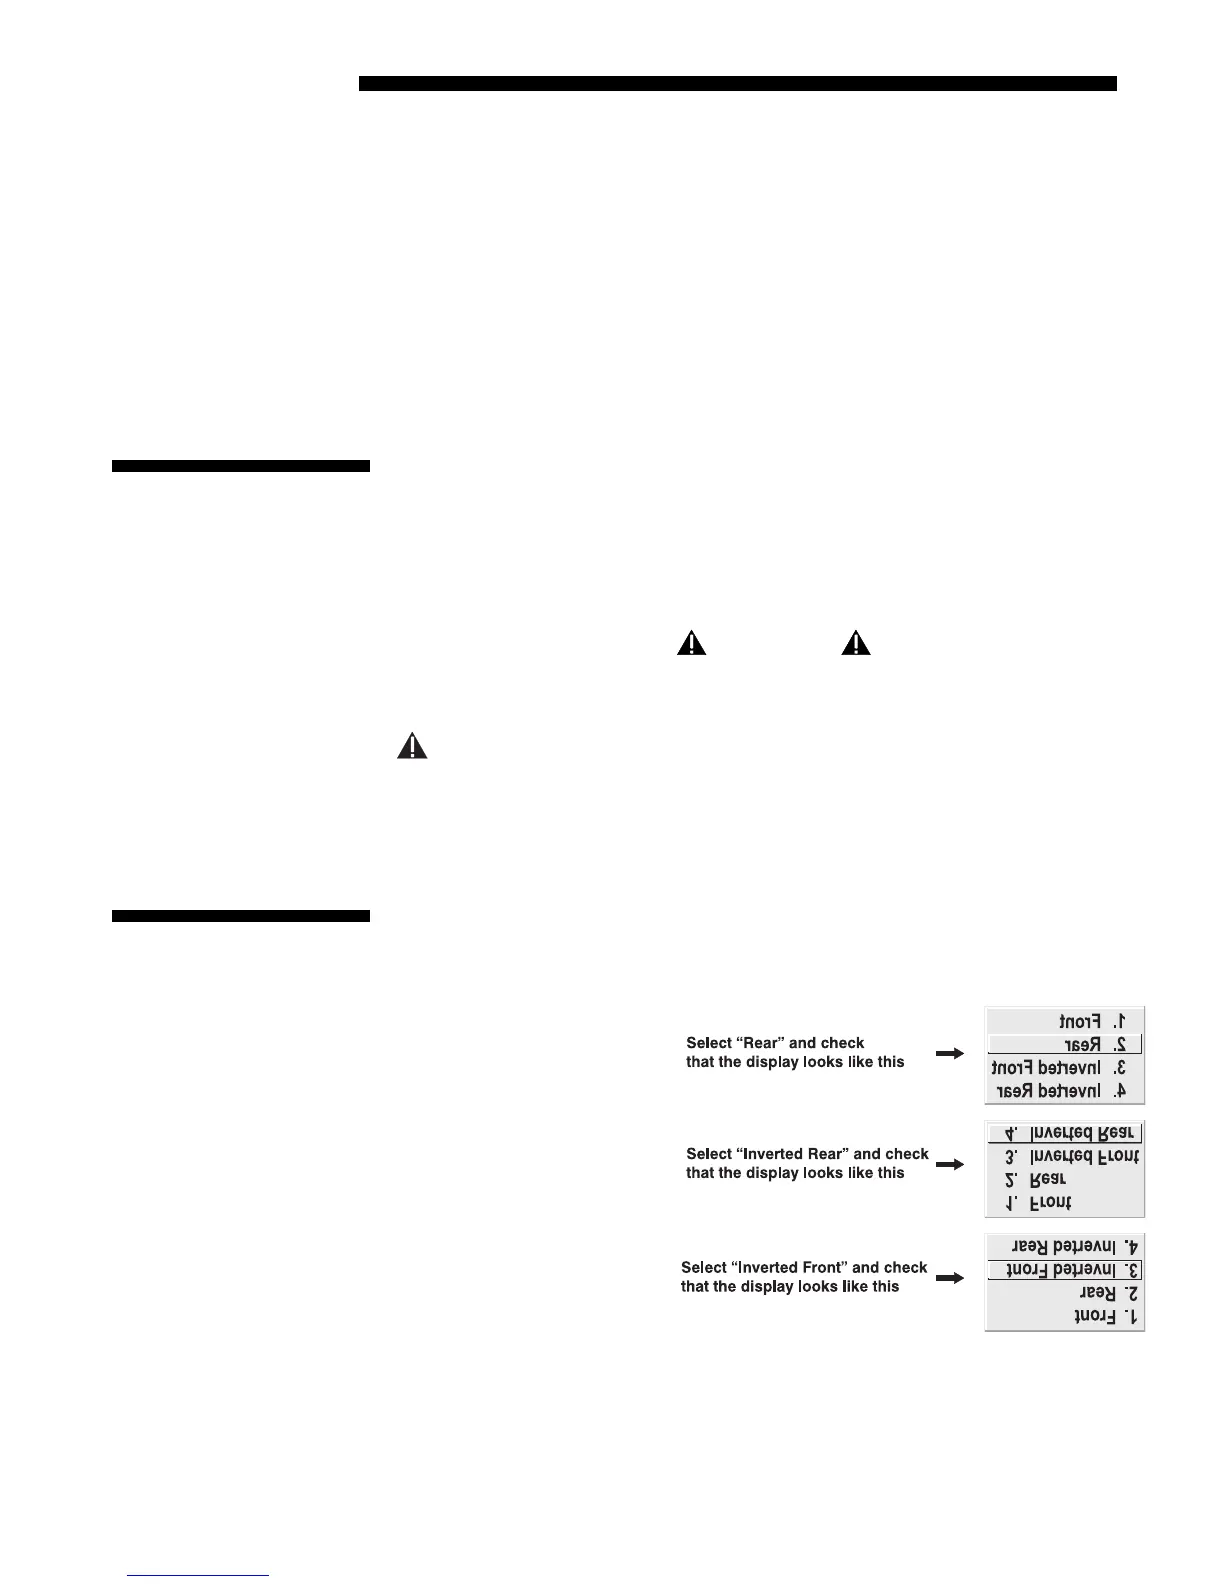
The projector is set up at the factory for use in a front screen, floor mount orientation.
If your initial installation is ceiling mount or rear screen, displayed images may be
upside down and/or reversed. To correct, you must change the image orientation
from within the Menu
Preferences menu (you may
prefer to do this before
physically installing the
projector in its final
position/orientation).
In the Menu Preferences
menu, highlight and select
the "Image Orientation" pull-
down list. Select from Rear,
Inverted Rear, Front or
Inverted Front according to
your intended installation.
See Section 3, Operation for
further information.
Connecting Multiple
'
Switchers
2.5 Power
Connection
2.6 Operating
Orientation