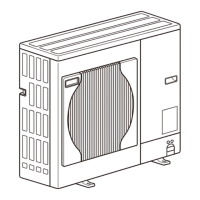
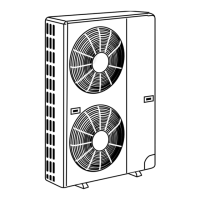
[4-1 Outdoor Unit Circuit Board Arrangement ]
- 63 -
HWE12050 GB
4 Electrical Components and Wiring Diagrams
4 Electrica l Componen ts and Wiring Diagrams
4-1 Outdoor Unit Circuit Board Arrangement
4-1-1 Outdoor Unit Control Box
1) Exercise caution not to damage the bottom and the front panel of the control box. Damage to these parts affect the water-
proof and dust proof properties of the control box and may result in damage to its internal components.
2) Faston terminals have a locking function. Make sure the cable heads are securely locked in place. Press the tab on the ter-
minals to remove them.
3) Control box houses high temperature parts. Be well careful even after turning off the power source.
4) Perform the service after disconnecting the outdoor unit fan board connector (CNINV) and the inverter board con-
nector (CN1). To plug or unplug connectors, check that the outdoor unit fan is not rotating and that the voltage of
capacitor in the main circuit is 20 VDC or below. The capacitor may collect a charge and cause an electric shock when
the outdoor unit fan rotates in windy conditions. Refer to the wiring nameplate for details.
5) To connect wiring to TB7, check that the voltage is 20 VDC or below.
6) Reconnect the connector (CNINV) back to the fan board and reconnect the connector (CN1) back to the inverter board after
servicing.
7) When opening or closing the front panel of the control box, do not let it come into contact with any of the internal components.
Before inspecting the inside of the control box, turn off the power, keep the unit off for at least 10 minutes, and confirm that
the capacitor voltage (inverter main circuit) has dropped to 20 V DC or less. It takes about 10 minutes to discharge electricity
after the power supply is turned off.
8) When the power is turned on, the compressor is energized even while it is not operating. Before turning on the power, discon-
nect all power supply wires from the compressor terminal block, and measure the insulation resistance of the compressor.
Check the compressor for a ground fault. If the insulation resistance is 1.0 M or below, connect all power supply wires to the
compressor and turn on the power to the outdoor unit. The liquid refrigerant in the compressor will evaporate by energizing
the compressor.
<HIGH VOLTAGE WARNING>
Control box houses high-voltage parts.
When opening or closing the front panel of the control box, do not let it come into contact with any of
the internal components.
Before inspecting the inside of the control box, turn off the power, keep the unit off for at least 10 minutes,
and confirm that the voltage between FT-P and FT-N on INV Board has dropped to DC20V or less.
(It takes about 10 minutes to discharge electricity after the power supply is turned off.)
FAN board
Control boardElectromagnetic relay
(DCL)
Rush current protection resistor
(R1, R5) Note 2)
M-NET boardINV board
Note 1)
Ground terminal
Terminal block
for power supply
(TB1)
Terminal block for
transmission line
(TB3, TB7)
Capacitor
(C100)
Electromagnetic
contactor (72C)
Noise filter
 Loading...
