Chapter Five: Maintenance and Troubleshooting Troubleshootin
71
Internal +5 V Voltage Reference
In the event that the voltage output from the internal +5 V source is not correct, measure the
input to the source.
1. Connect a digital voltmeter between TP4 and TP5 on the Main PC board.
The voltage should read between 4.999 and 5.001 Volts. If the voltage is out of the
acceptable range but is close and stable, proceed to step 2. If a gross error exists,
proceed to step 3.
2. Adjust R26 (REF ADJ pot) on the Main PC board.
Repeat step 1.
3. Check across on the Main PC board.
The voltage should read between 1.23 and 1.25 Volts. An incorrect input voltage may be
caused by a defective reference VR1. An incorrect output may be caused by a defective
amplifier U7, also located on the rear of the Main PC board. Contact MKS Instruments
for assistance.
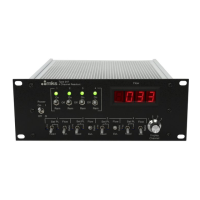
Digital Panel Meter
The digital panel meter (DPM) is a 3½ digit, 2 V full scale device. The meter is powered by a
+5 V supply located on the Main PC board.
To measure the supply voltage to the meter:
1. Measure the output of pin 2 in Interface connector J9.
The voltage on the DPM should match the voltmeter reading from pin 2 of Interface
connector J9, ±1 count. If it does not, you must adjust the span pot on the right rear of
the DPM until the readings agree. To access the span pot you must remove the top cover
of the 246 unit; proceed to step 2.
2. Remove the four (4) Phillips head screws from the top of the unit’s right side panel (refer
to Figure 3, page 24).
3. Loosen the four (4) Phillips head screws on the bottom of the unit’s left side panel, and
lift the cover off.
4. Adjust the span pot on the rear of the digital panel meter box (located directly behind the
DPM) with a small flathead screwdriver until the meter reading agrees with the voltmeter
reading from pin 2 of Interface connector J9, ±1 count.
If the range of this adjustment is insufficient to bring the two meter readings into
agreement, the DPM must be replaced.
5. Place the top cover back into position and replace or tighten the four screws on each side
panel to secure it in place.