10
CYLINDER REPLACEMENT
WARNING: The complete cylinder weight is
approximately 20kg, it is recommended to
obtain assistance for cylinder handling.
When disassembling and reassembling the
hydraulic fittings, first mark an alignment point
on both sides of the fitting. The fitting must be
retightened to the same torque on reassembly
to achieve correct seal.
Refer to Diagram 3
Cylinder Removal
1. Set hoist on first lock and apply ‘F’ clamp to hold
down the hydraulic release lever to drain oil from
system.
2. Isolate electrical power supply to the hoist.
3. Remove the cylinder covers
NOTE: An impact gun is required to effectively remove or refit the cylinder nyloc nut. For
this purpose, only use the impact gun by applying only in short bursts; short bursts should
only turn the nut and not the cylinder shaft, thus protecting the cylinder from damage.
Diagram 4 – Accessing
Nyloc Nut
Diagram 5 – Applying
Short Burst with Impact
Gun
Diagram 6 – Using Bag
and Ties to Contain
Hydraulic Oil Drips
Diagram 7 – Loosening
locking Grub Screw
from Cylinder End Cap
4. Using an impact gun and 27mm socket, remove the nyloc nut from the bottom of the cylinder rod.
Refer to Diagrams 4 & 5
5. Disconnect oil line that connects to the top of the cylinder and secure the end with a small plastic
bag a cable tie over the end of the oil pipe to contain any drips. Refer to Diagram 6
6. With an Allen key, loosen the 2.5mm grub screw (should not require more than 2 turns) in the
cylinder end cap located at the top of the cylinder. Rotate the cylinder to get better access to the
grub screw if required. Refer to Diagram 7
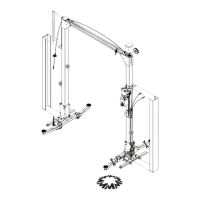
Diagram 3 – Hydraulic Fittings
Reassembly with Position Marking