76347-385 • 06 -15
4.3
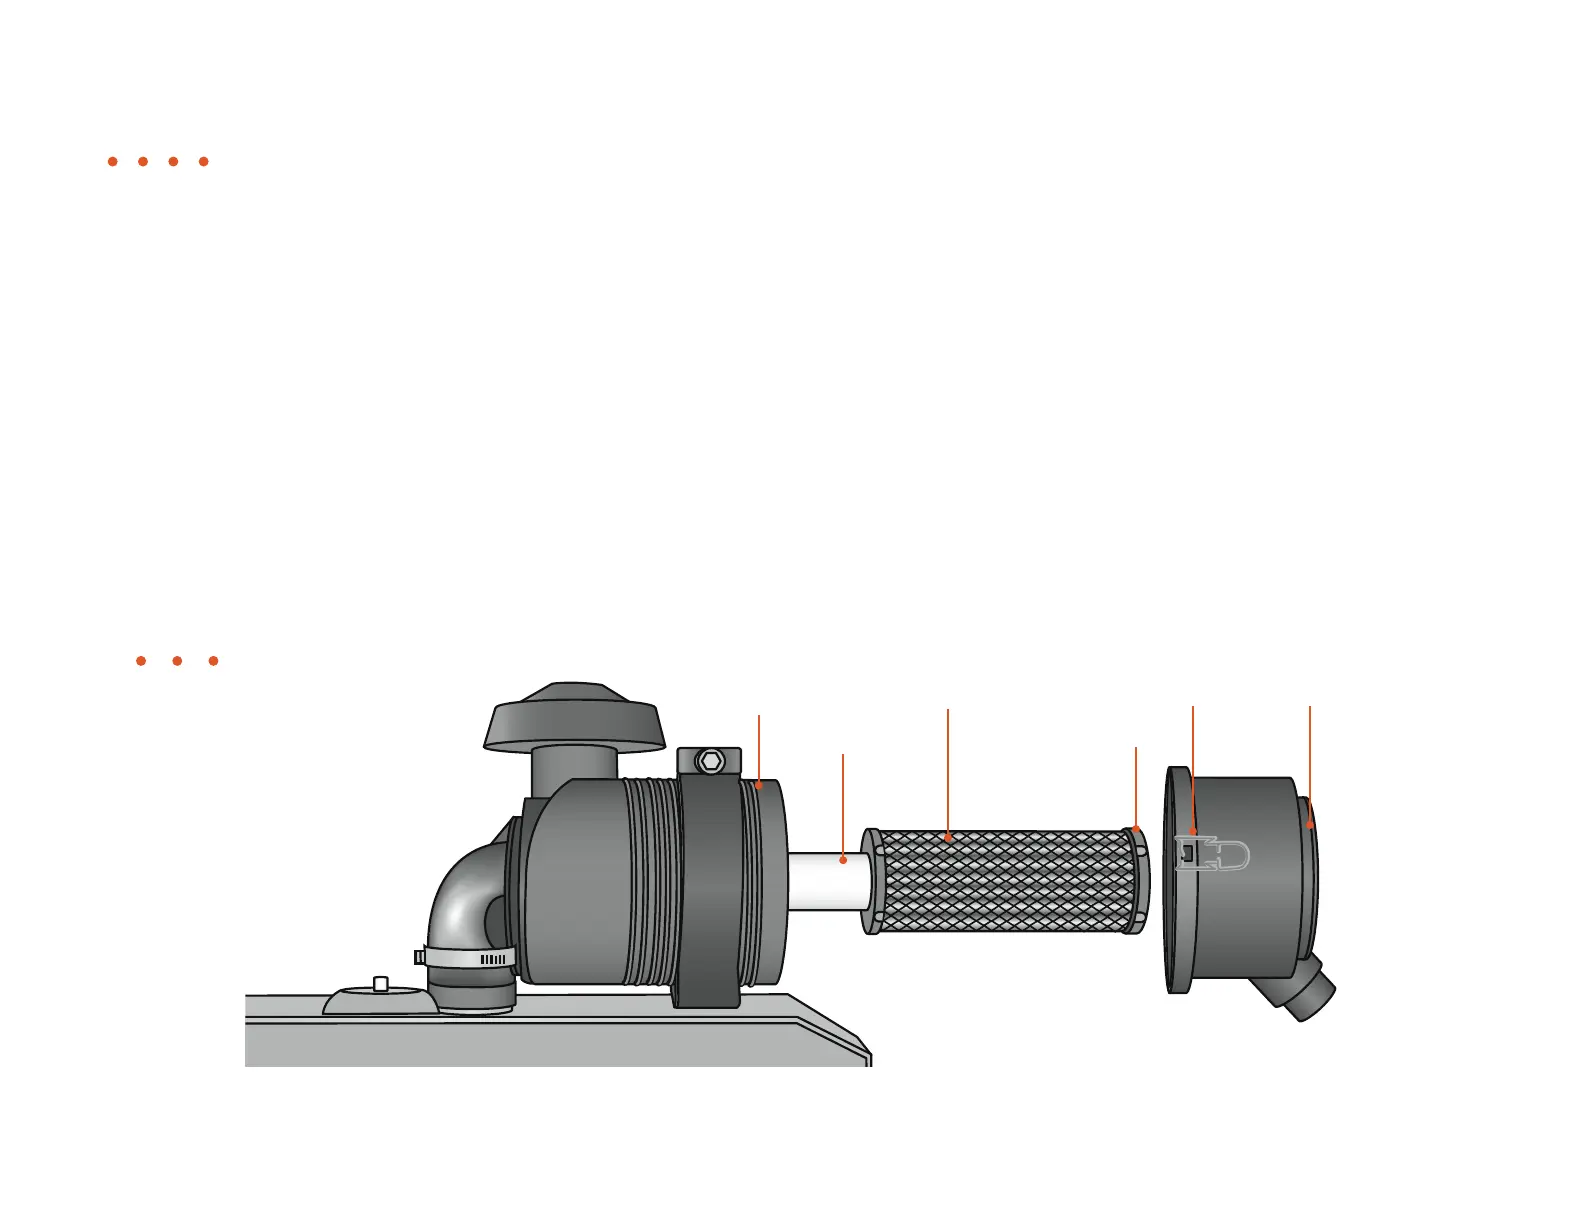
General Maintenance • Air Filter
Air filter cap
Primary air filter
Filter gasket
Filter housing
Latch
Secondary air filter
Air Filter
A clean air filter is critical to the performance of the chipper and the life of
the engine. Dirt inside the engine will ruin it. The filter should be
maintained, changed when necessary. At a minimum, changing should
occur every 200 hours or at the time of an oil change. Only use the correct
model filter.
To replace the air filter:
1. Inspect the outside of the housing and air transfer tubing for cracks,
dents, or holes. Check that all connection points from the filter
housing to the engine are tight and sealed. Dust trails indicate leaks.
2. Unlatch the air filter cap from the filter housing. Gently remove the
old filter to avoid dirt and dust dropping inside the clean side of the
filter housing and causing contamination.
3. Remove the filter and clean the inside of the housing and gasket
seal using a clean damp cloth. Make sure all hardened dirt ridges are
removed. Wipe every surface inside the housing.
4. Inspect the old filter for evidence of dust leakage and gasket sealing
problems. If you see a pattern on the elements clean side, it is a sign
that the old filter was not firmly sealed or a dust leak exists. Identify
the cause and fix it before placing the new filter in the housing.
NOTE: The gasket on the filter is one of the most important features of the
filter. Make sure it is a highly compressible gasket that springs back promptly
when you release it from finger pressure.
5. When installing the filter back into the housing make sure it is seated
evenly. If it is not seated evenly, the engine will not be protected from
dirt and dust.
6. Ensure the housing, connections, and ducts (e.g.: clamps, flange joints
and air cleaner mounting bolts) are air-tight.
Figure 4.1