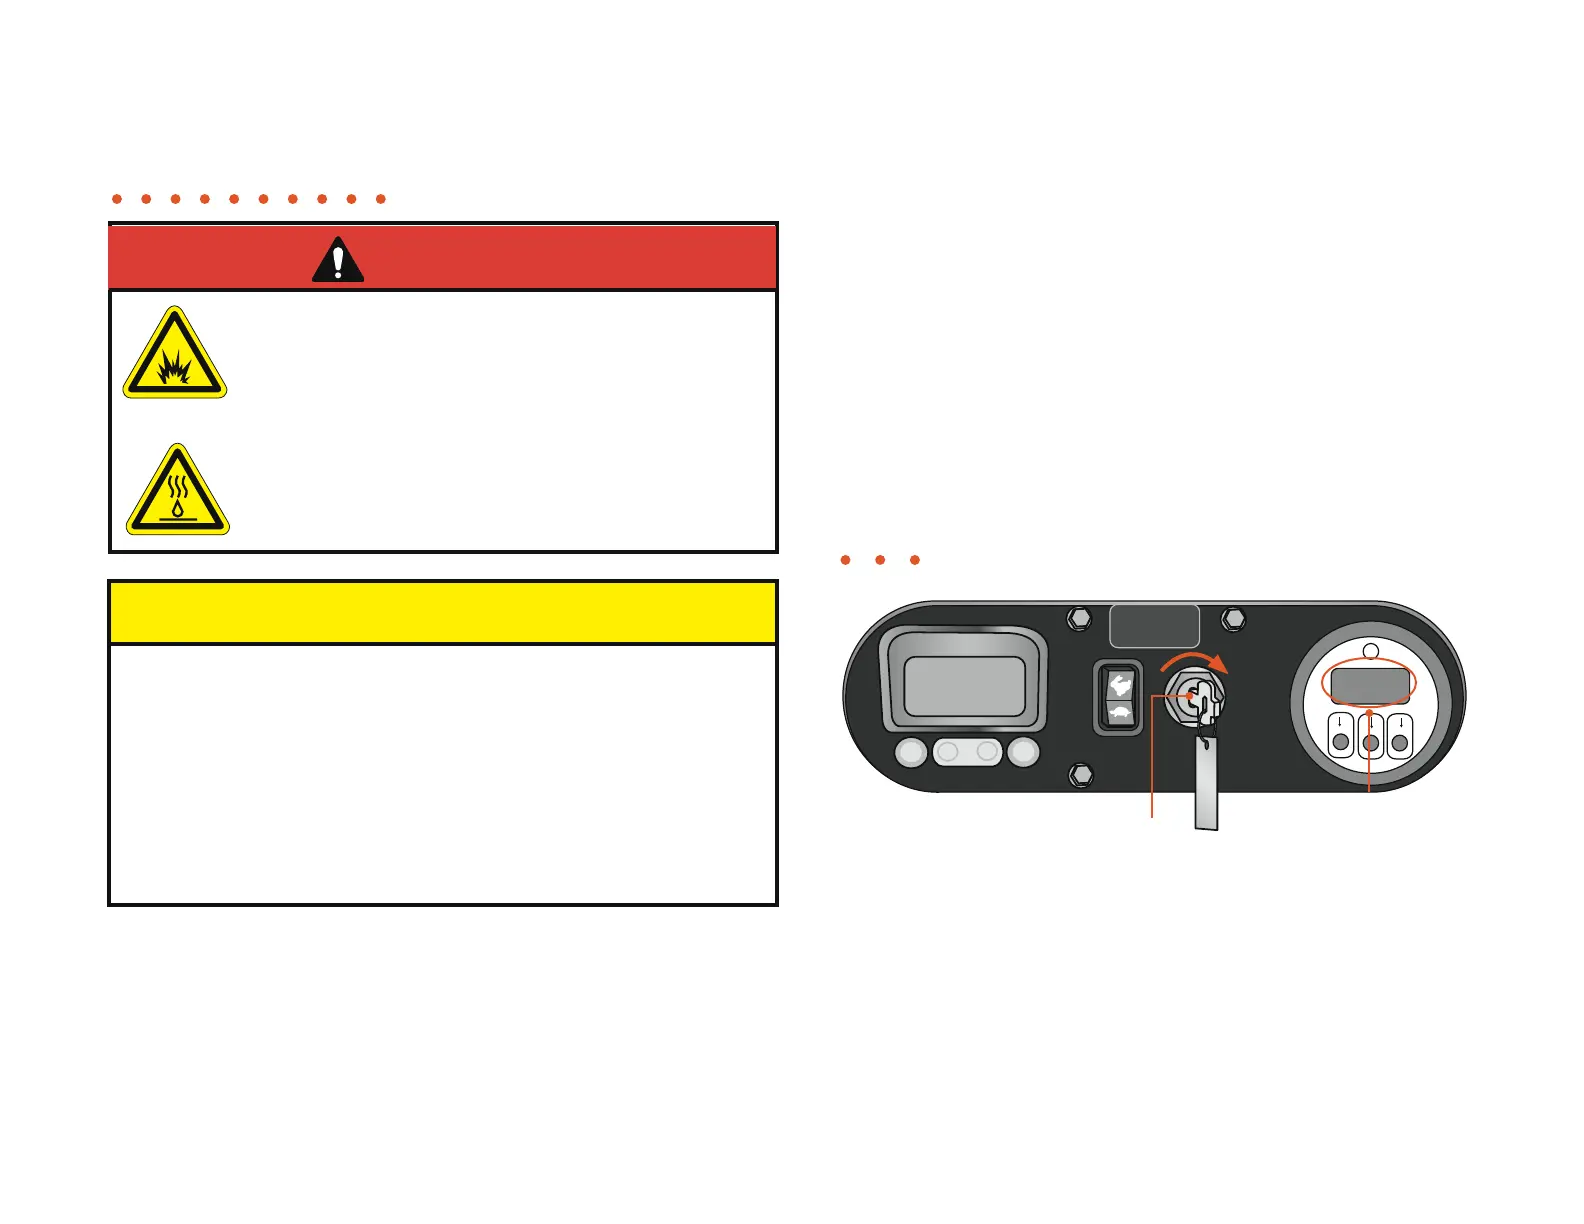
Typical control panel
DANGER!
2.6 76347-282 • 12- 08
Start-up
Exposing diesel fuel to an ignition source such as a flame
or spark will result in explosion, fire, serious injury, or death.
Never smoke, light a flame, or create a spark around the fuel
tank. Store the machine and extra fuel away from any ignition
sources.
After use of the machine hydraulic oil becomes extremely hot
and under pressure, which will burn or puncture the skin if
not handled properly. Allow the hydraulic oil to cool down
and relieve built up pressure before performing maintenance.
Do not allow the engine to idle with the clutch disengaged for longer
than 2-3 minutes. Failure to the pilot bearing will occur.
Shut the engine down immediately if you hear a noise that might
indicate loose or broken parts. Have the engine checked by qualified
personnel.
In cooler weather let your hydraulic system run for approximately 15
minutes prior to operation. Extremely cold oil will cavitate causing
noise, loss of capacity, and damaging the motors and pumps.
Fluid Levels
Before you start the machine it is important to check the fuel, hydraulic oil,
and radiator coolant levels. Allow the machine to cool down before adding
oil, fuel, or radiator coolant. Remove the cap slowly to relieve pressure.
Engine start-up:
1. Place the safety control bar into the neutral position.
2. Place all hydraulic valves in the neutral position.
3. Because the M18R has many engine options, consult your engine
operators manual for specific directions on starting your engine.
Note:Refer to the electric motor/starter manual for start-up procedure.
Note:”Panel will vary with engine make and model and is shown for
illustrative puposes only.”
The Chipping Cycle • Start-up
Tachometer
(measures the RPM’s)
4. Start engine, wait 1 minute, and engage the clutch by moving the clutch
handle toward the engine for 2 to 3 seconds, then move the clutch
handle away from the engine disengaging the clutch. Wait until the
engine regains RPM’s then repeat 2 more times until drum is spinning at
full RPM’s. Then fully engage the clutch handle. Let the engine warm up
according to your engine operators manual until the engine stabilizes.
5. Place the safety control bar into the feed position. This position pulls the
material into the feed wheel.
6. Allow the engine to warm-up.
Figure 2.4
Ignition key
NOTE
 Loading...