Do you have a question about the MSI Hetis 945 and is the answer not in the manual?
Key safety guidelines for operating the equipment, including avoiding hazards.
Safety warnings about power cords, internal moving parts, and grounding.
Safety precautions for Class 1 Laser products, advising against touching the lens.
Details the hardware specifications of the system.
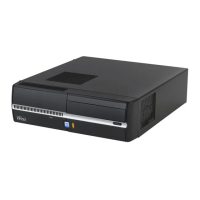
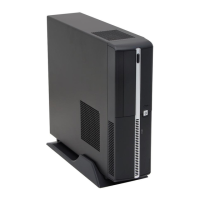
Describes the system's physical layout and components.
Explains the cooling system and airflow management.
Illustrates and labels the mainboard's components and connectors.
Covers CPU installation, support, and thermal management.
Covers CPU installation, support, and thermal management.
Details memory module installation and specifications.
Details memory module installation and specifications.
Explains power supply connectors and their functions.
Explains power supply connectors and their functions.
Describes front panel ports for audio, USB, and IEEE 1394.
Describes front panel ports for audio, USB, and IEEE 1394.
Details rear panel ports including audio, VGA, LAN, and USB.
Details rear panel ports including audio, VGA, LAN, and USB.
Lists and describes various internal mainboard connectors.
Step-by-step guide for assembling the computer system.
Instructions on how to access the BIOS setup utility.
Details supported Intel processors and the LGA775 package.
Lists Intel 945G/945GZ and ICH7 chipset capabilities.
Describes DDRII SDRAM support, capacity, and speed.
Details front/rear I/O, audio, LAN, and integrated graphics.
Illustrates and labels front panel components of the lite version.
Illustrates and labels rear panel components of the lite version.
Visual guides for connecting various external devices like USB, audio, monitors.
Explains the CPU cooler and illustrates its airflow for optimal cooling.
Warning to maintain clearance around ventilation holes for proper airflow.
Diagram and labels for the lite version mainboard layout.
Covers CPU support, installation advice, and overheating prevention.
Step-by-step guide for installing the CPU and cooler correctly.
Details on socket cap removal, lever operation, and alignment for installation.
Inspecting CPU seating, removing clips, and securing heatsink.
Step-by-step guide for inserting DDR2 memory modules.
Step-by-step instructions for removing the computer chassis cover.
Detailed steps for installing an HDD into the chassis.
Step-by-step guide for installing an optical drive.
Instructions for installing an optional card reader.
Guides on locating and inserting memory modules into DIMM slots.
Step-by-step instructions for installing the CPU into the socket.
Guides on placing, securing CPU cooler, and connecting its power.
Instructions for reassembling chassis cover and placing the PC.
Guides on attaching the PC to the footstand using rubber feet.
Guides through the installation process of the Realtek HD audio driver.
Details how to use 2/4/6/8 channel audio features.
Provides instructions for installing the Realtek HD Audio Driver on Windows 2000/XP.
Details the steps for installing the driver and restarting the system.
Configures multi-channel audio and speaker assignments for jacks.
| Model | Hetis 945 |
|---|---|
| Category | Desktop |
| CPU Support | Intel Pentium 4, Pentium D, Celeron D |
| Graphics | Integrated Intel GMA 950 |
| Form Factor | Mini-ITX |
| Chipset | Intel 945G |
| Memory | DDR2 533/667 |
| Expansion Slots | 1 x PCI |
| LAN | Realtek RTL8111 Gigabit LAN |
| Operating System | Windows XP, Vista |
| Ports | USB 2.0, VGA, LAN, Audio |