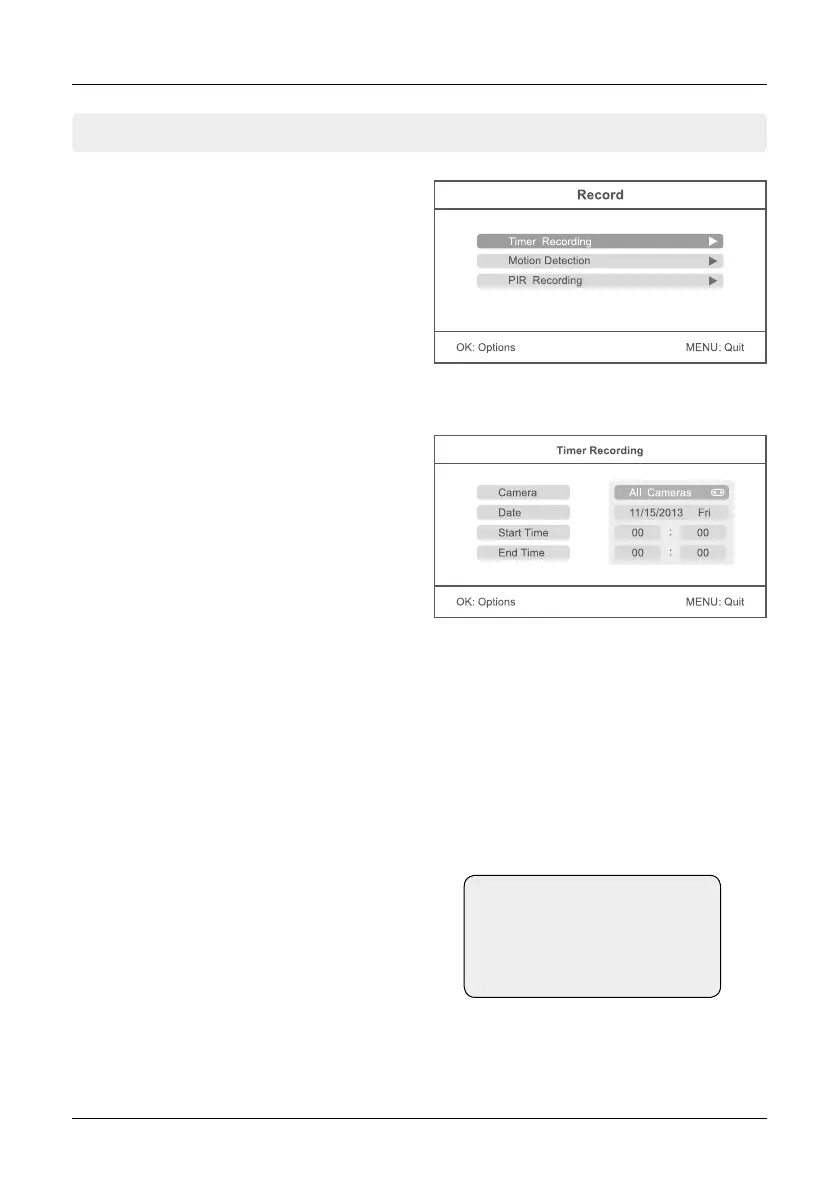
5.2 Record
Press in the real-time monitoring the MENU but-
ton to enter the main menu.
Press the t or u button to select the menu
item RECORD. Confirm with OK.
5. Main Menu
14 ENGLISH
Press the p or q button to select the menu
item „Timer Recording“. In this menu you can
set a recording at a certain time.
After you have made all the settings, press the
OK button to set the timer to save and again
to check your settings in an overview. To save
the timer settings and exit the menu, press the
MENU button. If you want to add another recor-
ding, select „New Schedule“ and confirm with
OK. It can max. 6 recordings are programmed.
1. Press the p or q button to select „Camera“. Using the t or u button to select whether a parti-
cular (camera 1-4) or all cameras to record a video.
2. Press the p or q button to select „Date“. Using the t or u button to select on which day you will
record. It is also possible to set the following options: Mon-Fri, Mon-Sat, Sat-Sun, or on a specific day.
3. Press the p or q button to select „Start Time“. Using the t or u key to select a any desired hour.
Using the p or q button to move to minutes.
4. Press the p or q button to select „End Time“. Using the t or u key to select a any desired hour.
Using the p or q button to move to minutes.
Timer Recording
Note:
The timer recordings are
saved only when you insert an
SD card or a USB device.