ENGLISH
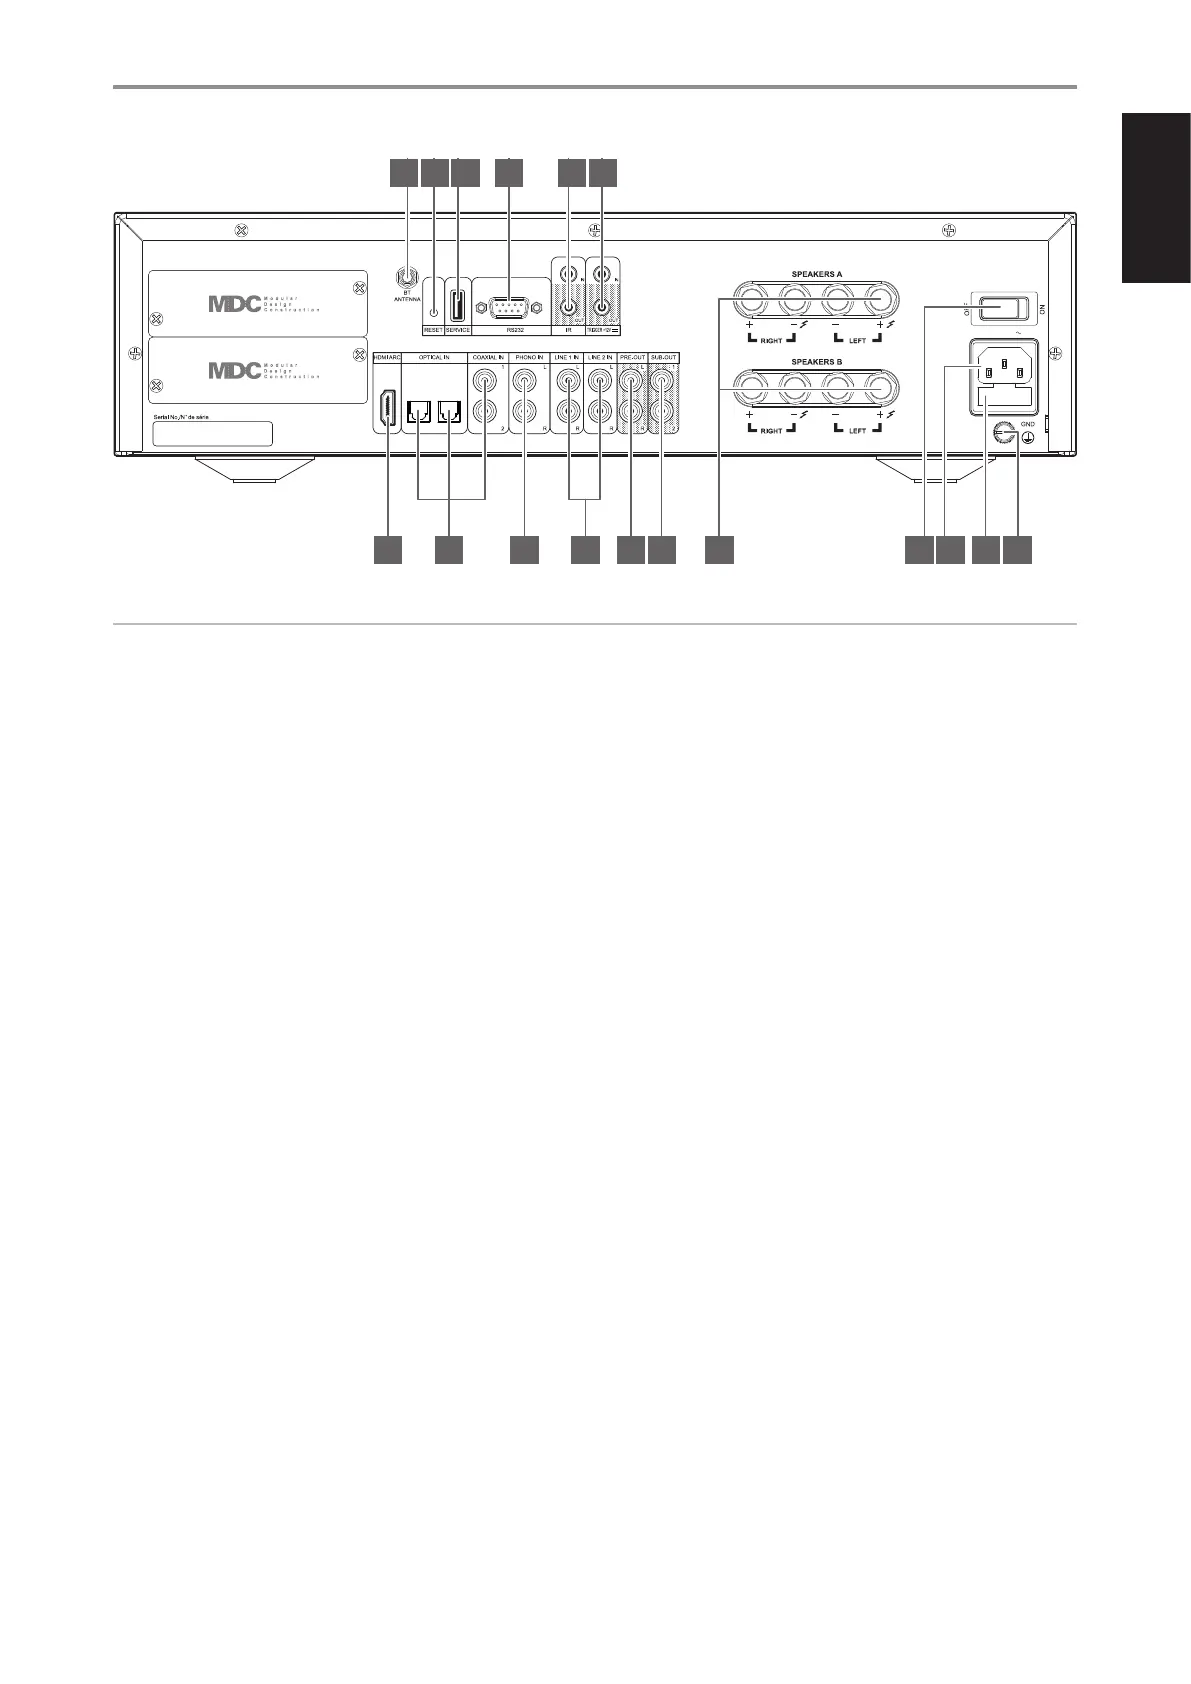
1 BLUETOOTH ANTENNA TERMINAL
• Install supplied Bluetooth antenna to this Bluetooth antenna
terminal.
2 RESET
• It is not recommended to use RESET button unless necessary. Use
the RESET function button when everything else fails and the unit
may not be able to recover.
• Switched OFF the rear panel POWER switch. Press and hold the
RESET button and switch ON the rear panel POWER switch. There
will be two scenarios as you hold on to the RESET button
- Hold on to the RESET for less than 30 seconds: Initiate chassis
USB stick Upgrade or BluOS MDC card upgrade if a BluOS card
is installed.
- Hold on to the RESET for more than 30 seconds: Initiate chassis
factory reset.
• Contact your nearest service center for further guidance on how to
use RESET function button.
3 SERVICE
• Use for USB rmware update. Contact your nearest service center
for rmware update guidance.
4 RS 232
NAD is a certied partner of AMX and Crestron and fully supports
these external devices. Check out the NAD website for information
about AMX and Crestron compatibility with NAD. See your NAD audio
specialist for more information.
• Connect this interface using RS-232 serial cable (not supplied) to
any Windows compatible PC to allow remote control of the C399
via compatible external controllers.
• Refer to the NAD website for information about RS232 Protocol
documents and PC interface program.
5 IR IN/IR OUT
• These mini-jacks accept and output remote-controlled codes in
electrical format, using industry-standard protocols, for use with
“IR-repeater” and multi-room systems and related technologies.
• All NAD products with IR IN/IR OUT features are fully compatible
with the C399. For non-NAD models, please check with your other
product’s service specialists with respect to their compatibility to
the C399’s IR features.
IR IN
• This input is connected to the output of an IR (infrared) repeater
(Xantech or similar) or the IR output of another compatible device
to allow control of the C399 from a remote location.
IR OUT
• Connect IR OUT to the IR IN jack of a compatible device.
• Command and control the linked compatible device by directing its
own remote control to C399’s infrared receiver.
6 +12V TRIGGER
+12V TRIGGER OUT
• The +12V TRIGGER OUT is used for controlling external equipment
equipped with a +12V trigger input.
• Connect this +12V TRIGGER OUT to the other equipment’s
corresponding +12V DC input jack using a mono cable with 3.5mm
male plug.
• This output will be 12V when the C399 is ON and 0V when it is
either OFF or in standby mode.
IDENTIFICATION OF CONTROLS
REAR PANEL
7
© NAD C 399
100-120V/220-240V 50/60Hz
1615
6
14
5
10 11 12 13
4
9
3
8
2
7
1
17
ATTENTION!
Please ensure that the C399 is powered o or unplugged from the mains power outlet before making any connections. It is also advisable to power down
or unplug all associated components while making or breaking any signal or AC power connections.