63
English
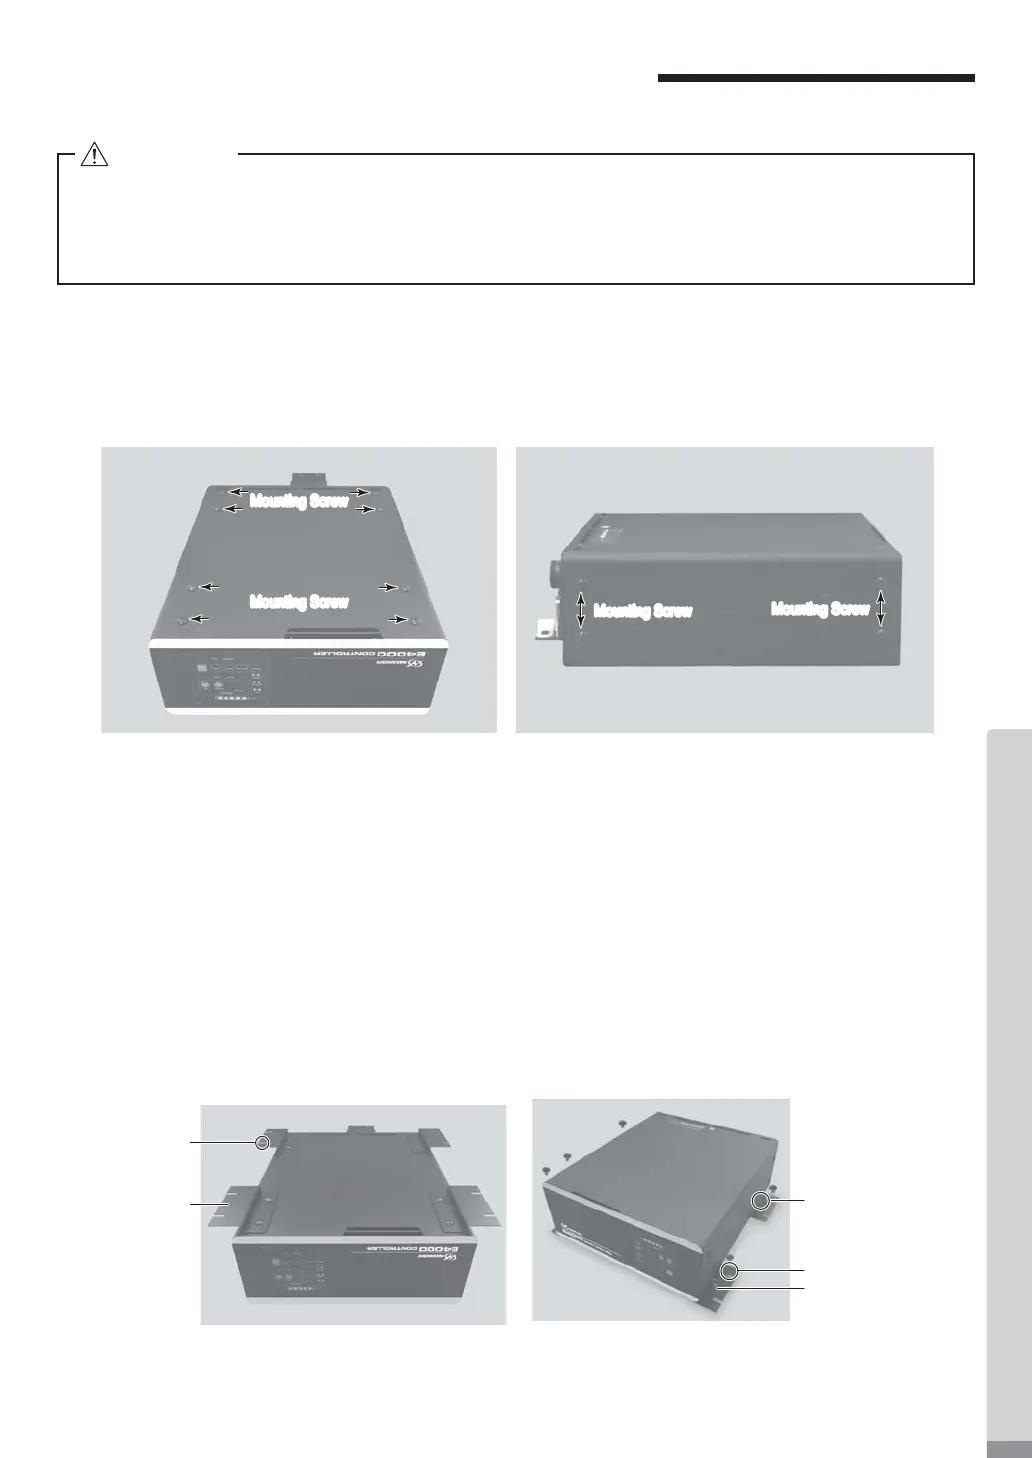
10. BRACKET AND RUBBER PAD INSTALLATION
Fig. 10 Fig. 11
10 - 1 Installation of the Brackets
・Brackets are provided 4pcs.
・
Bracket Mounting Screws are attached to the following locations of the CONTROLLER (Fig. 9).
Bottom: 8pcs. Both sides: 4pcs. each side.
・
The Bracket can be installed on the " (1) Bottom Mounting (Fig. 10, 11) " and " (2) Side Surface Mounting (Fig. 12,
13) " of the CONTROLLER.
Fig. 9
(1) Bottom Mountng
① Remove the Mounting Sc
rews (8pcs.) from bottom of the CONTROLLER (Fig. 9).
② Install the Brackets (4pcs.) to the bottom of CONTROLLER by using removed Mounting Screws (8pcs.)
(Fig. 10).
③ Attach the CONTROLLER (Bracket's Slotted Area) to the machine using the mounting screws
(8 pcs. not
included / provided by the end-user.)
(Fig. 11).
* Mounting screws used to attach the CONTROLLER on the machine, not included / provided by
the end-
user.
Mounting Screw
Bracket
Mounting Screw 8pcs.
(Not included / Provided by
the end-user)
Bracket
Slotted Area
Mounting Screw
Mounting Screw
Mounting Screw
Mounting Screw
Mounting Screw (8pcs.) attached to the bottom
of the CONTROLLER.
Mounting Screw (each 4pcs.) attached to the side of
the CONTROLLER.
・If there is a possibility for the CONTROLLER from its mounting location, be sure to secure it with
the Provided Brackets for safety.
・When mounting the Bracket, do not loosen any other screws other than the Mounting Screws
that are meant to install the Br
acket.
CAUTION