33Installing the Water Heater
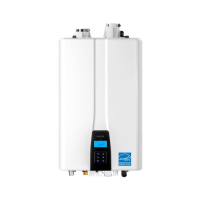
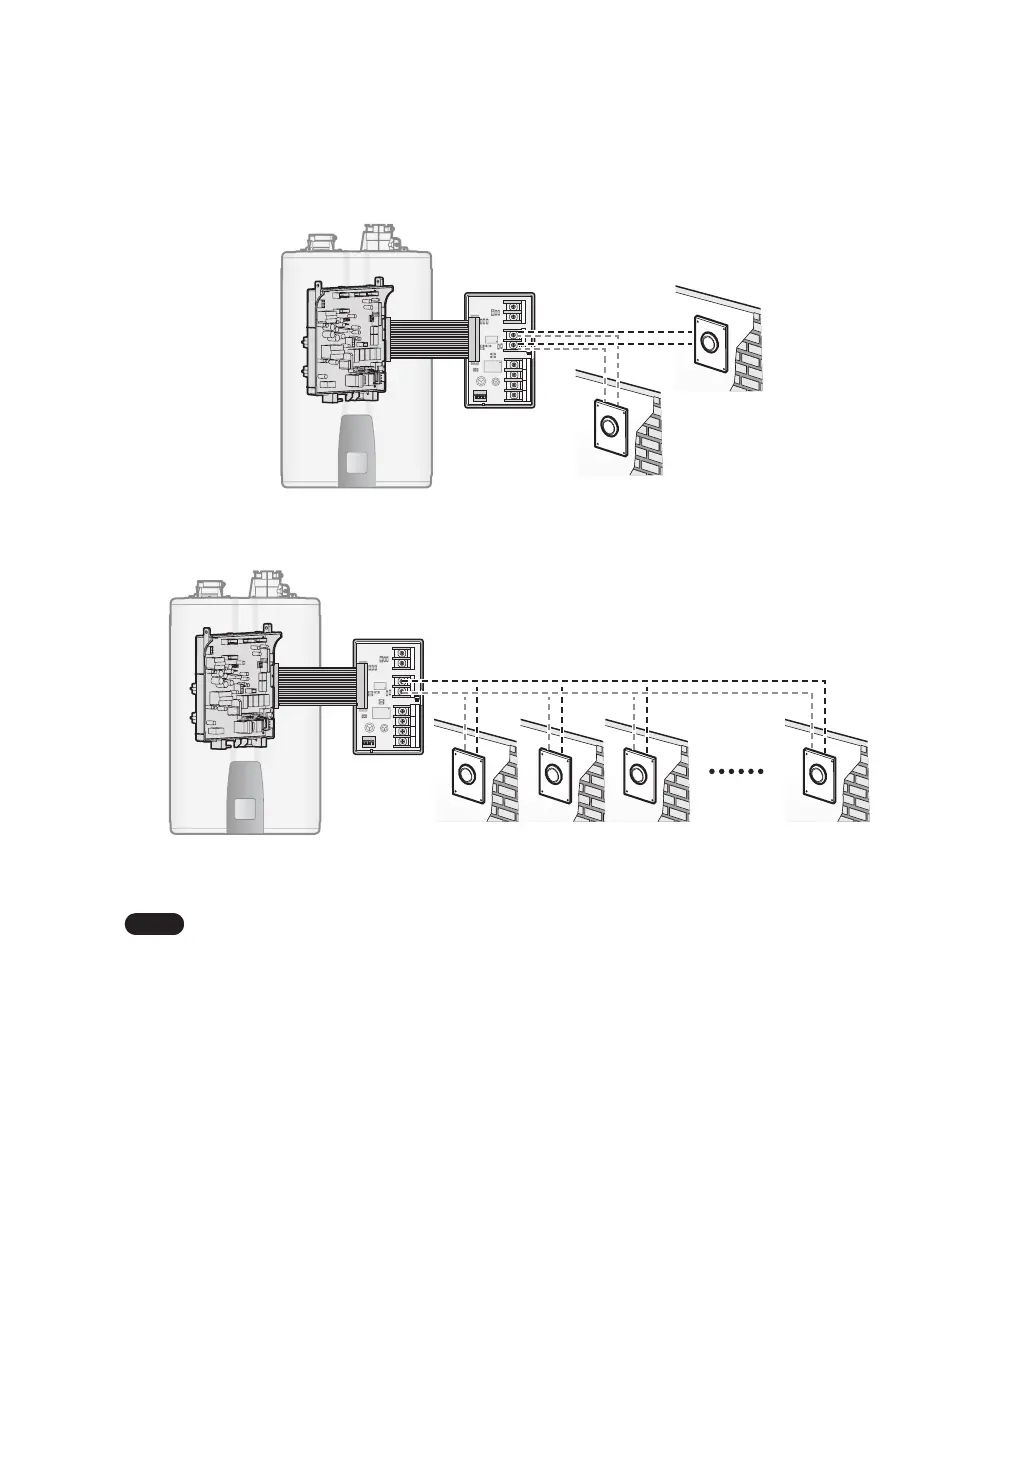
When you connect the push button switches to the controller, you can run cables from each switch directly to the
controller and connect them to the same terminal. Or, you can run a common branch circuit that runs from the
controller and connect each switch to the branch.
1 2 3 4
ON
SW1
CE1
CE2
U1
C1
C2
C7
R6
PC1
12 V 5 V SIGNAL
SIGNAL 1
GND
R5
R9
R8
C3
R1
R2
R7
D1
CON3
CON5
CON2
CON1
SIGNAL 2
SENSOR I
RA1
[Multiple switches connected directly to the same terminals at the controller]
1 2 3 4
ON
SW1
CE1
CE2
U1
C1
C2
C7
R6
PC1
12 V 5 V SIGNAL
SIGNAL 1
GND
R5
R9
R8
C3
R1
R2
R7
D1
CON3
CON5
CON2
CON1
SIGNAL 2
SENSOR I
RA1
Switch #1 Switch #2 Switch #3 Switch #10
[Multiple switches connected to a common branch circuit]
Note
●
You can connect up to 10 push button switches to one HotButton controller.
●
Use UTP cables or cables with a diameter greater than AWG 24.
●
Make sure that the total cable length does not exceed 328 feet (100 meters).
●
Additional push button switches (#GXXX001426) and wall plates (#GXXX001427) can be purchased
through Navien.
 Loading...