Section 2: PCB Installation and Startup
Aspila EX Hardware Manual Section 2: PCB Installation and Startup 2-27
2
Installing the Direct Inward Dial PCB:
1. Set the run/block switch to block,
DOWN.
2. Install the DIOPU PCB into a slot.
Note that the white PCB Pull Tab should always be positioned closest to the top of the
cabinet.
3. Set the run/block switch to run,
UP.
With normal operation, the status LED will flash fast. If trouble was found during the self
diagnostics routine, the status LED will flash slowly.
4. The 4DIOPU will use the first block of 4 trunk ports available, the 8DOIPU will use the first
block of 8 trunk ports. Confirm the ports used with Program 10-03
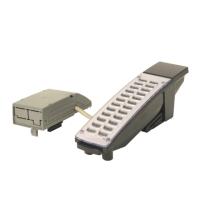
Figure 2-13: DIOPU PCB INSTALLATION
 Loading...
