required direction until the false needle lies between the two lines
"A". Tighten screw No. 048050 GEB firmly and remove the gauge.
Carry out the adjustments I, II, III, IV of the instruction: " Tim
ing of shuttle and needle bar " (page 13).
Now, sew with the machine.
a) If the machine sews correctly:
Place a sharply pointed pin into the tapered pin hole of the oscillating
crank shaft and mark on the carrier shaft the position of the hole to be
drilled and reamed in the carrier shaft. Remove the carrier shaft
assembly, then drill and ream the tapered pin hole in the carrier shaft.
Next, assemble with machine, using the ta-
t
Point of
shuttle or
hook -
Moveme
nt
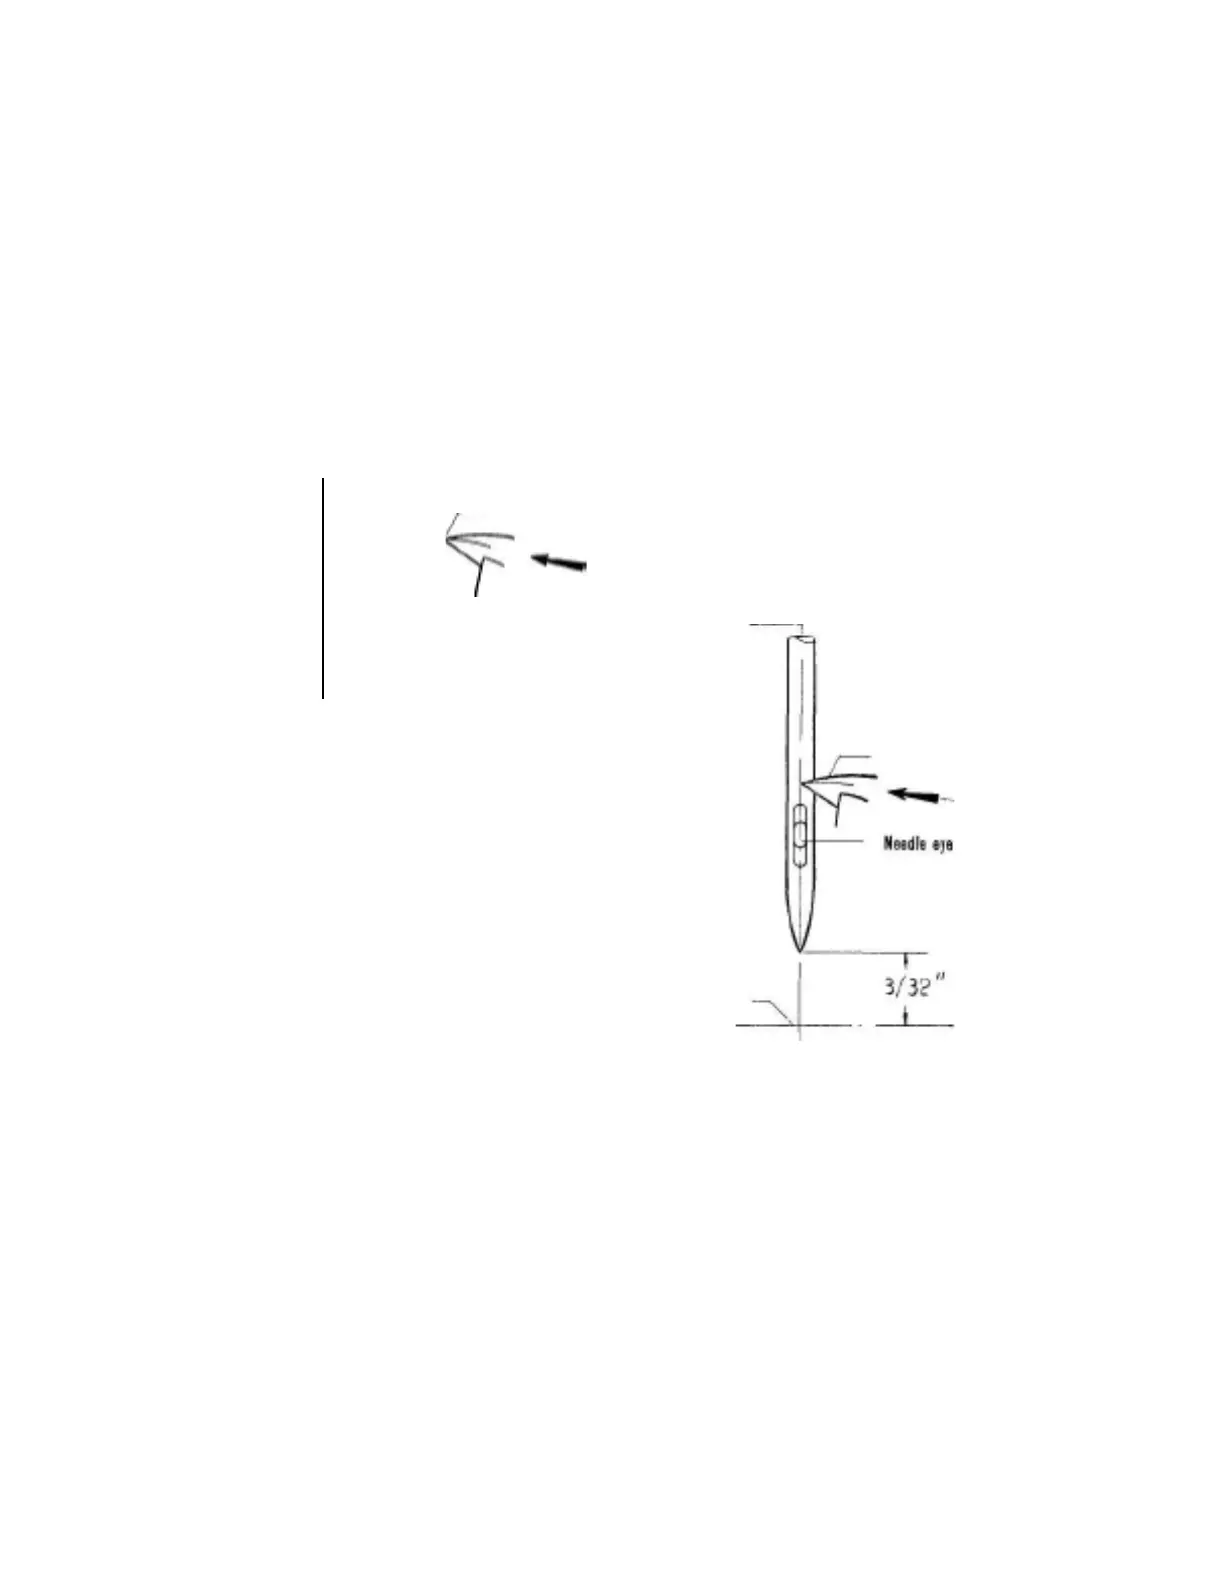
Needle
Needle
eye
Center of needle
Point of shuttle or hook
Movement
\J/
Lowest
position of the needle
Fig. 30