1= b
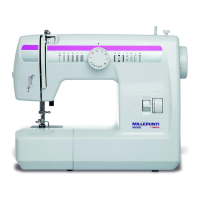
The feed dog has completed its
horizontal movement in the slot of
the needle
Fig. 59
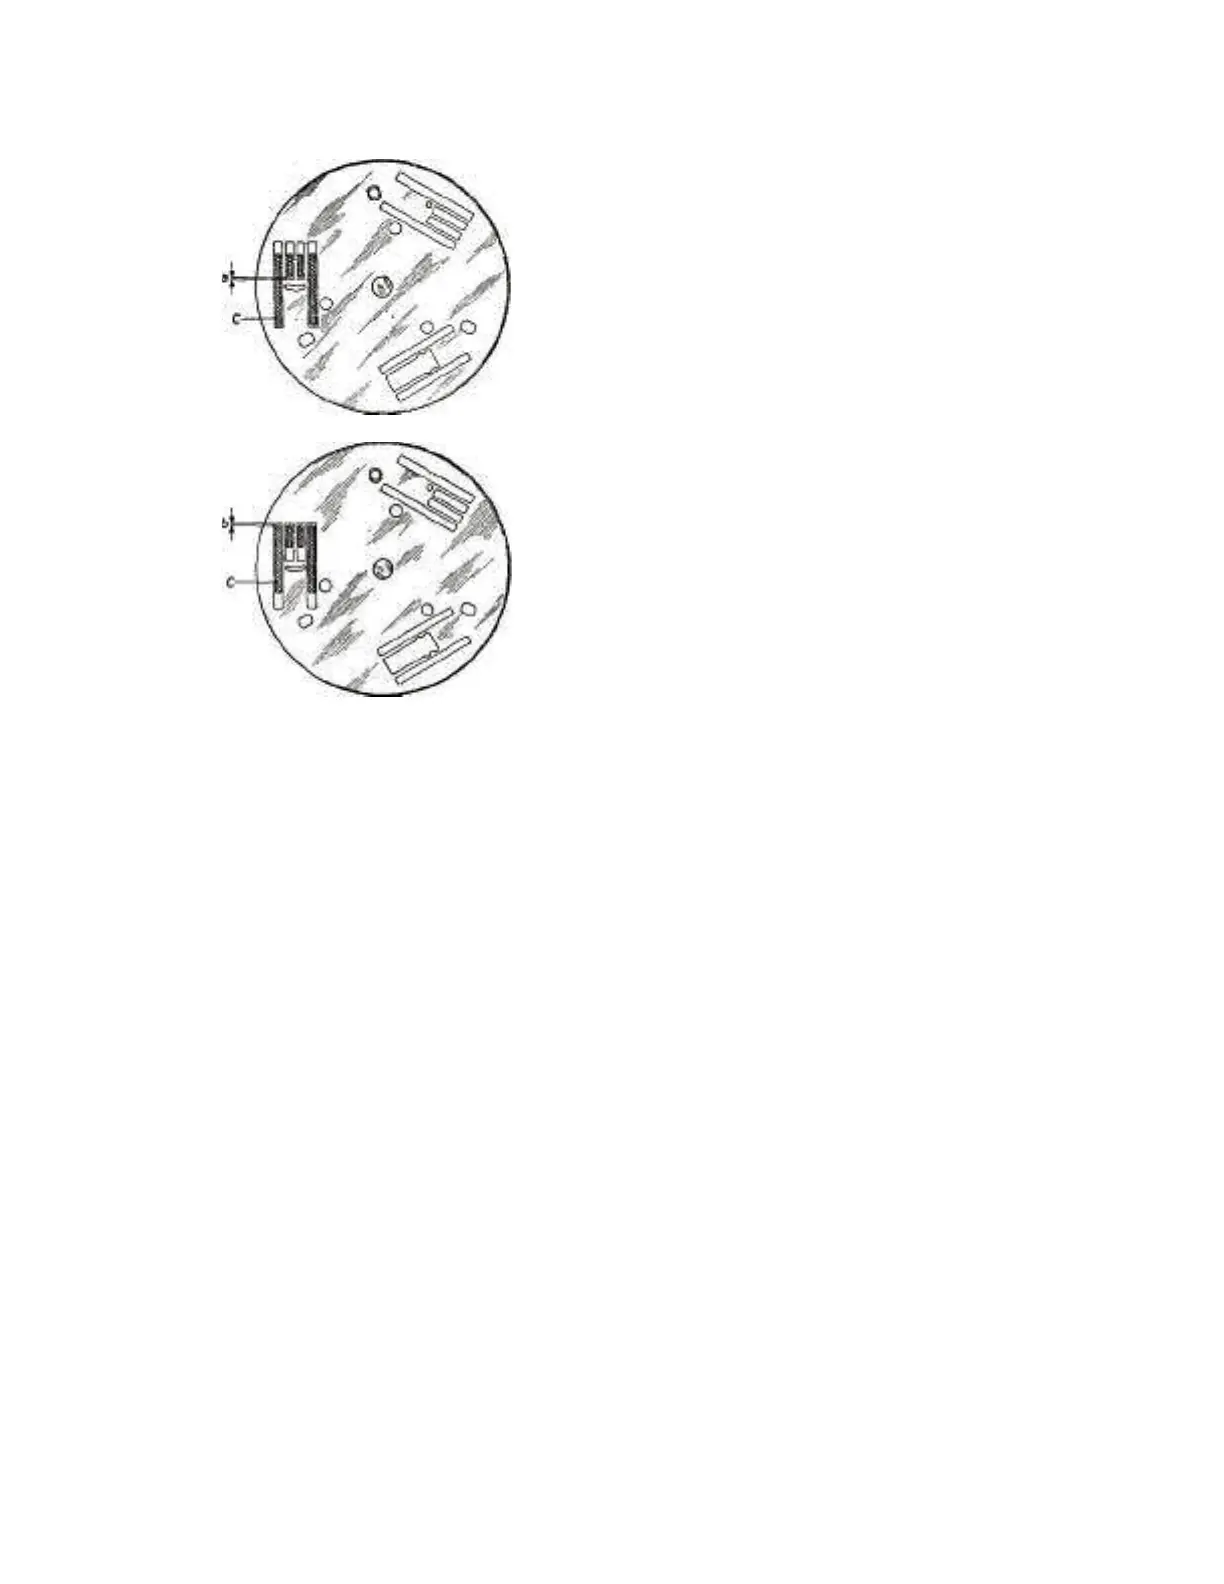
The feed dog starts its horizontal
movement in the slot of the needle
plate
Fig. 58
" G " until the rows of the feed dog are in the right position,
namely at the same distance from both edges of the slot.
Tighten screws " E " firmly, making certain that no looseness exists
between the pointed pins " F " and the feed rock shaft " G ". Before
tightening the screw " H", check adjustment " B" as
explained later on.
2nd Case
The rows "C" of the feed dog (Fig. 57) are not parallel with the
edges of the needle plate slots. To adjust, proceed as follows:
remove needle plate (as shown in Fig. 5) and slightly loosen the
screws " M " (Fig. 60) which fasten the feed dog to its support.
Then align the feed dog " C " as required and set it in the correct
position. Place the needle plate in its receptacle and check
whether the feed dog is parallel with the slots. Remove needle
plate again and tighten the screws " M ' firmly.
Adjustment " B "
If this adjustment is required, loosen the screw " H " which holds
the crank " L " to the feed rock shaft " G " (Fig. 60). Rotate the
shaft " G " by hand slightly toward the left or right, as required.
Tighten screw " H " and check whether all parts are correctly
adjusted.