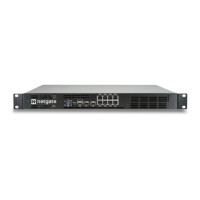
Security Gateway Manual Netgate-4200
– Automatic or Hybrid Outbound NAT
– Manual Outbound NAT
• Firewall Rules
– Open
– Isolated
• Other Services
2.6.1 Requirements
• This guide assumes the underlying interface is already present (e.g. physical port, VLAN, etc).
• Choose a new local subnet to use for the additional LAN type interface. This example uses 192.168.2.0/24.
2.6.2 Assign the Interface
The first step is to assign an OPT interface.
• Navigate to Interfaces > Assignments
Look at list of current assignments. If the interface in question is already assigned, there is nothing to do. Skip
ahead to the interface configuration.
• Pick an available interface in Available network ports
If there are no available interfaces, then one may need to be created first (e.g. VLANs).
• Click Add
The firewall will assign the next available OPT interface number corresponding to the internal interface designation.
For example, if there are no current OPT interfaces, the new interface will be OPT1. The next will be OPT2, and so
on.
Note: As this guide does not know what that number will be on a given configuration, it will refer to the interface
generically as OPTx.
The newly assigned interface will have its own entry under the Interfaces menu and elsewhere in the GUI.
2.6.3 Interface Configuration
The new interface must be enabled and configured.
• Navigate to Interfaces > OPTx
• Check Enable interface
• Set custom name in the Description, e.g. GUESTS, DMZ, etc.
• Set the IPv4 Address and CIDR mask for the new LAN
For this example, 192.168.2.1/24.
• Do not add or choose an IPv4 Upstream gateway
© Copyright 2024 Rubicon Communications LLC 55