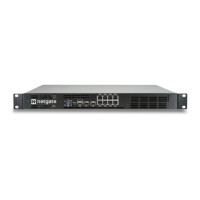
Security Gateway Manual Netgate-4200
Warning: Use caution when replacing the SIM card slot retention screw. Do not cross thread or over-
tighten the screw.
The screw only requires a few gentle turns. Excess force can crack and permanently damage the plastic lid.
11. Replace the sim card slot cover and retention screw using the #1 Phillips screwdriver.
Warning: Use caution when replacing the SIM card cover retention screw. Do not cross thread or over-
tighten the screw.
The screw only requires a few gentle turns. Excess force can crack and permanently damage the slot cover.
Reconnect
The device is now ready to be put back into its former location.
1. Move the device back to its original location.
2. Re-mount the Netgate 4200 device if it should be secured in some way (e.g. wall mount)
3. Plug in all network cables, USB cables and devices, serial console connections, etc.
4. Insert the USB memstick containing the installation media
5. Plug in the power cable
6. Reconnect to the serial console
Reinstall pfSense Plus Software
With the device back together and ready to proceed, the next step is to reinstall pfSense Plus software to the SSD. This
procedure is covered in detail in Reinstalling pfSense Plus Software.
Note: If prompted to select a drive during the installation, choose the NVMe drive which will be nda0. The installer
will typically select this drive automatically, but double check to be certain it is correct.
The eMMC drive (da0 or da1) should remain deselected so it will not be used by the installer.
If there is no backup to restore, then no further steps are necessary. Login to the firewall and configure it as normal
(Initial Configuration).
Restore the Configuration
The final step is to restore the configuration. If a configuration was backed up earlier in this procedure, now is the time
to restore it using the GUI or one of the other methods mentioned in the pfSense software documentation section on
Backup and Restore.
© Copyright 2024 Rubicon Communications LLC 96