Do you have a question about the NETGEAR EAX80 and is the answer not in the manual?
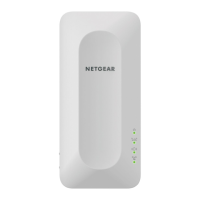
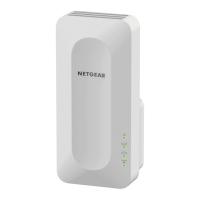
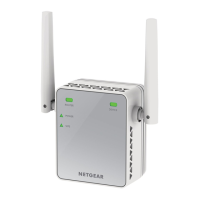
Your package contains an extender and power adapter.
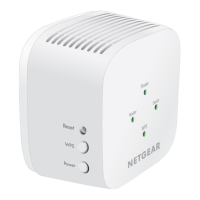
The following table describes the LEDs.
The back panel of the extender provides ports, buttons, and a DC power connector.
You need the following to install your extender.
The extender works like a bridge between a WiFi router and a WiFi device.
Place the extender, apply power, and connect the extender to your existing WiFi network.
You can use the extender as a WiFi access point, which creates a new WiFi hotspot.
After you complete the setup process, you can connect all your devices to the new extender network.
After installation, you can log in to the extender to view or change the extender's settings.
You can use Smart Setup to change the extender settings. This is an easy way to connect the extender.
The One WiFi Name feature enables your extender to use the same WiFi network settings as your router.
The Smart Connect feature selects the fastest WiFi band for your WiFi devices to connect to.
You can view a list of devices that are connected to the extender network.
To view the WiFi settings.
To change the WiFi network name.
You can turn off the SSID broadcast to create a hidden WiFi network.
By default, the extender's WiFi radios broadcast signals in the 2.4 GHz and 5 GHz bands.
You can adjust the extender output power percentage and range of your extended WiFi network.
WPS lets you connect a computer or WiFi device to the extender's network without entering the passphrase.
For you to use the push button method to connect a WiFi device to the extender's WiFi network.
To use the PIN method to connect a WiFi device to the extender's WiFi network.
You can deny network access to specific computers and WiFi devices based on their MAC addresses.
You can control access by all users during specific periods of the day.
The default device name is the extender's model number.
The extender comes set up to use a dynamic IP address, which is the correct setting for most home networks.
If you enabled a WiFi MAC filter, WiFi access control, or access control list (ACL) on your router...
You can change the admin user name and password that you use to log in to the extender.
You can turn password protection for your extender web interface off and on.
If you changed the password that you use to access the extender and you set up password recovery, you can recover your password.
To set up the extender to automatically adjust for daylight saving time.
If you turned on the access schedule, you can set the extender clock.
You can back up the configuration file of the extender.
You can restore the configuration settings of the extender to a previously saved configuration file.
You might want to erase the configuration and reset the extender to factory default settings.
You can log in to the extender and check to see if new firmware is available.
You can log in to the extender and restart it.
You can turn the LEDs off, the Power LED remains on.
You can adjust the extender output power percentage and range of your extended WiFi network.
The extender works with most USB-compliant external flash and hard drives.
ReadySHARE lets you access and share USB storage devices that are connected to the appropriate extender port.
To access the USB storage device from a Windows computer.
To map the USB storage device to a Windows network drive.
From a computer or device on the network, you can access a storage device that is connected to the extender.
By default the USB port is on, but you can log in to the extender and turn it off and on.
You can add network folders on a USB storage device connected to a extender USB port.
You can set a password for read access or write access to a folder that's on your USB storage device.
By default, the extender's network and device name is readyshare. You can change the name.
By default, the extender acts as a ReadyDLNA media server, which lets you view movies and photos on DLNA/UPnP AV-compliant media players.
You can set up your TiVo to access media files stored on a USB device that is connected to your extender.
This section provides answers for difficulties you might experience with the extender.
If your extender and router use the same WiFi network name (SSID), you must use the extender's IP address.
If you cannot connect to the extender, determine what prevents you from connecting.
To join a WiFi network, you must know its WiFi network name and password.
When you try to access www.mywifiext.net to set up your extender, you might receive an error message.
To reset the extender to factory default settings, you can use the Reset button on the side panel or log in and click the onscreen RESET button.
The following table shows the technical and environmental specifications.
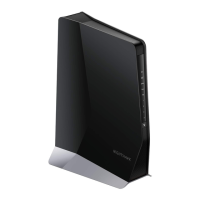
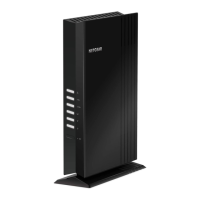
| Product type | Tabletop router |
|---|---|
| Certification | FCC, CE, RoHS |
| Product color | Black |
| Indication light | Yes |
| Power source type | DC |
| Package depth | 326 mm |
| Package width | 260 mm |
| Package height | 130 mm |
| Package weight | 1594 g |
| Master (outer) case width | 294 mm |
| Master (outer) case height | 342 mm |
| Master (outer) case length | 364 mm |
| Master (outer) case weight | 3930 g |
| Harmonized System (HS) code | 85176990 |
| Quantity per master (outer) case | 2 pc(s) |
| DSL WAN | - |
| WAN connection type | RJ-45 |
| Channels quantity | 8 channels |
| WLAN data transfer rate (max) | 6000 Mbit/s |
| Modulation | 1024-QAM |
| Wi-Fi standards | 802.11a, 802.11b, 802.11g, Wi-Fi 4 (802.11n), Wi-Fi 5 (802.11ac), Wi-Fi 6 (802.11ax) |
| Security algorithms | 128-bit AES, AES |
| Ethernet LAN data rates | 10, 1000 Mbit/s |
| Ethernet LAN interface type | Gigabit Ethernet |
| Ethernet LAN (RJ-45) ports | 4 |
| USB 3.2 Gen 1 (3.1 Gen 1) Type-A ports quantity | 1 |
| Type | Network repeater |
| Maximum transfer distance | - m |
| Depth | 197 mm |
|---|---|
| Width | 106 mm |
| Height | 279 mm |
| Weight | 860 g |