Get Started
6
M4100 Series Switches
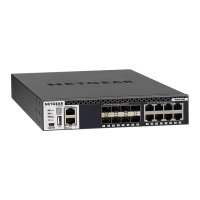
You can access the console port of the switch either through a mini-USB port or through the
serial port:
• Mini-USB port. The switch comes with a mini-USB to USB cable, which you can use to
connect the mini-USB console port on the switch to a USB port on a VT100-compatible
terminal or a Windows computer that runs VT100 terminal emulation software.
Note: To use the mini-USB port, you must install the USB driver on the
computer. (The Windows USB driver is on the resource CD.)
• Serial port. The serial port is configured for 115200 baud, eight data bits, one stop bit,
and no parity. It is a DB9 male connector. You must connect an RS-232 crossover cable
(which might not come in the switch package) from the serial port to the DB9 port on a
VT100-compatible terminal or computer that runs VT100 terminal emulation software.
Prepare a Terminal
To configure the terminal emulation software:
1. Select one of the serial ports to connect to the console.
2. Set the data rate to 115200 baud.
The speed is set to 115200 baud at the factory. The setting is also printed on the front
panel under the console port.
3. Set the data format to eight data bits, one stop bit, and no parity.
4. Set the flow control to none.
5. Under Properties, select the correct mode.
6. Select terminal keys.
Access the Switch Through the Console Port
You can use a locally or remotely attached terminal to access the switch through the console
port.
To access the switch through the console port:
1. Set up a VT100-compatible terminal on the computer and open the appropriate COM
port.
When the terminal interface initializes, the login user prompt displays.
2. Enter your user name and password.
The default for the user name is admin and the password is blank (that is, do not enter a
password).
You can now access the switch with its default configuration.
For information about how to perform the initial configuration of the switch through the
CLI, see
Perform Initial Configuration of the Switch Through the Console Port on page 8.
 Loading...
