NETGEAR USB Multifunction Printer Server PS121v2 User Manual
2-14 Installation and Setup
v2.0, April 2007
h. From the Add Port screen, enter the IP address of the print server in the IP Address field.
Click Next to proceed.
i. In the Device Type section of the Additional Port Information Required screen, select
Custom. and then click Settings.
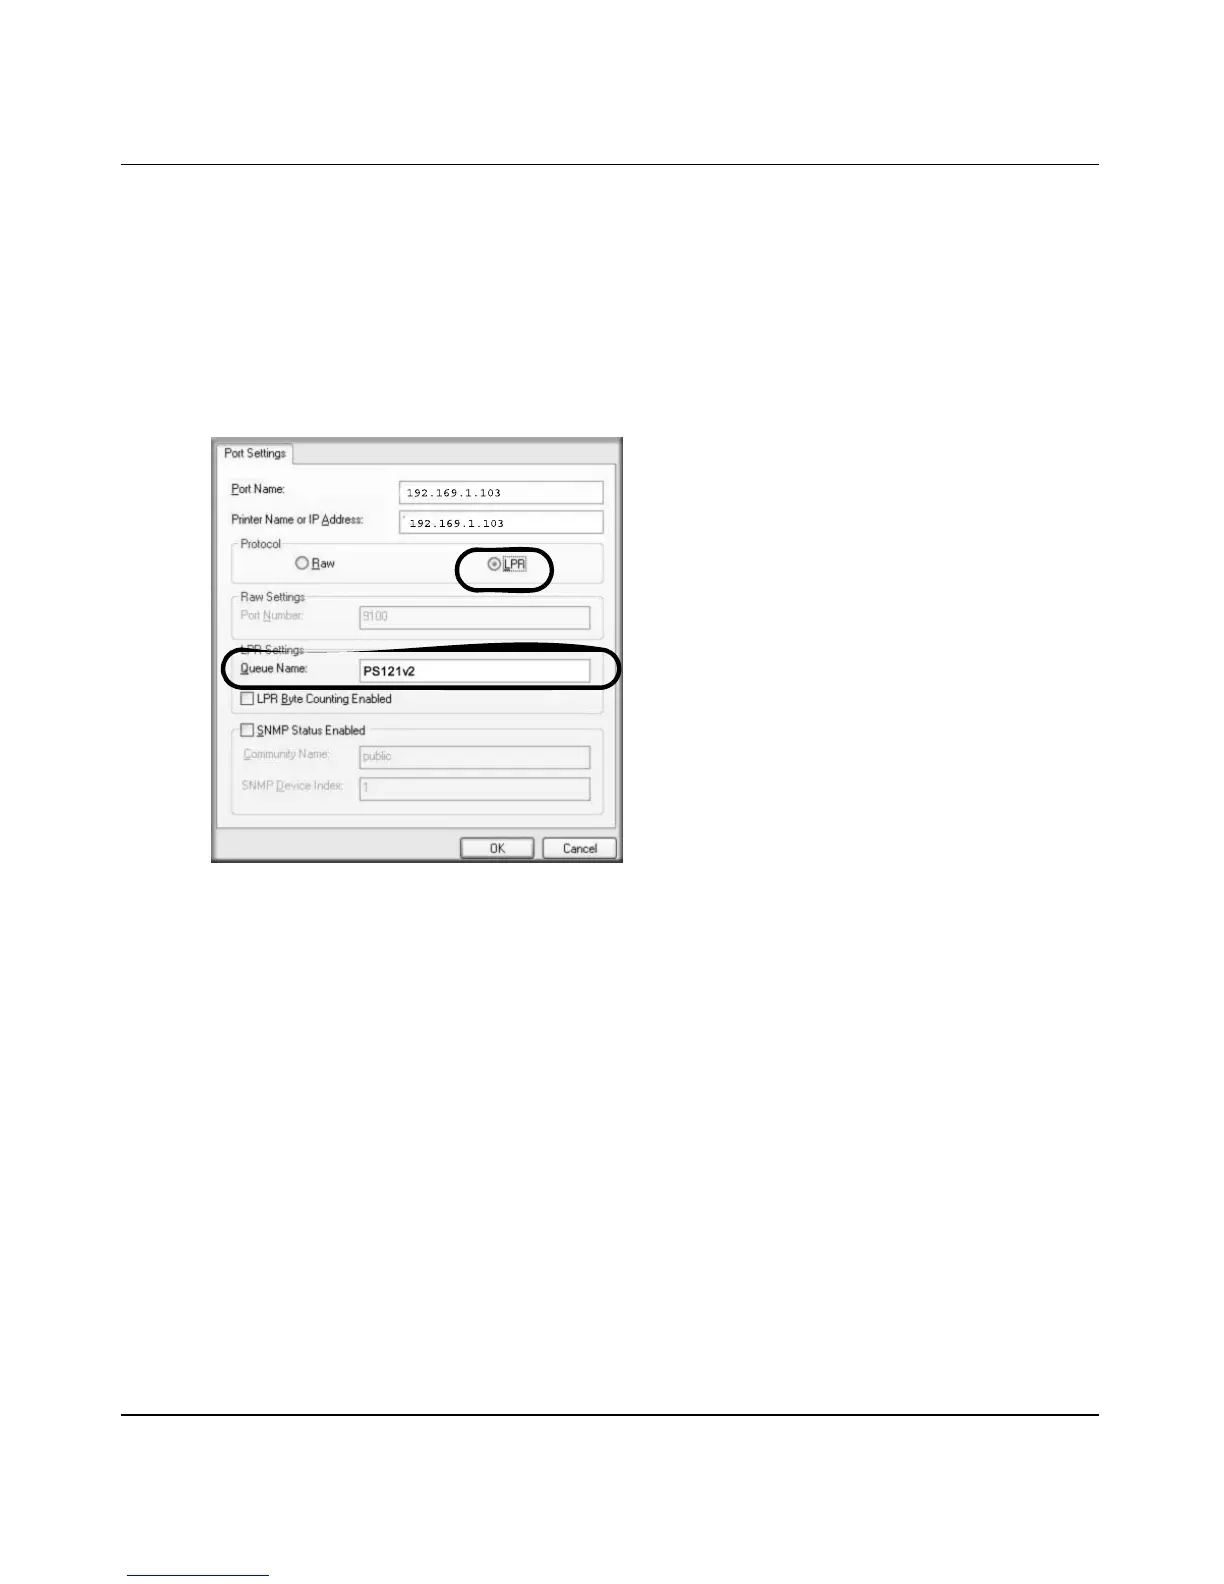
j. The Port Settings tab page opens. In the Protocol section, select the LPR radio button, and
enter PS121v2 as the Queue Name in the LPR Settings section. Click OK to close this tab.
k. Click Next to proceed.
The Add Printer Wizard prompts you to install the software for the printer that you
attached to the USB Multifunction Print Server.
2. Complete the Add Standard TCP/IP Printer Port Wizard as follows:
Figure 2-19