NETGEAR USB Multifunction Printer Server PS121v2 User Manual
Installation and Setup 2-15
v2.0, April 2007
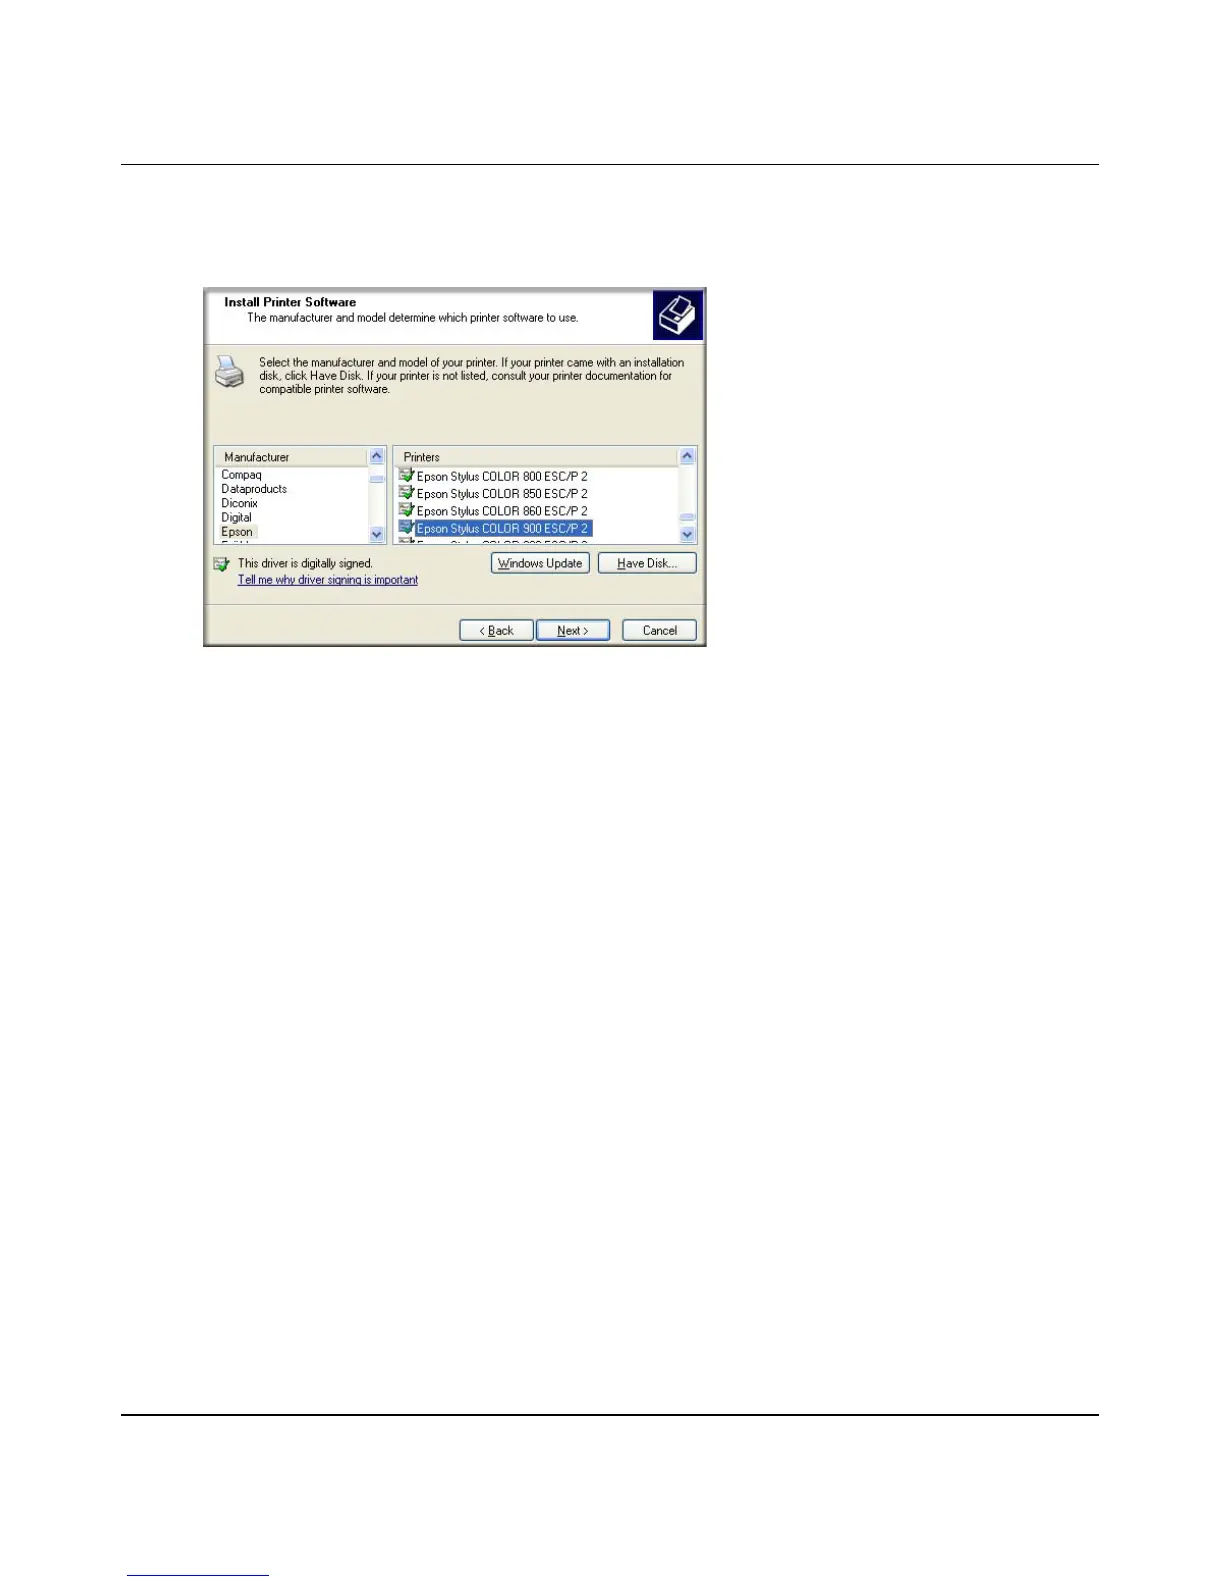
a. From the Install Printer Software screen, find the manufacturer and model of the printer
you connected to the USB port on the print server.
If you do not see your make and model of printer in the lists, and you are connected to the
Internet, you can click the Windows Update button to download additional printer
software from the Microsoft website, or you can click the Have Disk button to install the
printer software from a disk you have.
b. Click Next to proceed.
If the printer software is already installed on this computer, the Add Printer Wizard will
inform you and let you keep the existing driver.
c. The Name Your Printer screen prompts for a descriptive name and whether you want it to
be the default or not. Enter your choices and then click Next to proceed.
d. On the Printer Sharing screen, accept the “Do not share this printer” option and click Next.
Figure 2-20