10 • Getting Started NEW FOCUS, Inc.
Setting Up the Laser
1. Mount the laser head:
The laser head is shipped with a mounting
bracket already attached. This bracket also serves as a heatsink to
avoid overheating the laser head. Mount the laser head/bracket in a
stable position with the output aperture pointing towards an
appropriate beam block. Output-beam height is two inches. See
page 14 for details on mounting techniques.
2. Position the controller:
Position the controller within a cable
length of the laser head (about five feet). Make sure that the side and
rear vents of the controller are not blocked. The controller
keyswitch should be off (position “
0
”).
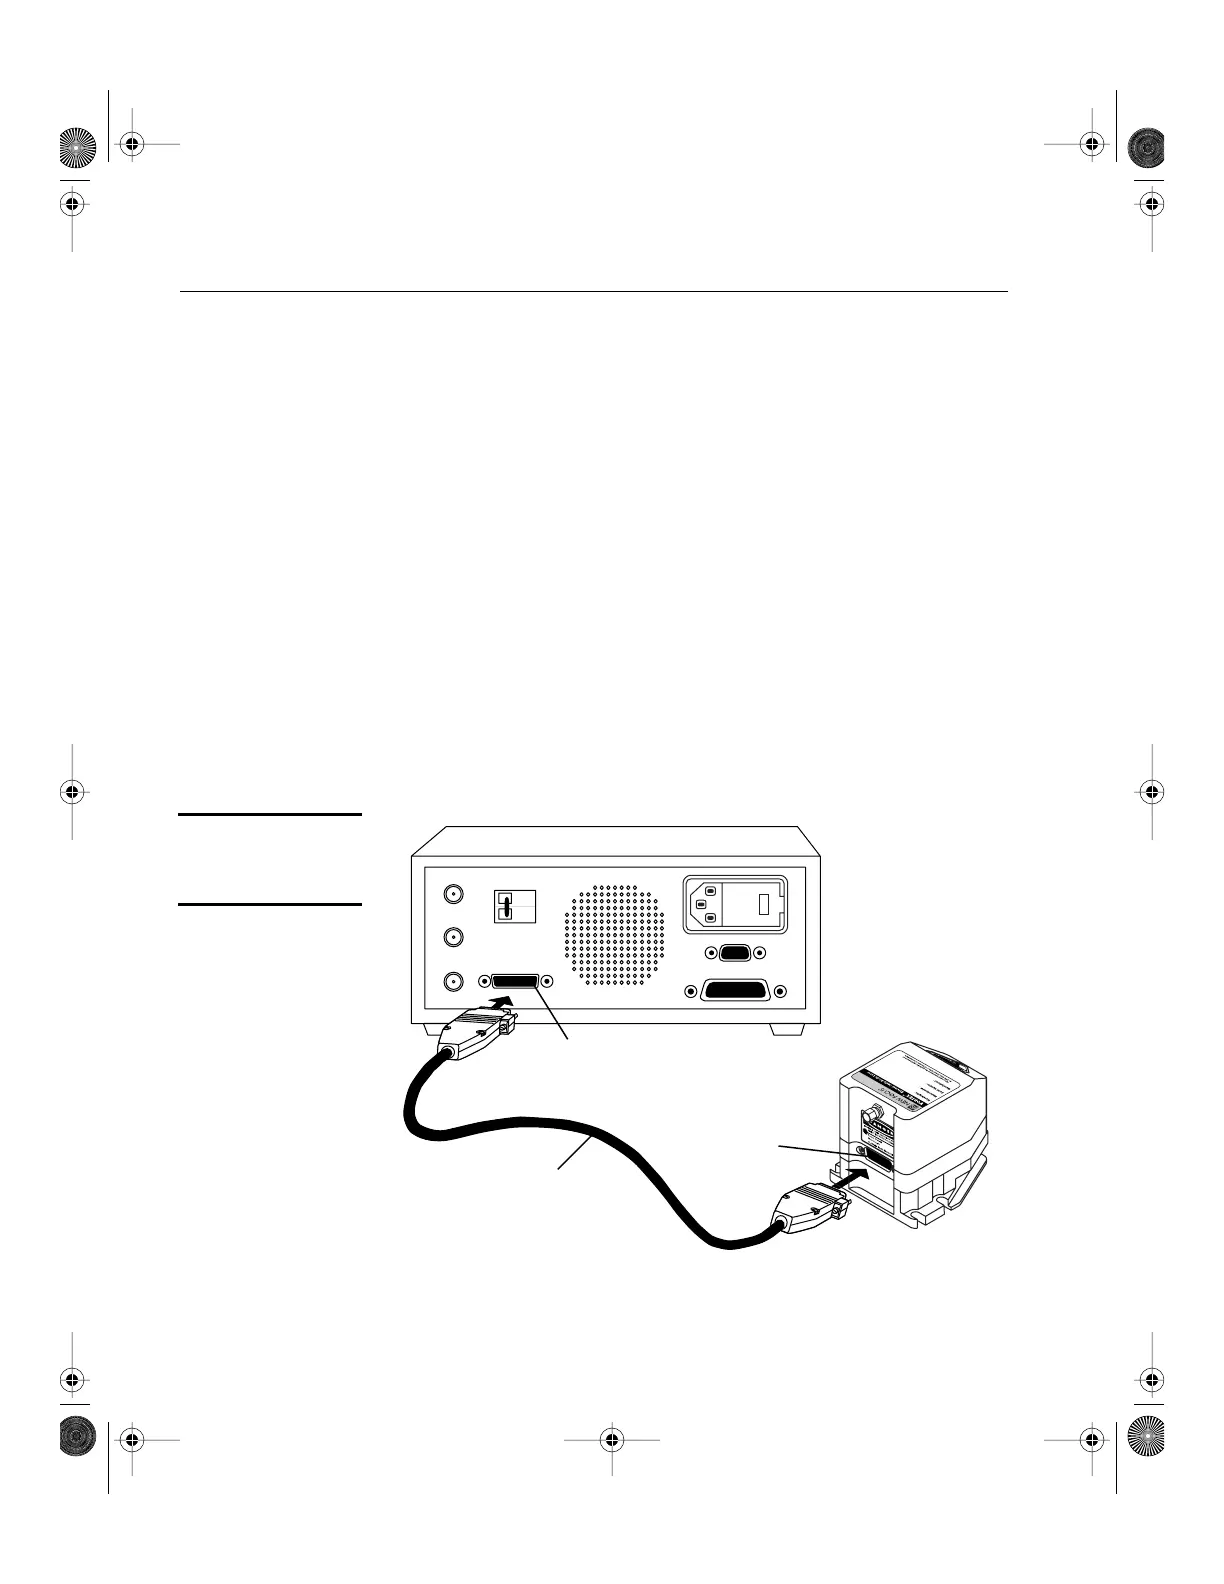
3. Connect the head and controller:
Connect the controller to the
laser head with the 26-pin D-connector laser cable provided.
Use
only
the supplied New Focus laser cable to connect the controller to
the laser head. To ensure proper and safe operation of the laser,
secure the cable to the laser head and controller using the captive
attachment screws in the cable’s D-connectors.
Figure 3:
Controller to Laser
Head Connection
Frequency
Modulation
Current
Modulation
Auxillary
Input
Laser
Interlock
IEEE 488
RS232
Laser Cable
26 Pin
D-Connector
26 Pin
D-Connector
120Vac
~
Vortex6000.book Page 10 Tuesday, February 19, 2002 3:25 PM
Artisan Technology Group - Quality Instrumentation ... Guaranteed | (888) 88-SOURCE | www.artisantg.com