Copyright © 2008 NEXCOM International Co., Ltd. All Rights Reserved.
22
Chapter 3: System Setup
NDiS 161 User Manual
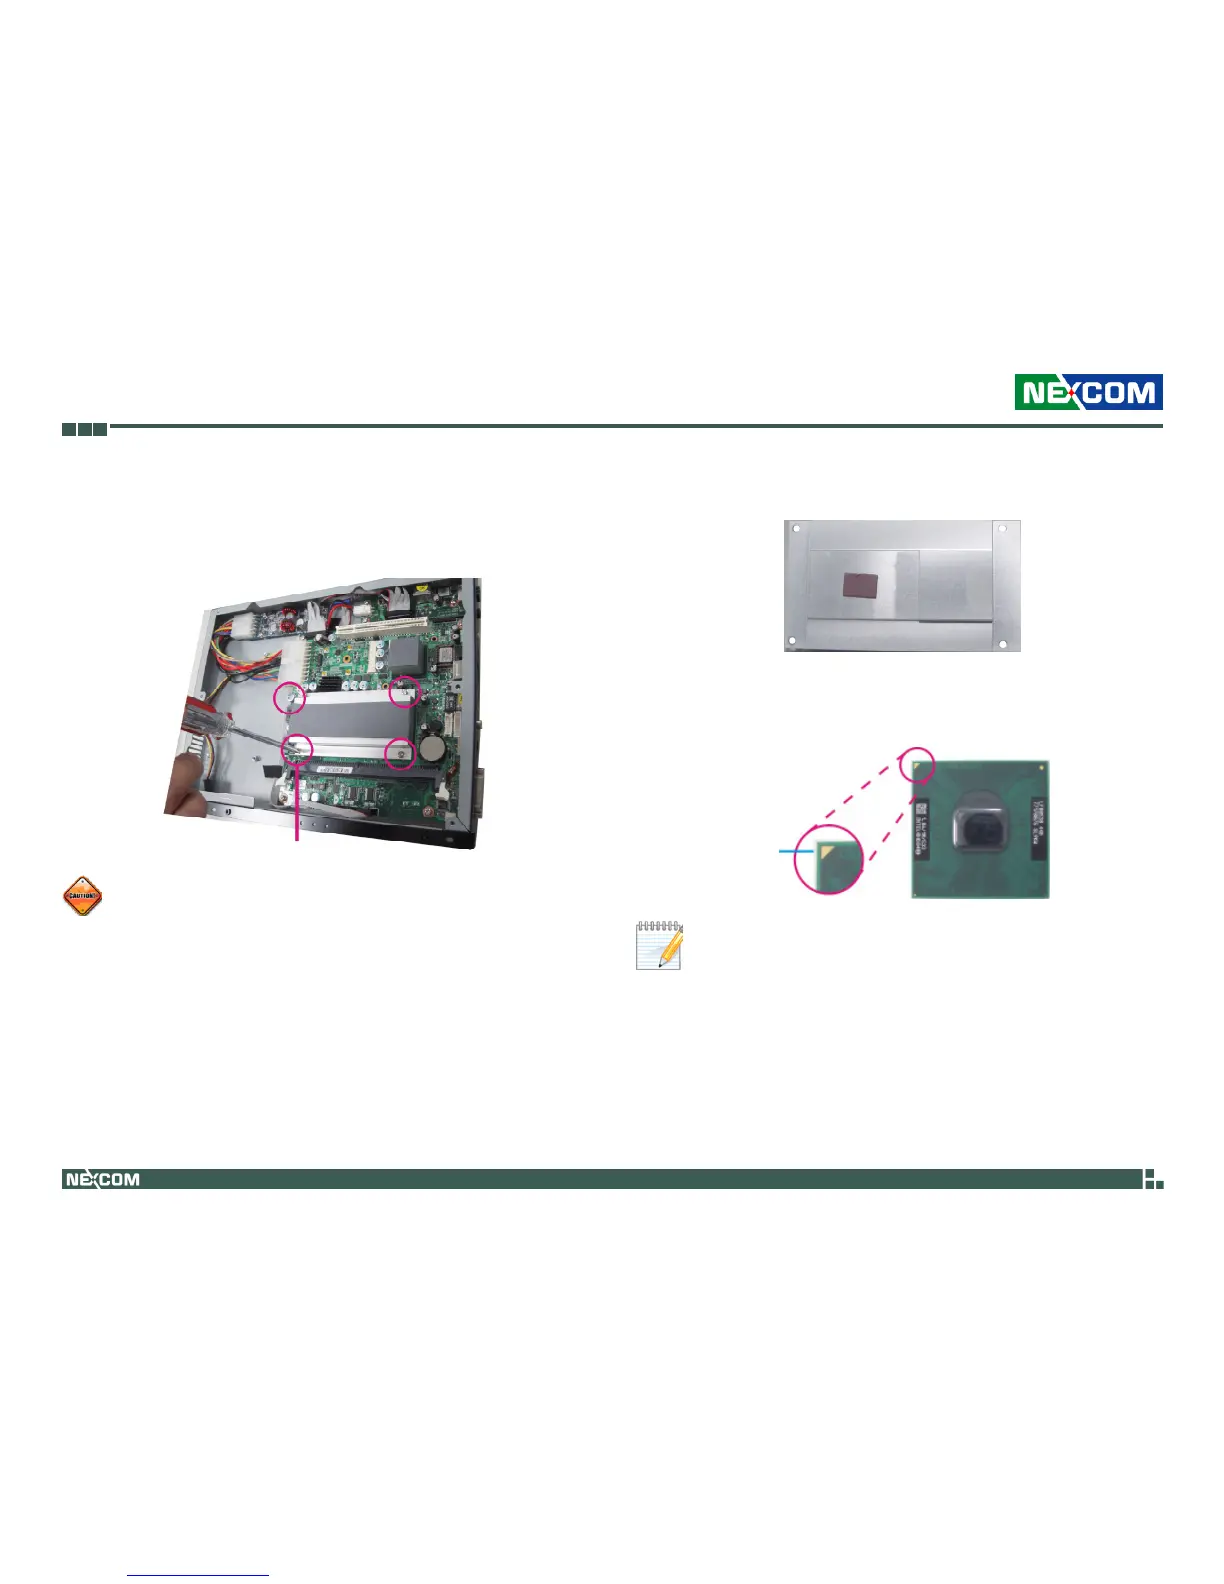
Installing the CPU
1. Remove the screws that secure the heat sink to the board. Save these
screws for later use.
Make sure all power cables are unplugged before you install the •
CPU.
The CPU socket must not come in contact with anything other •
than the CPU. Avoid unnecessary exposure.
Remove screw
2. Now remove the heat sink to access the CPU socket.
Bottom Side of the Heat Sink
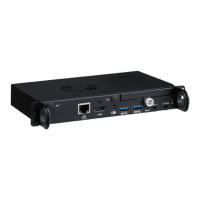
3. The gold triangular mark on the CPU must align with pin 1 of the CPU
socket.
Pin 1
Handle the CPU by its edges and avoid touching the pins.