GEO S12 HARDWARE SETUP PROCEDURE
Page 30 / 95 System Manual GEOS12 LS18
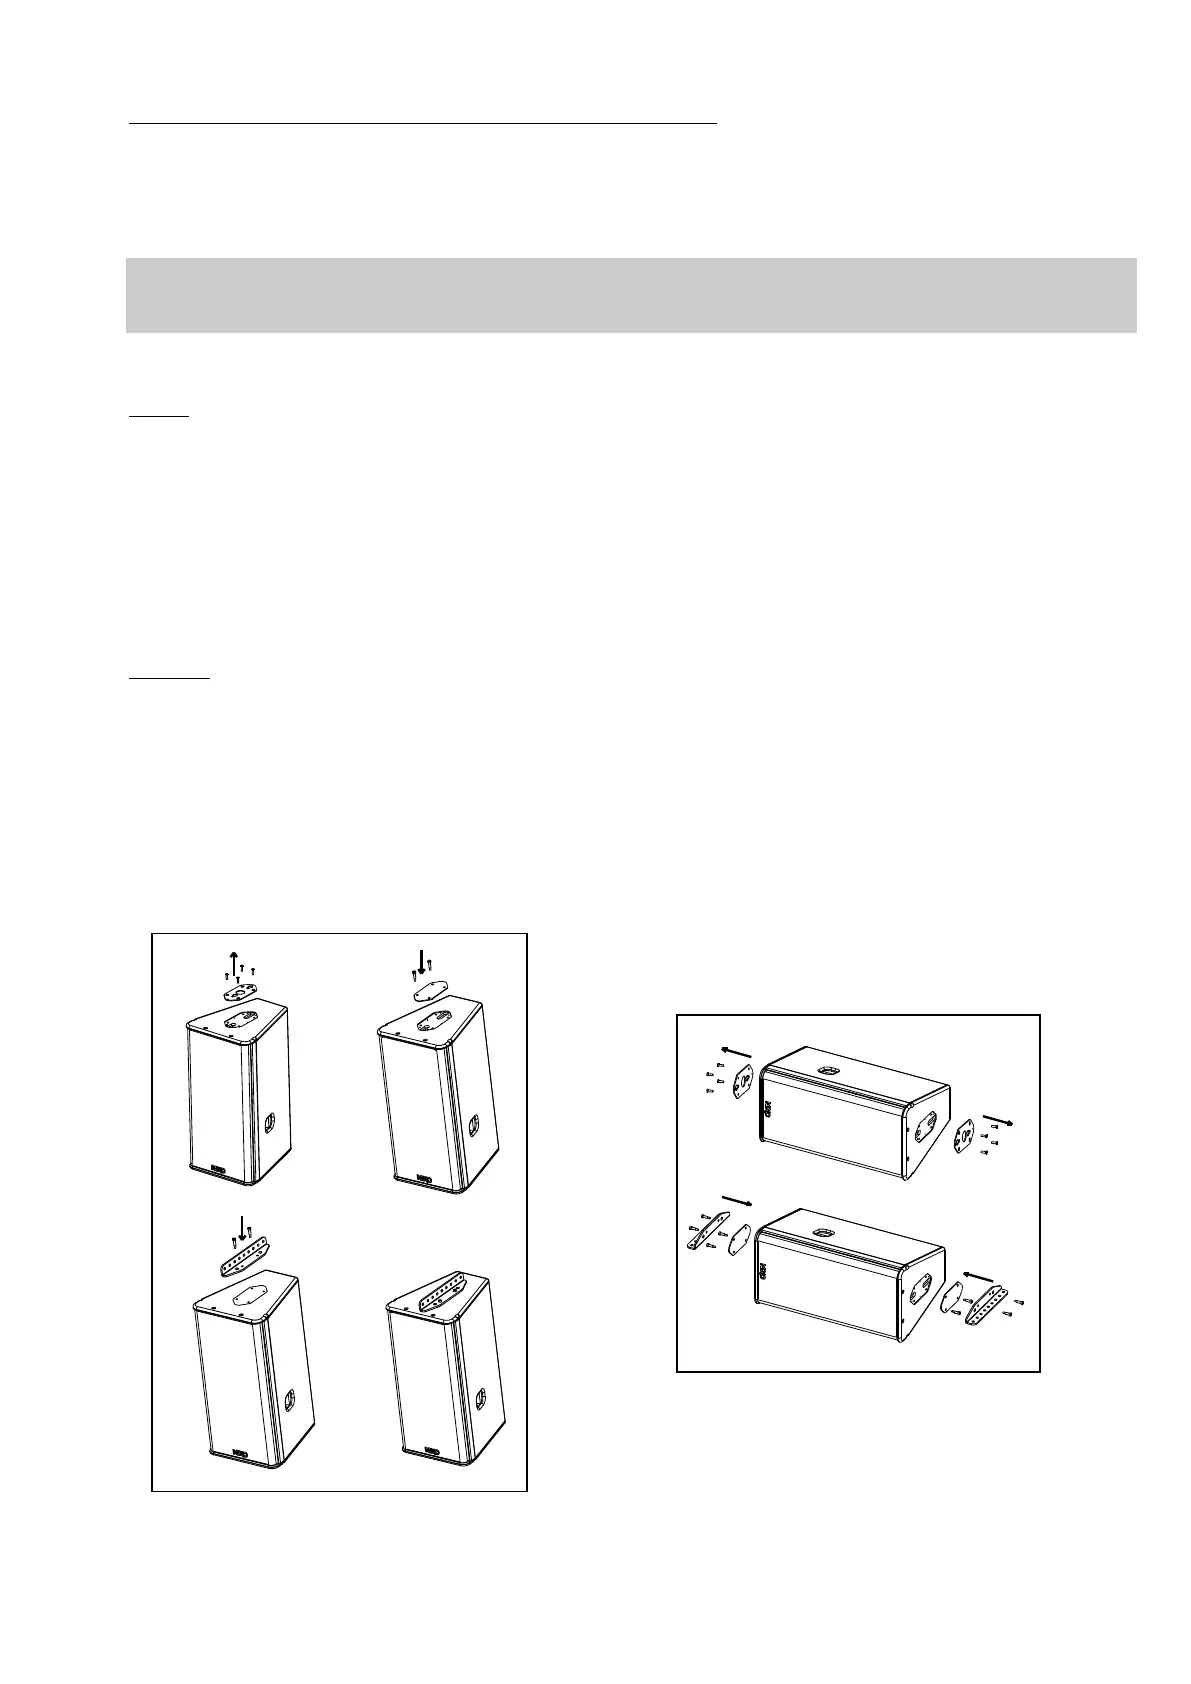
6.3.3 Single GEO S12 cable mounted on a ceiling (vertical or horizontal)
Required items
- 1 or 2 x VNI-LBRK (allows cable suspension, holes for cable suspension are 10mm diameter)
- 2 or 4 slings and corresponding shackles (not provided)
IMPORTANT
Ensure that the ceiling is strong enough to hold 4 times GEO S12 weight and that the cable suspension
system required to install the cabinet under the ceiling is properly dimensioned.
Procedure
Vertical
- Remove the four TORX screws holding connector plates on upper side of GEO S12
- Remove the connector plate from GEO S12
- Apply Loctite 243 or equivalent to the 4 shoulder screws from VNI-LBRK
- Position external plate from VNI-LBRK kit and secure it using the 2 of the 4 shoulder screws
- Position “L” bracket from VNI-LBRK kit, and secure it to the cabinet using the 2 remaining shoulder screws
- Slings and shackles (not provided) are required to secure the cluster under the ceiling
Horizontal
- Remove the four TORX screws holding connector plates on both sides of GEO S12
- Remove the connector plates from GEO S12
- Apply Loctite 243 or equivalent to the 4 shoulder screws from VNI-LBRK
- Position external plates from VNI-LBRK kits and secure them using the shoulder screws
- Position “L” brackets from VNI-LBRK kits, and secure them to the cabinet using the 4 remaining shoulder screws
- Slings and shackles (not provided) are required to secure the cluster under the ceiling
 Loading...